Contact the Support

SKT Appointment - Appointment Schedule Plugin Documentation

Plugin Installation

Manually Installation Through Dashboard
  • Log in to the WordPress Dashboard.
  • Go to Plugins.
  • Click on Add New.
  • Click on Upload Plugin button.
  • Click on Choose File button and select skt-appointment.zip then click on Install Now button and wait for the install to complete.
  • Follow above same steps to install its Braintree Extension
  • After the Plugin installed successfully, click on Activate button.
Manual Installation using FTP
  • Unzip skt-appointment.zip and skt-appointment-braintree.zip to your Desktop.
  • Using an FTP client to access your host web server. Go to /wp-content/plugins/
  • Upload Plugins to /wp-content/plugins/.
  • Go to plugins and activate Plugin from Dashboard.

Manage Services

Click on "Manage Services" tab in left navigation under SKT Appointment for managing the services, its category and location.

1. Select Add Location radio button > Add Location Name > Submit. Added locations will appear as below.

2. Select Add Category radio button > Select Location > Add Category name > Submit.

3. Select Add Services radio button > Select Location > Select Category > Add Service name > Add Price > Submit. All services will display as below.

Manage Appointment Date

For managing appointment date, click on "Manage Appointment Date" tab of any category on Add Category page.

Add No. of Appointment Days and Appointment Date > Submit

Manage Appointment Time

For managing appointment time, click on "Manage Appointment Time" tab of any category on Add Category page.

Here you will find 2 options for time scheduling : "Manage Time" And "Assign Working Hours"

1. Manage Time Tab > Add Time Schedule (Start and End Time) > Submit

2. Assign Working Hours > Assign all working hours > Submit

Manage Holiday

Click on Manage Holiday in left navigation under SKT Appointment for managing Holidays or Events.

Appointment Order

Click on Appointment Orders in left navigation under SKT Appointment for managing the appointment order recieved.

Invoices

Click on "Invoice" to view invoice of specific appointment order.

Below is invoice of appointment order. You can view, save or print the particular invoice.

Manage Currencies

Click on Manage currencies in left navigation under SKT Appointment for set payment method currency

Shortcode

Click on Shortcode in left navigation under SKT Appointment to copy appointment shortcode.

Configure Payment Gateways.

Click on Settings in left navigation under SKT Appointment for set Payment Gateways

SKT Appointment Plugins Comes With 10 Payment Gateways:

  • Cash On Payment
  • PayPal
  • Stripe
  • Braintree
  • Instamojo
  • Molie
  • RazorPay

How to Configure Payment Method?

For configure payment method simply click on any payment gateway under payment gateway tab which need to configure.

Below is the example for configure "PayPal" payment Gateway.

If you want to set "PayPal" in Live Mode so simply select "Live" from Mode Dropdown

After making any changes click on "Save Changes" button at bottom of page.

Follow same steps to configure other payment method.

Manage Email Setting

Click on "Email Setting" tab for manage email setting.

Form Setting

For manage form fields click on "Form Setting" tab on SKT Appointment Settings Page.

Time Duration Setting

For manage the time duration for events click on "Time Duration Setting" tab on SKT Appointment Settings Page.

Time Duration Setting

For manage the time duration for events click on "Time Duration Setting" tab on SKT Appointment Settings Page.

RazorPay Setting

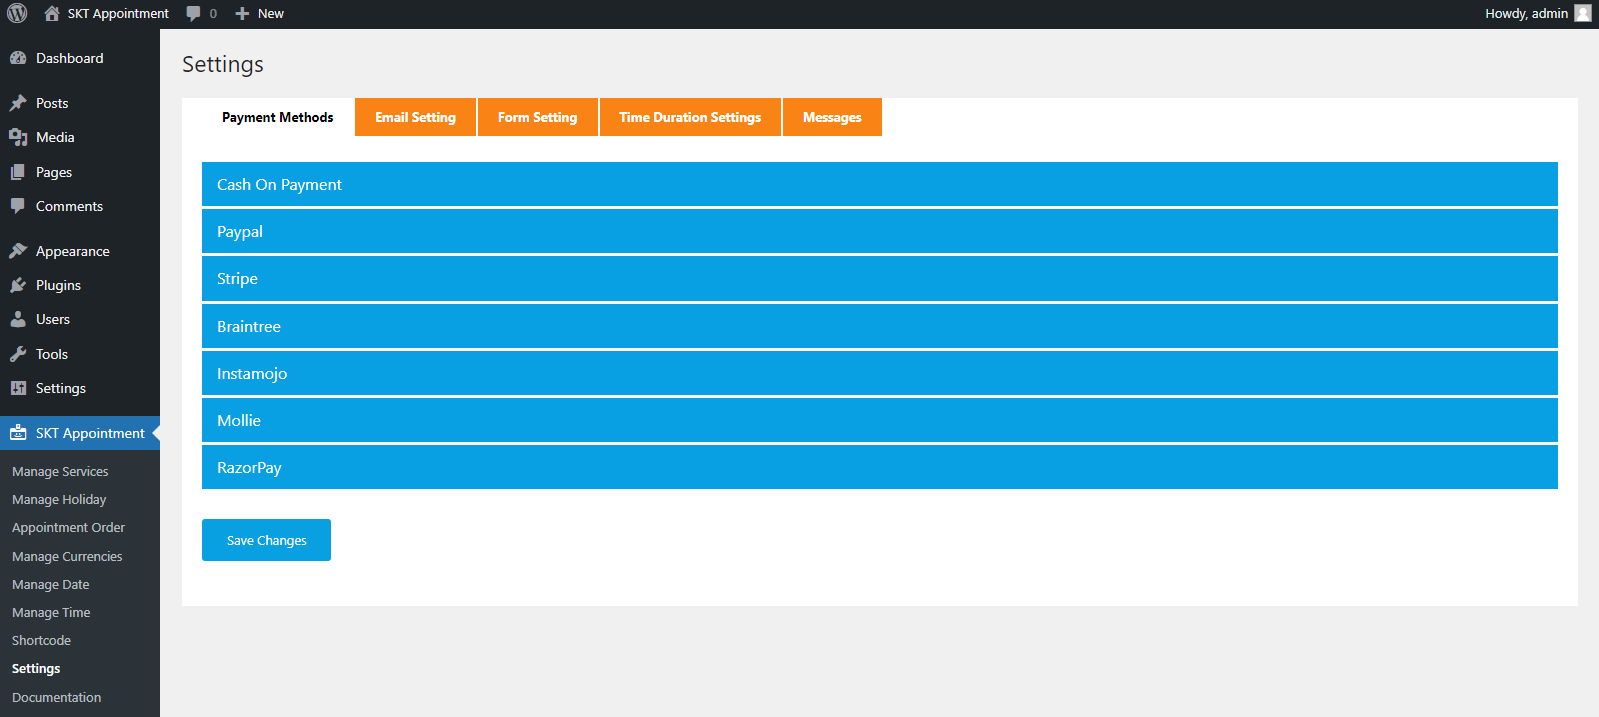
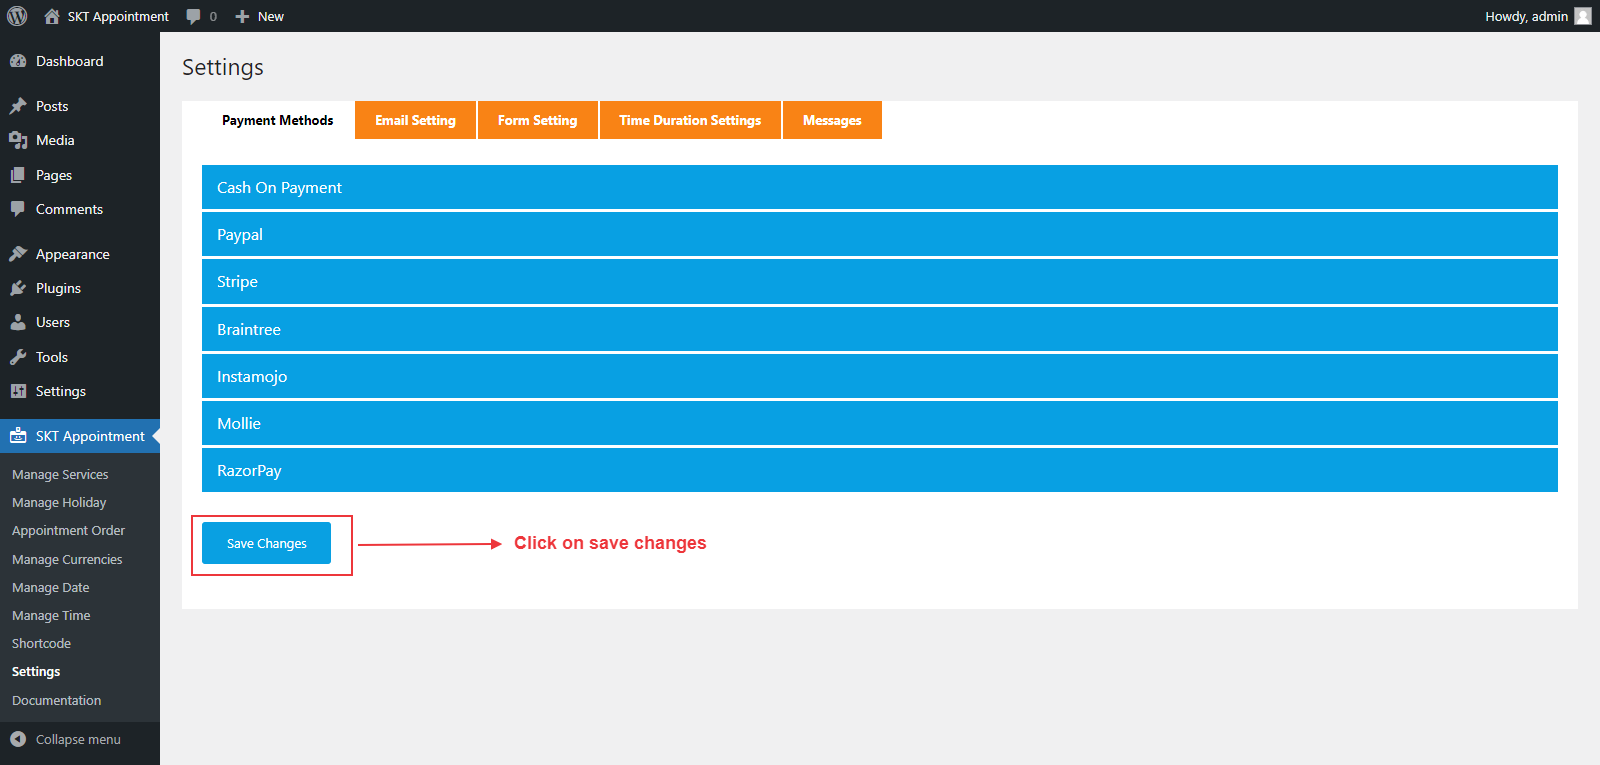
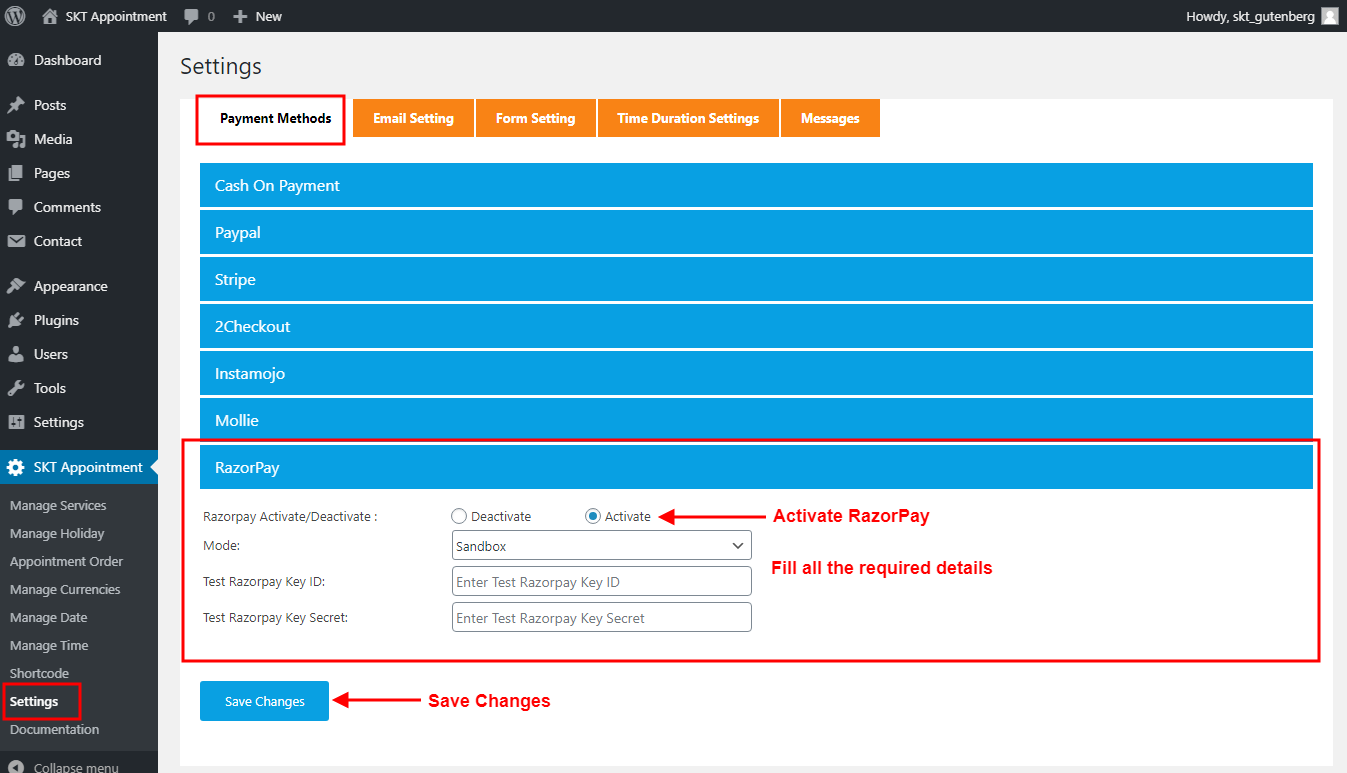
If you want to use RazorPay as a payment gateway. Click on Settings in left navigation under SKT Appointment and go to Payment Method tab.

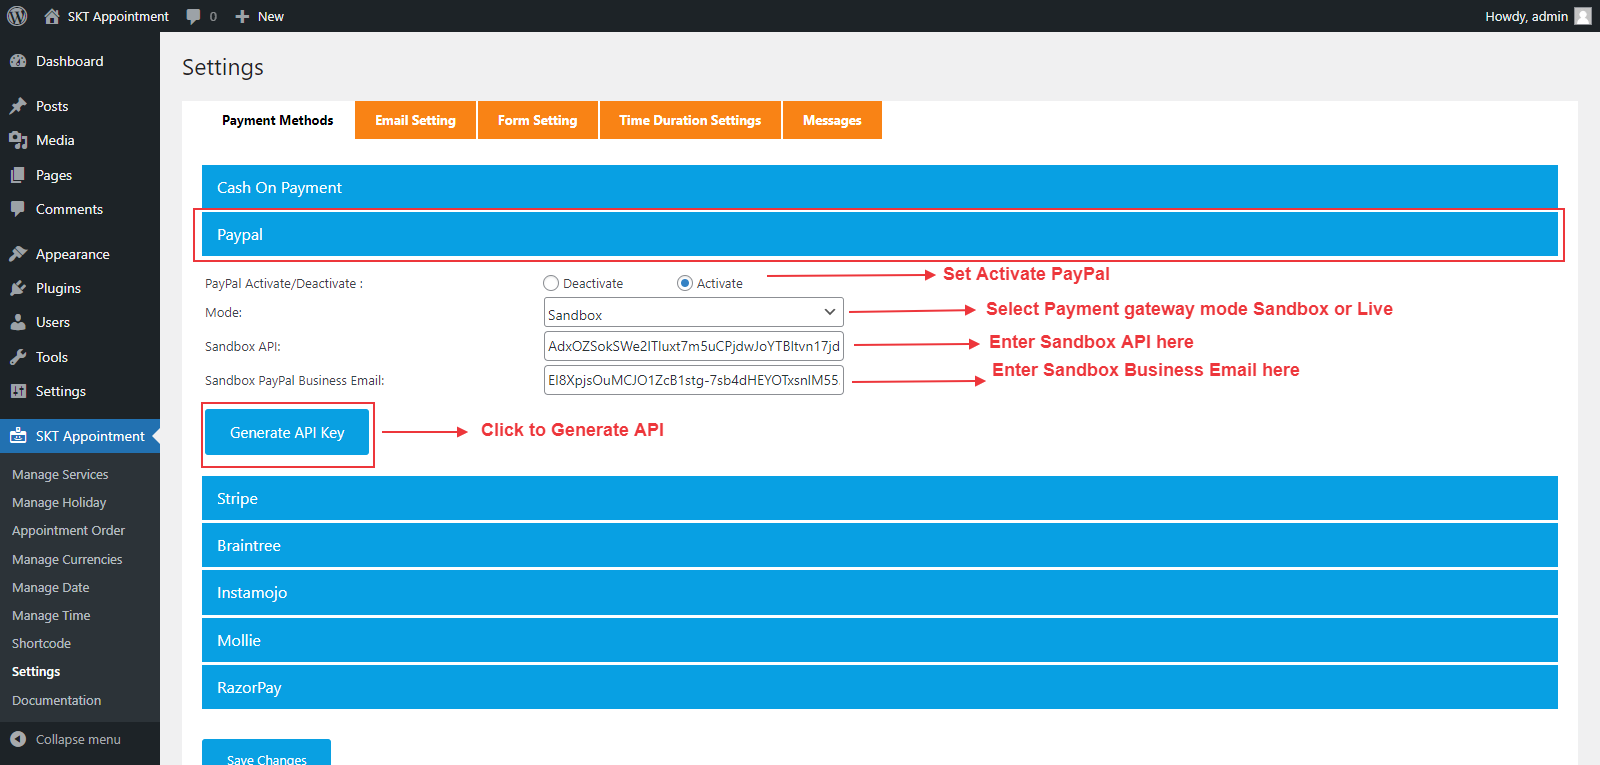
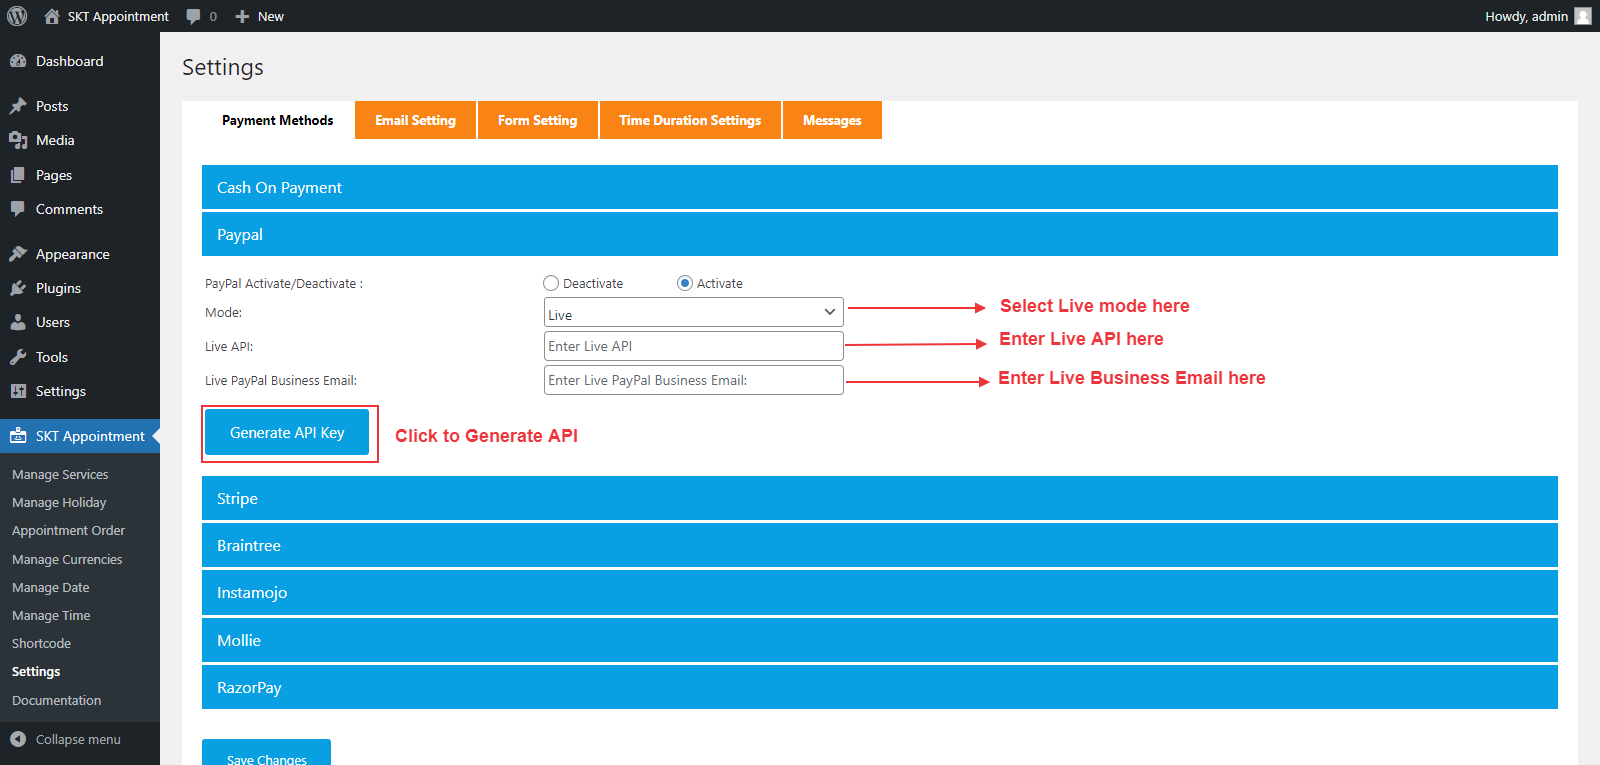
Select RazorPay option from the below given payment methods. Activate RazorPay , fill details and Save changes.

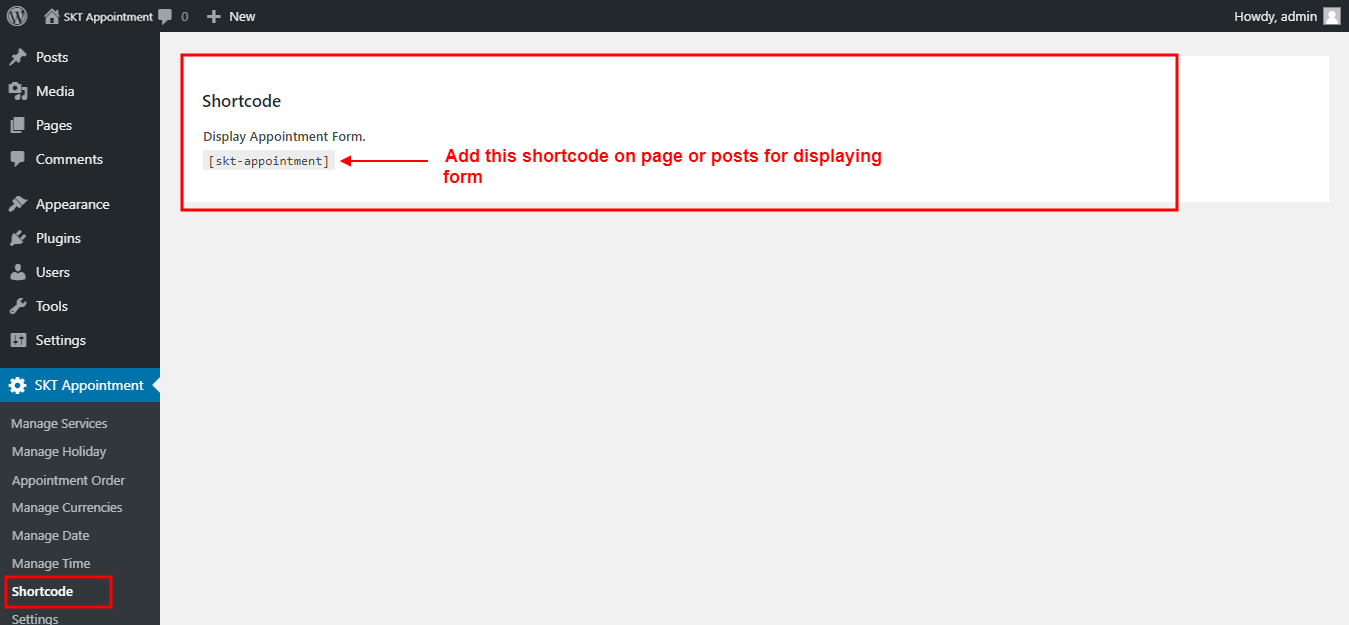
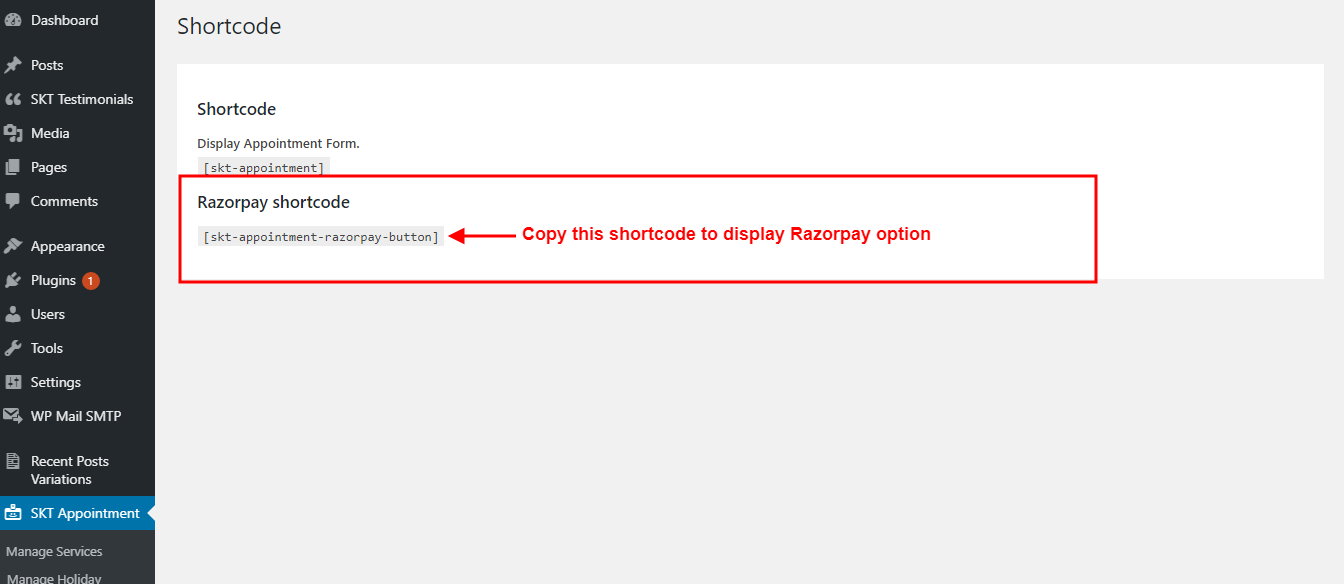
After activating RazorPay, a RazorPay shortcode will appears on shortcode page. Click on Shortcode in left navigation under SKT Appointment, find RazorPay Shortcode there.

Create a new page for RazorPay. Copy the shortcode and paste it on the new created Razorpay page.

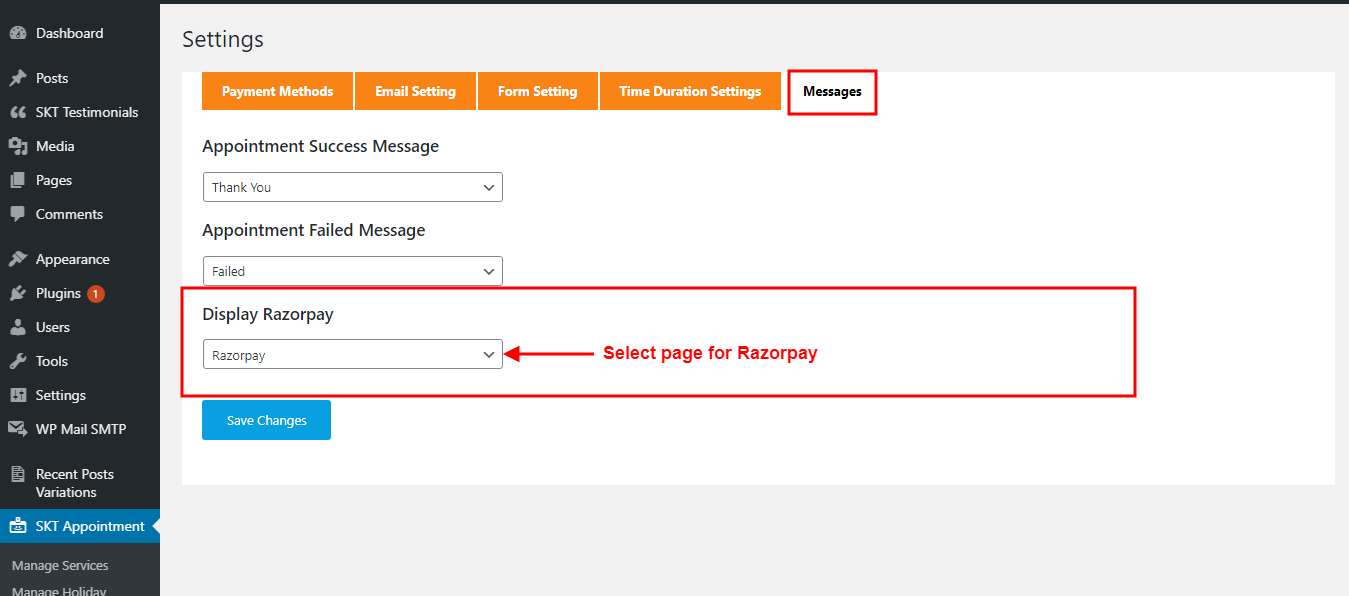
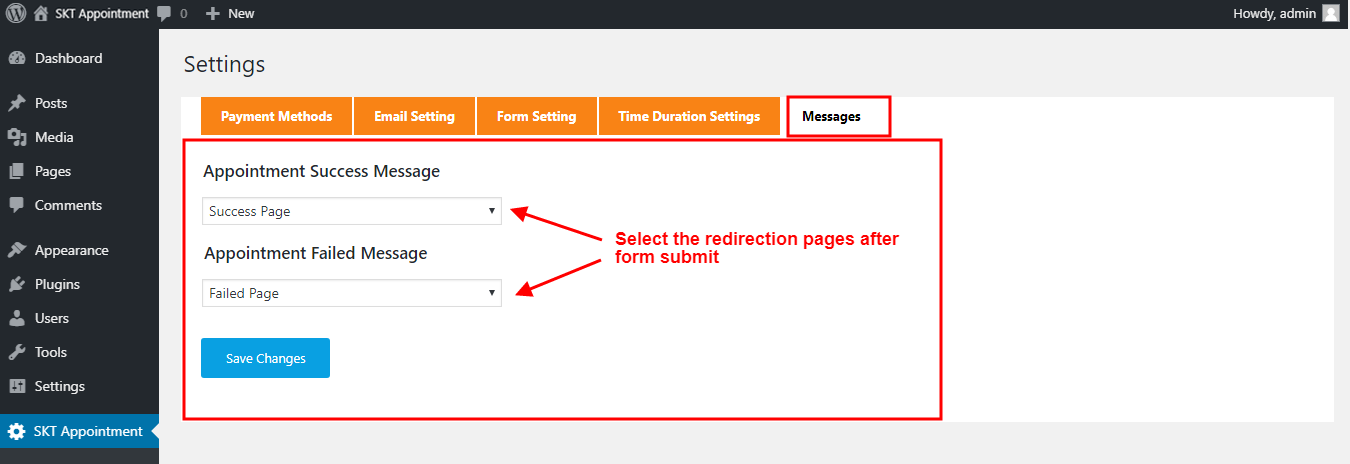
Lastly, Go to Message tab from Settings in left navigation under SKT Appointment, select the page created for RazorPay. Save Changes.