Through Dashboard
- Log in to the WordPress Dashboard.
- Go to Appearance->Themes.
- Active SKT Legal Expert Pro themes.
Manual Installation using FTP
- Unzip skt-legalexpert-pro.zip to your Desktop.
- Using an FTP client to access your host web server. Go to /wp-content/themes/
- Upload theme to /wp-content/themes/.
- Go to Appearance->Themes and activate theme from Dashboard.
How to import demo content?
Note: All the required plugins for this theme must be installed and activated before importing demo content.
- Go to Tools -> Import
- Install and run WordPress importer.
- Download demo content zip or get the file from demo-content folder included in theme's zip.
- Right click on legalexpertdemo.zip extract and import xml file demo data
- Click on browse, select XML file and click on Upload file and import.
- You will be asked to map the authors in this export file to users on your website. For each author, you may choose to map to an existing user on your website or to create a new user.
- You will then have the choice to import attachments, so click on the "Download and import file attachments" box.
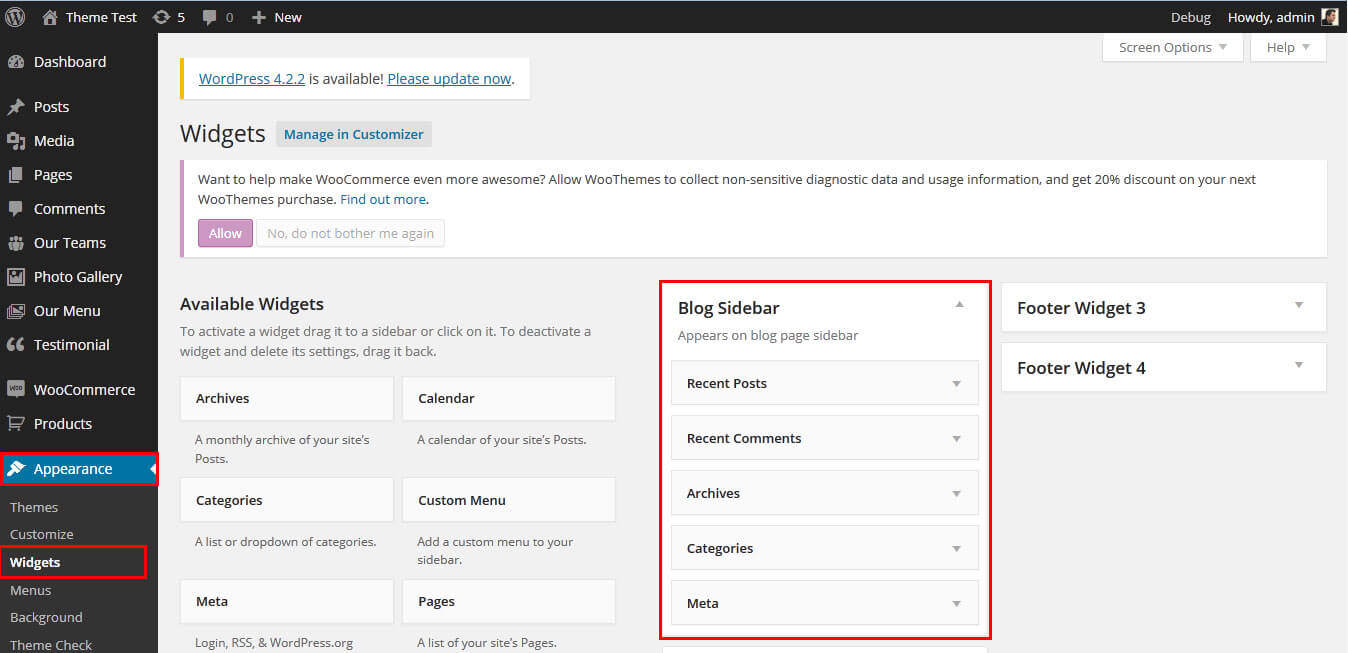
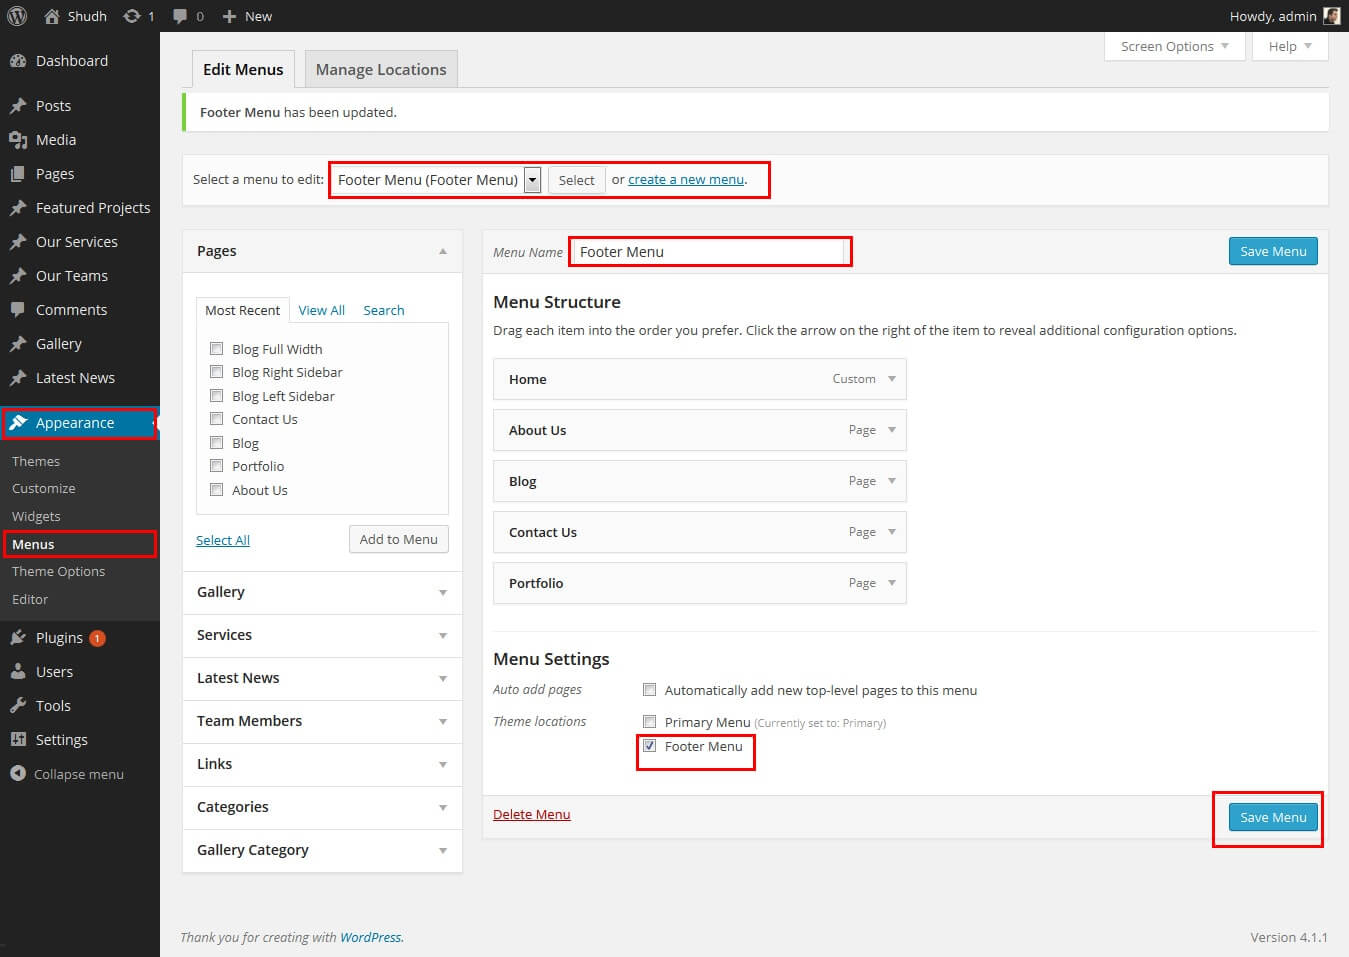
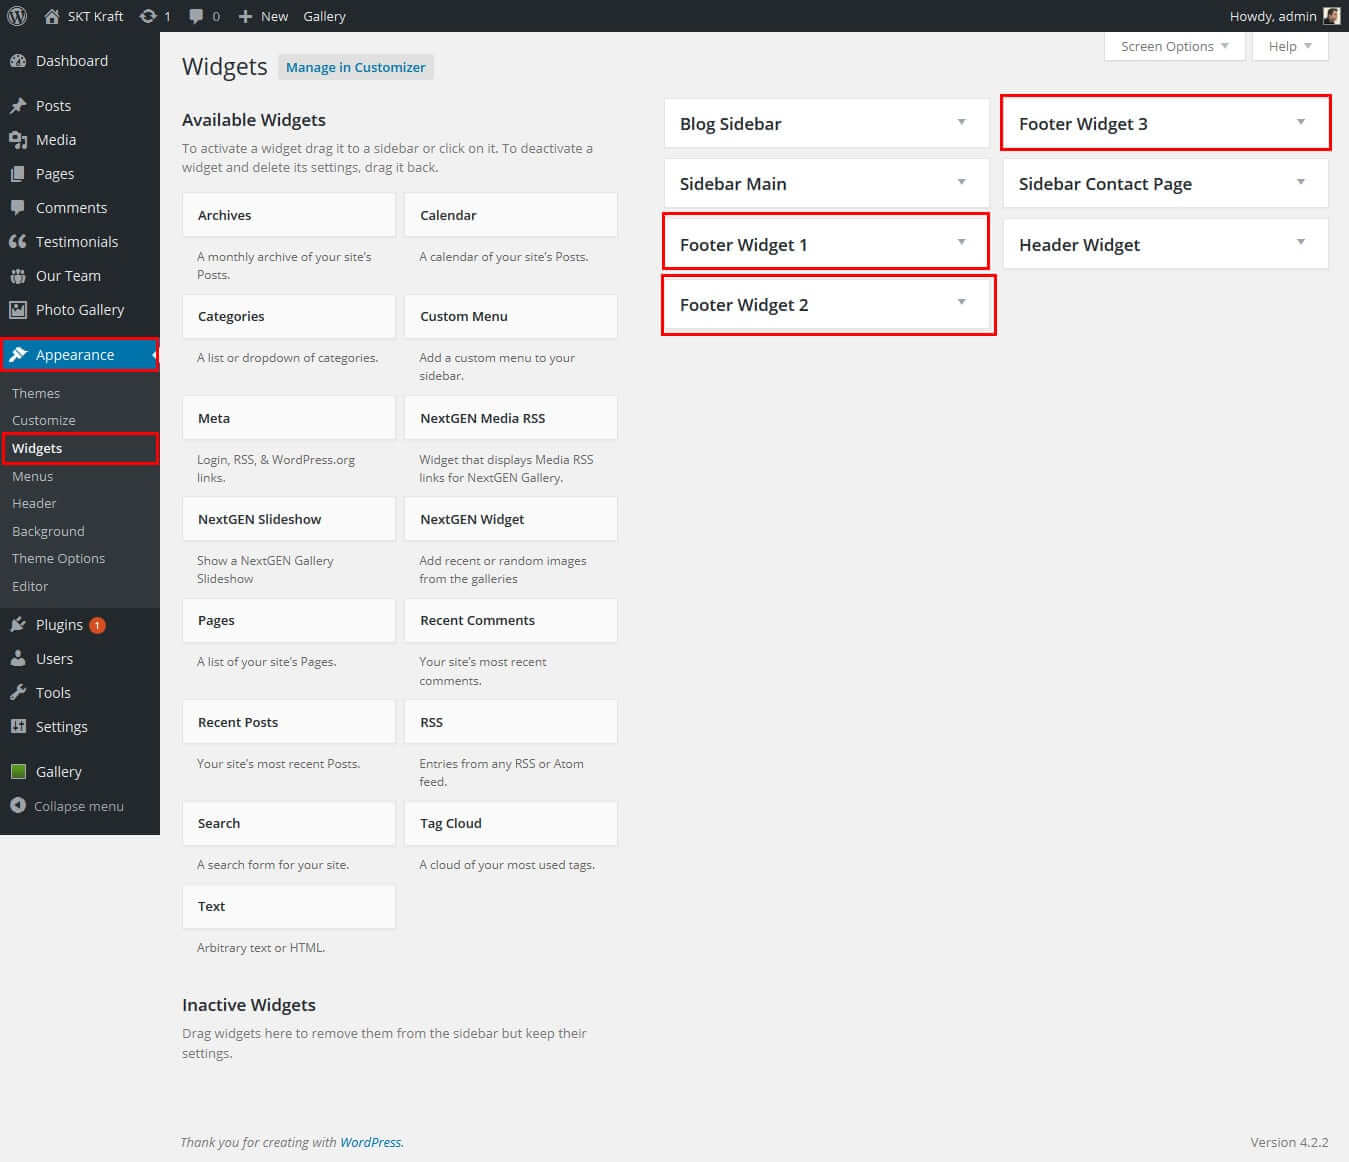
- Please be patient while WordPress imports all the content. Posts, Pages, Products, and Menus are imported. You will need assign the menu a theme location & you’ll need to configure widgets. This is a limitation of WordPress import system.
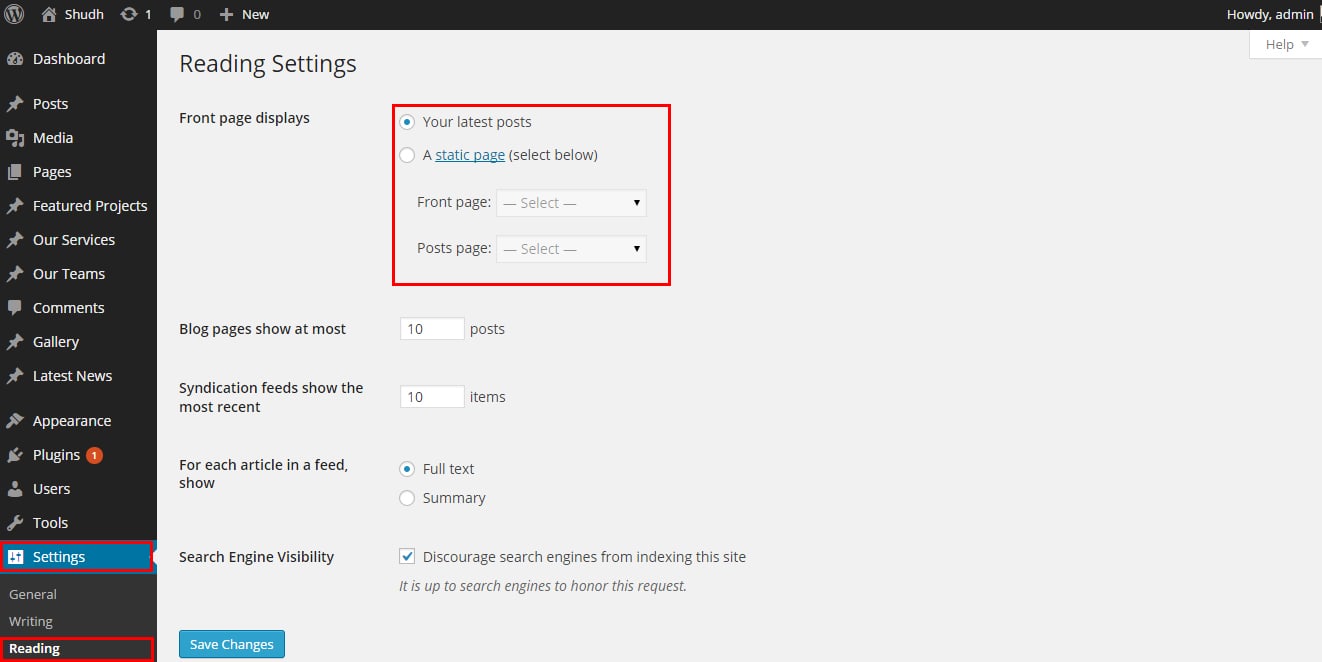
How to Set up Home Page?
- WordPress Admin -> Settings -> Readings -> Your Latest Posts
- Kindly visit Appearance -> Theme Options -> Sections to Manage the homepage sections.

- Our Services section Manage from Appearance->Themes Options-> Section Tab -> section 1
- see screenshot below...

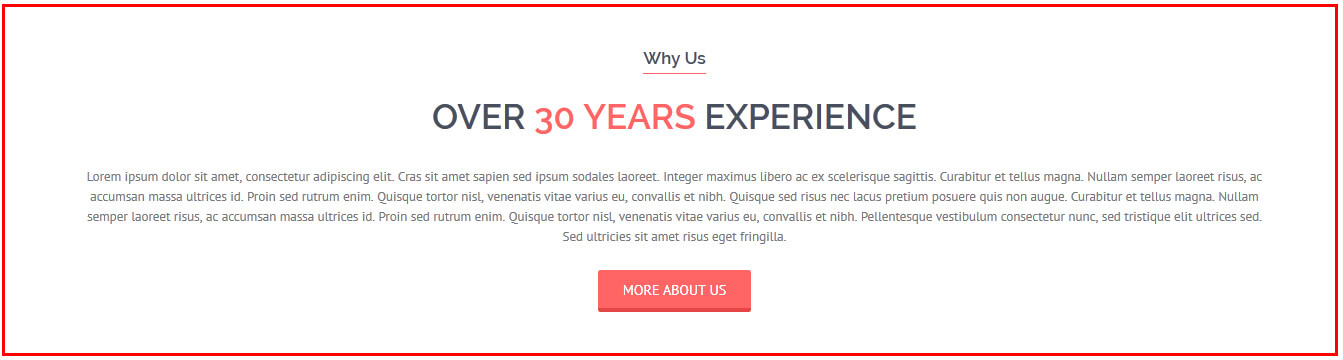
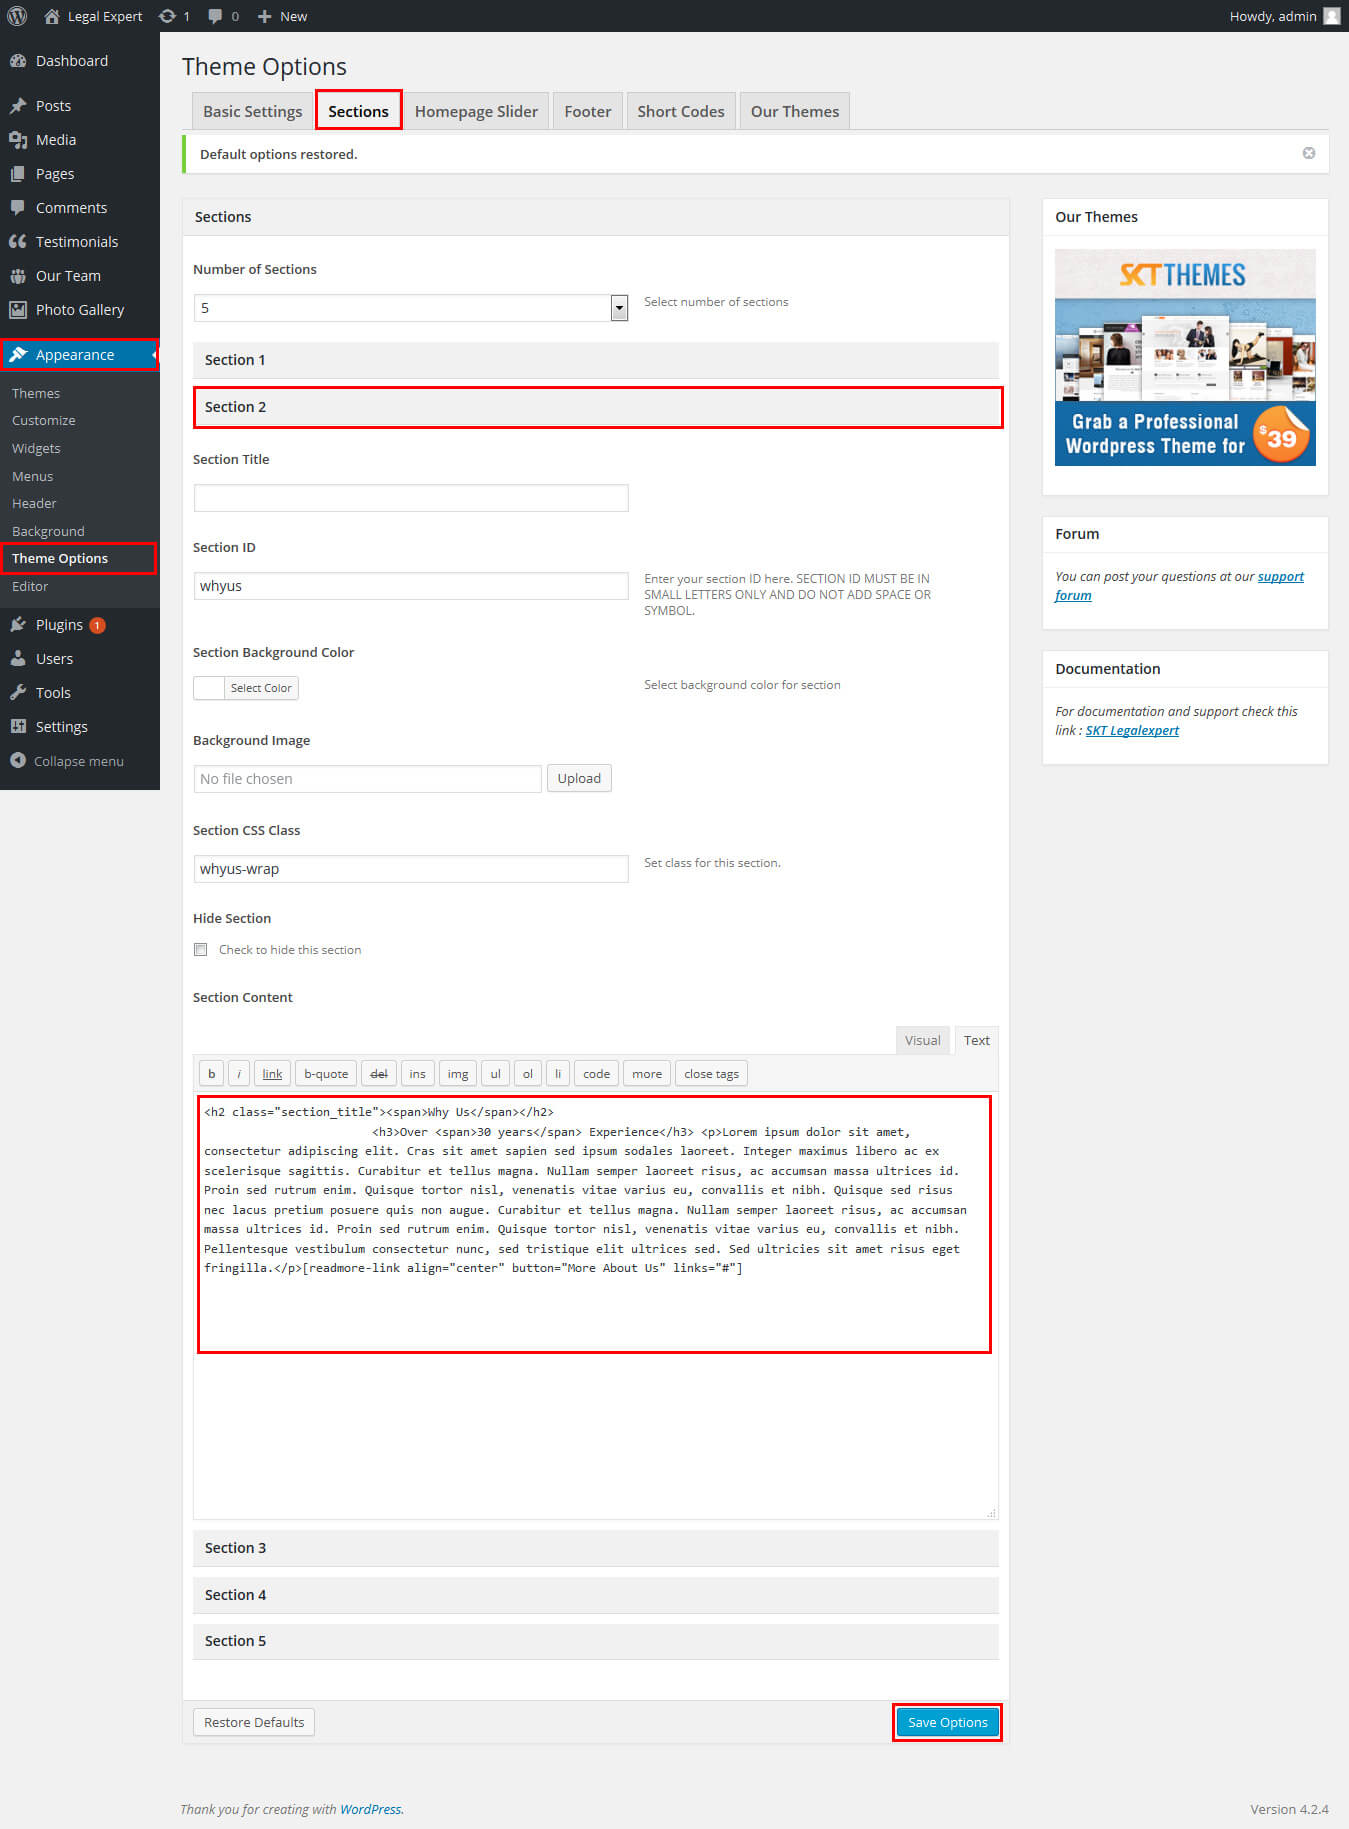
- Why Us section manage from Appearance->Themes Options-> Section Tab -> section 2
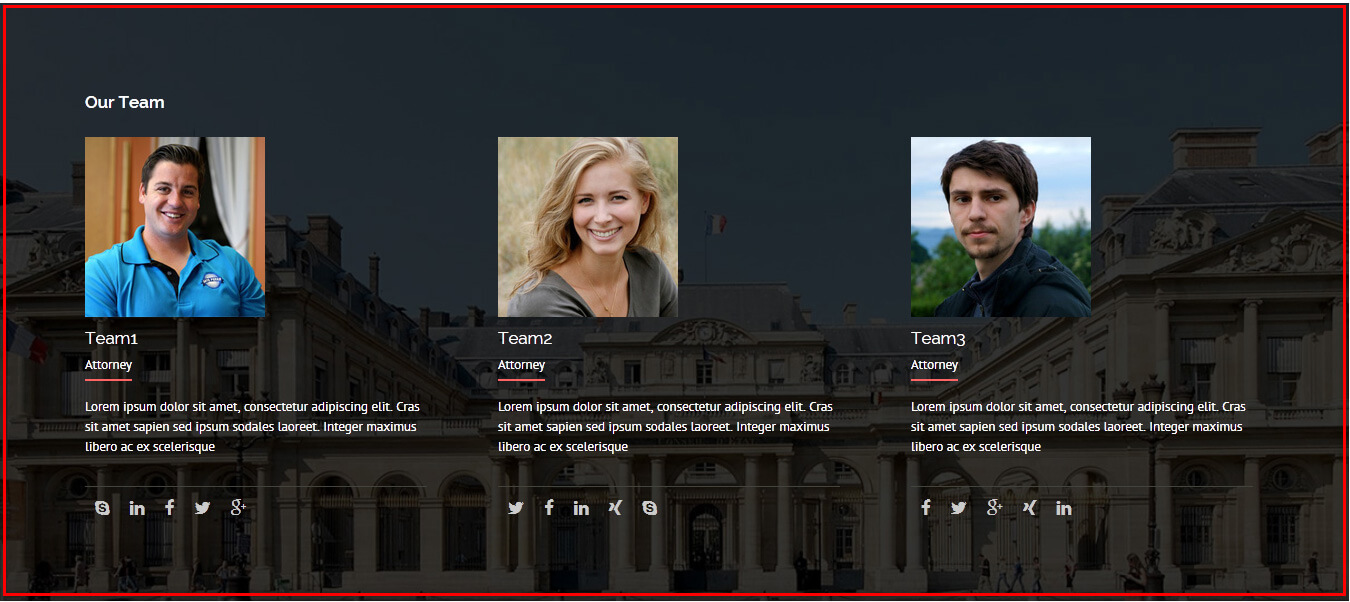
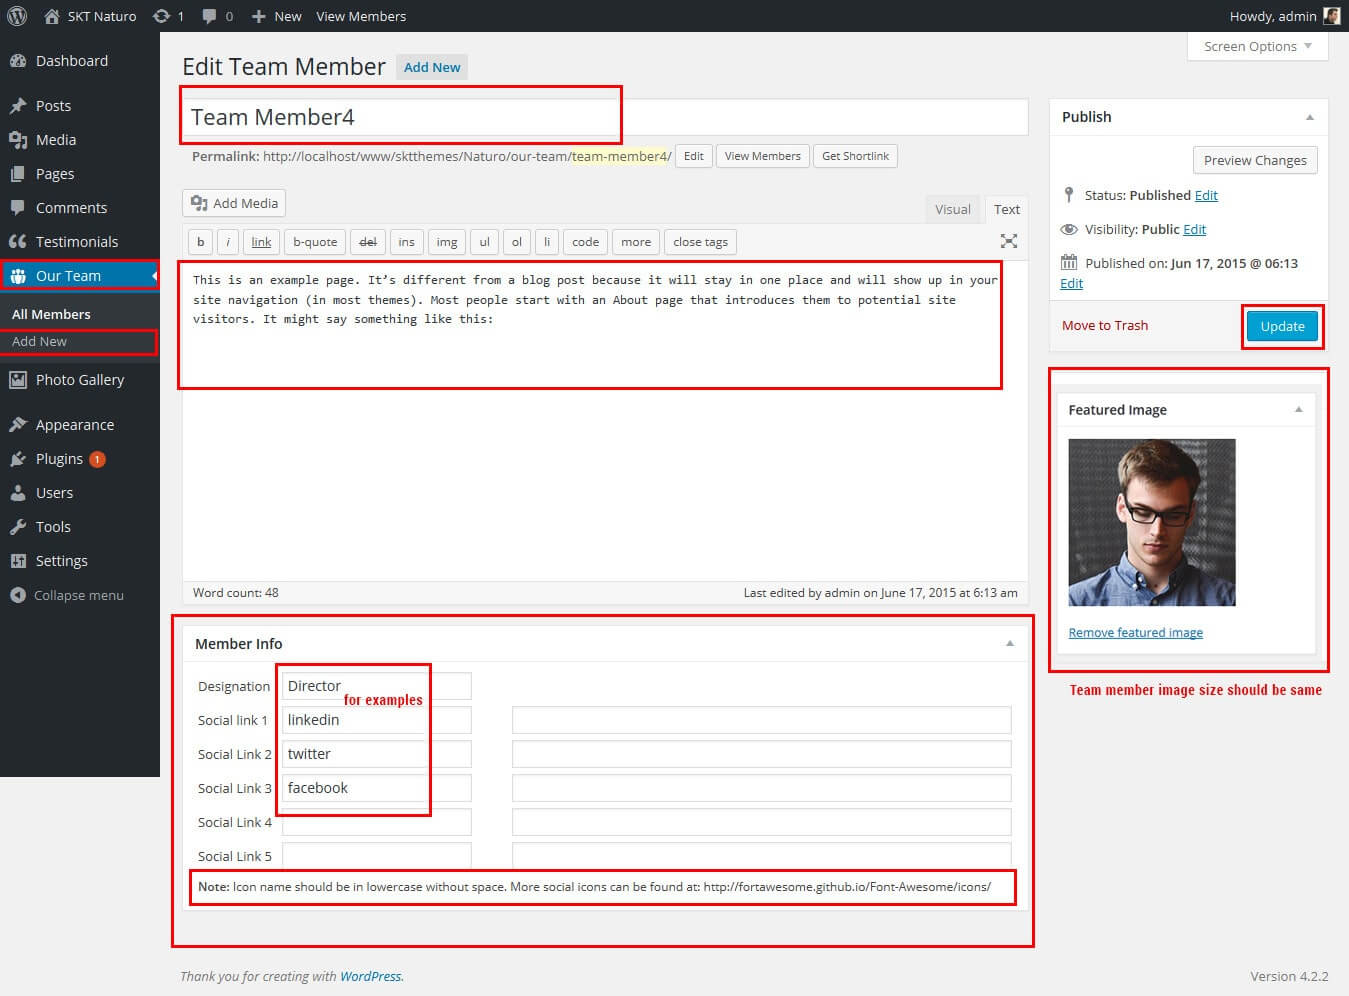
- Our Team shortcode display in Appearance->Themes Options-> Section Tab -> section 3
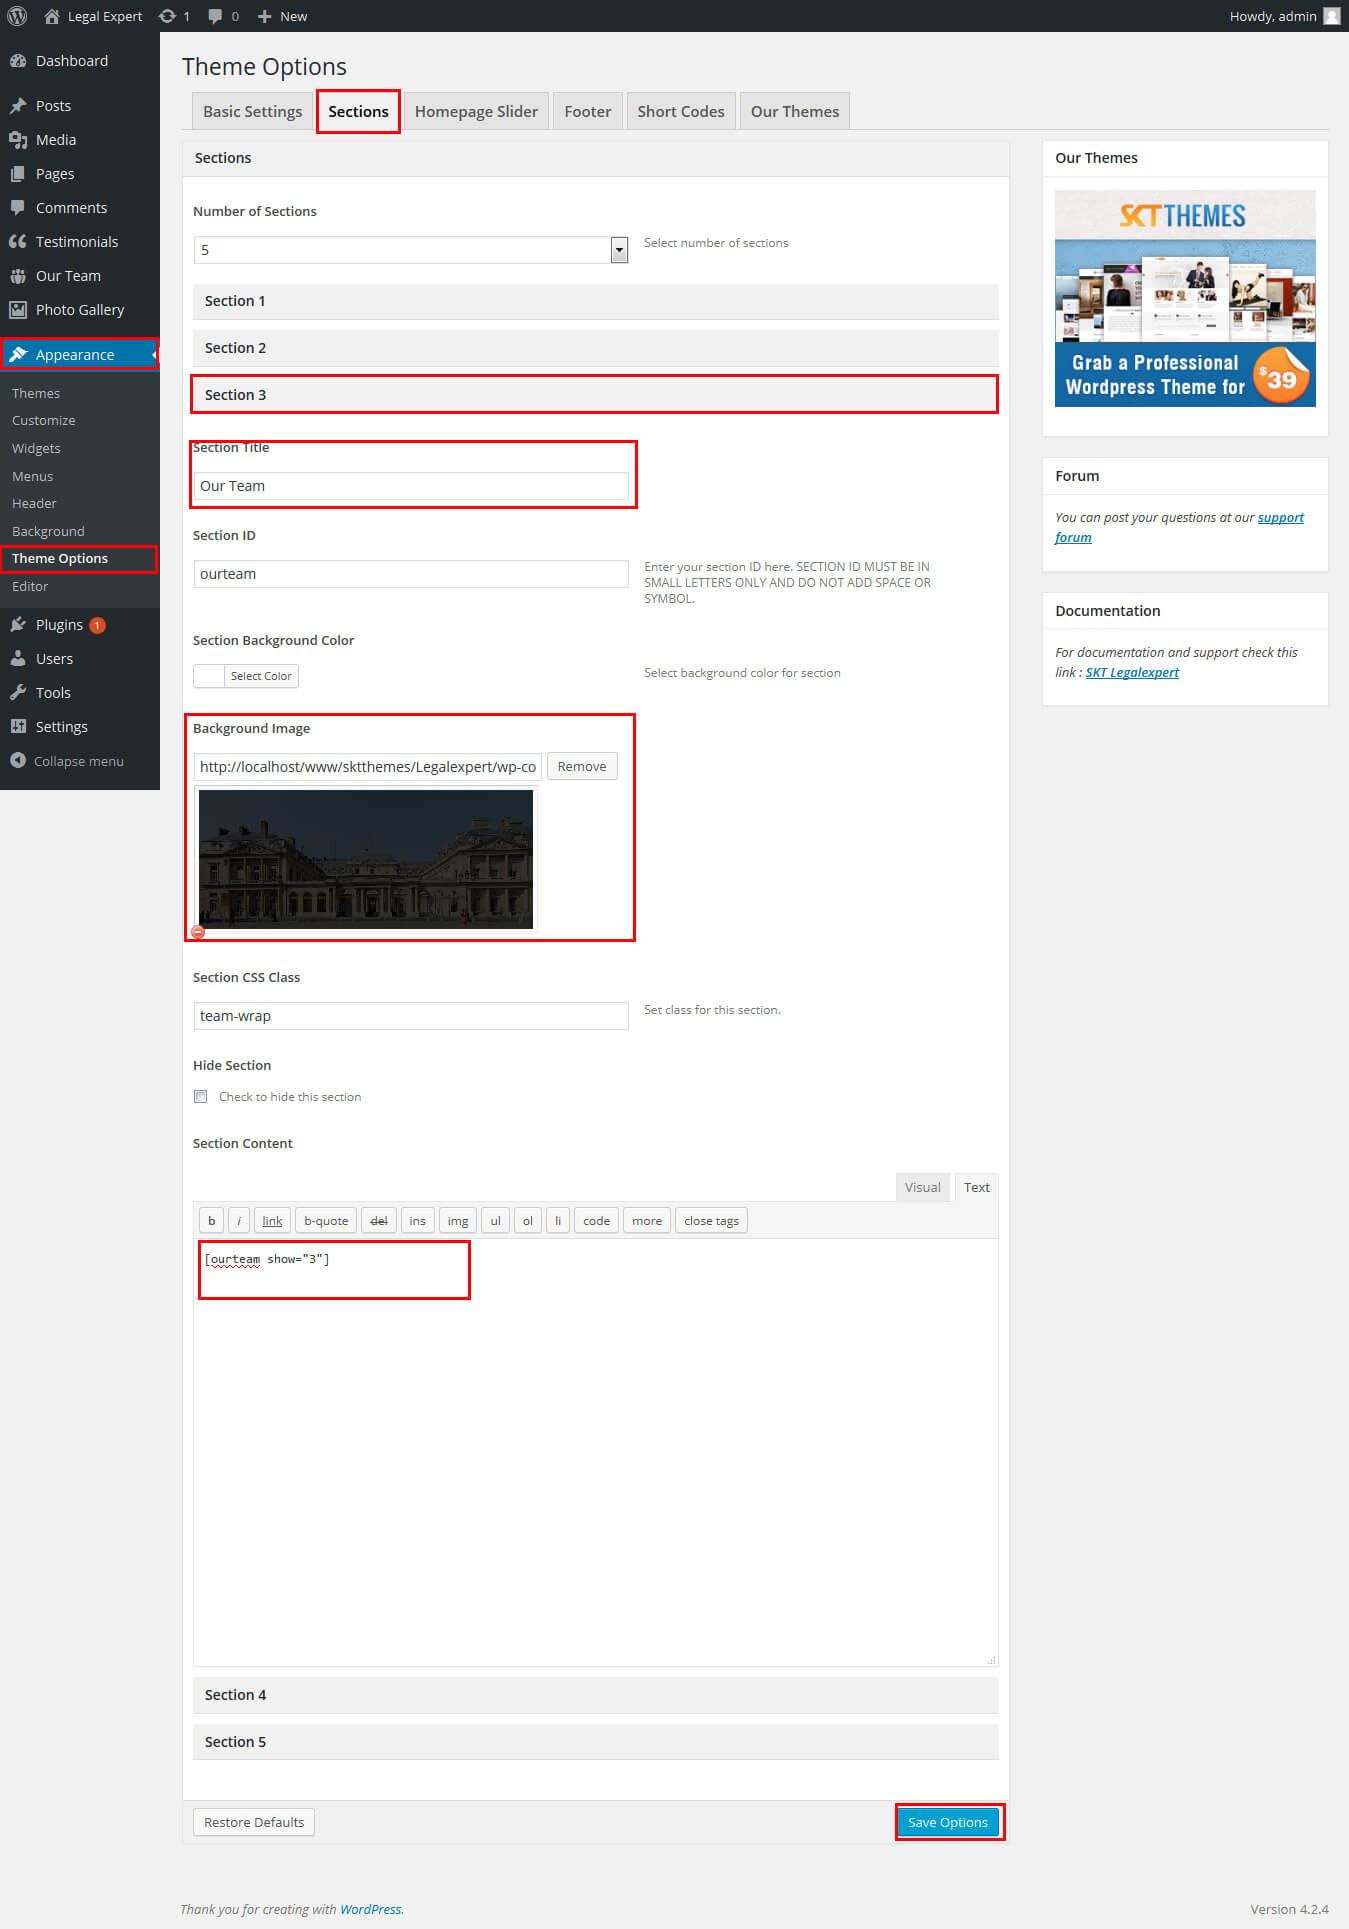
- Shortcode: [ourteam show="3"]
- team member photo size should be Same
- How to manage team member area see screenshot below.
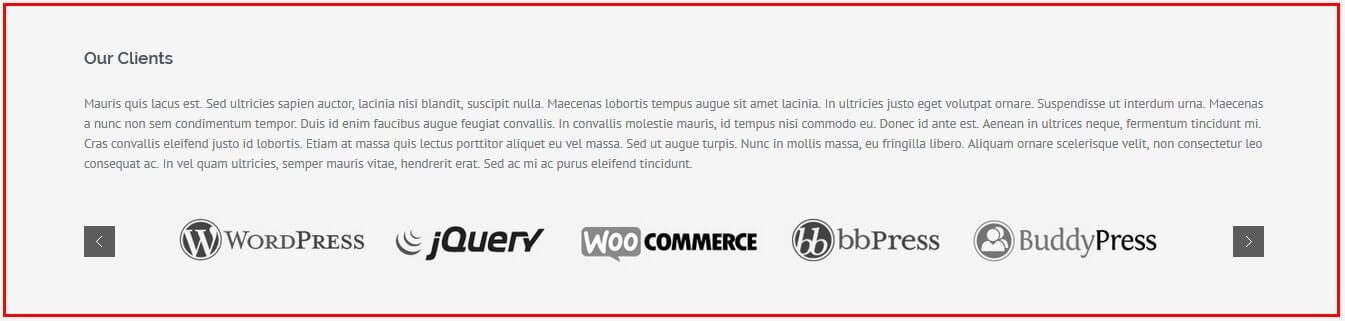
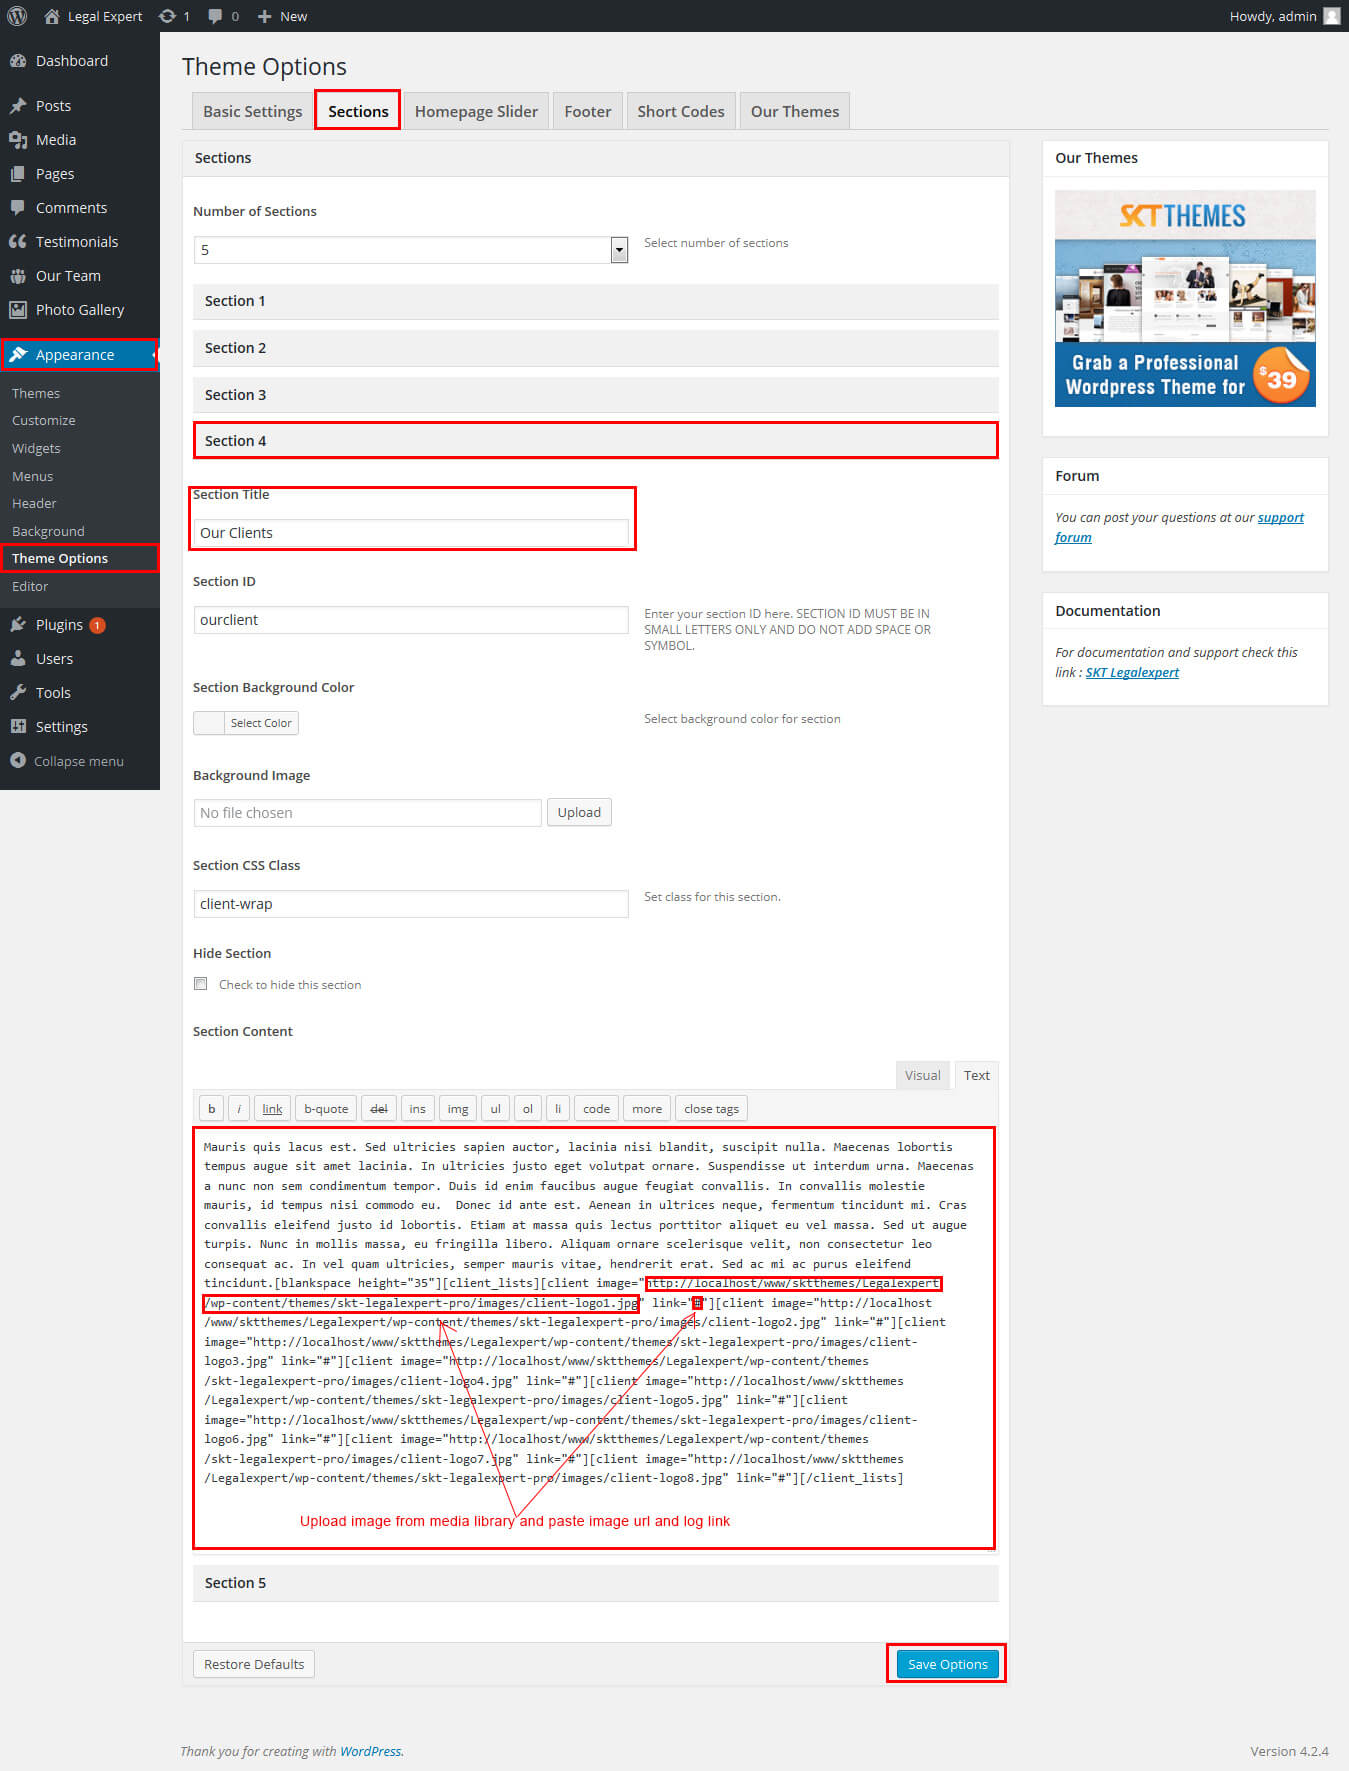
- Our Client section manage from Appearance->Themes Options-> Section Tab -> section 4
- Shortcode: [client_lists]
[client image="image path here( exa.http://localhost/www/sktthemes/Legalexpert/wp-content/themes/skt-legalexpert-pro/images/client-logo1.jpg )" link="#"]
[client image="http://localhost/www/sktthemes/Legalexpert/wp-content/themes/skt-legalexpert-pro/images/client-logo2.jpg" link="#"]
[client image="http://localhost/www/sktthemes/Legalexpert/wp-content/themes/skt-legalexpert-pro/images/client-logo3.jpg" link="#"]
[client image="http://localhost/www/sktthemes/Legalexpert/wp-content/themes/skt-legalexpert-pro/images/client-logo4.jpg" link="#"]
[client image="http://localhost/www/sktthemes/Legalexpert/wp-content/themes/skt-legalexpert-pro/images/client-logo5.jpg" link="#"]
[client image="http://localhost/www/sktthemes/Legalexpert/wp-content/themes/skt-legalexpert-pro/images/client-logo6.jpg" link="#"]
[client image="http://localhost/www/sktthemes/Legalexpert/wp-content/themes/skt-legalexpert-pro/images/client-logo7.jpg" link="#"]
[client image="http://localhost/www/sktthemes/Legalexpert/wp-content/themes/skt-legalexpert-pro/images/client-logo8.jpg" link="#"][/client_lists]
- see screenshot below
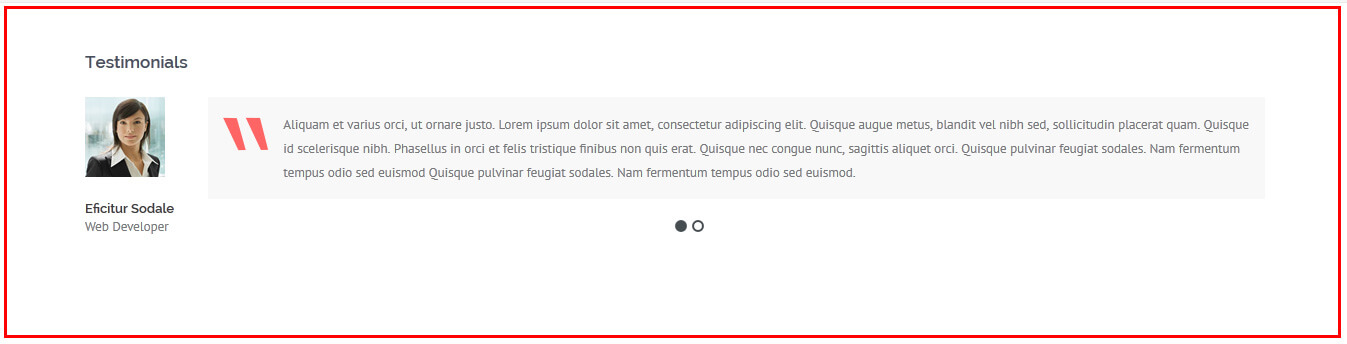
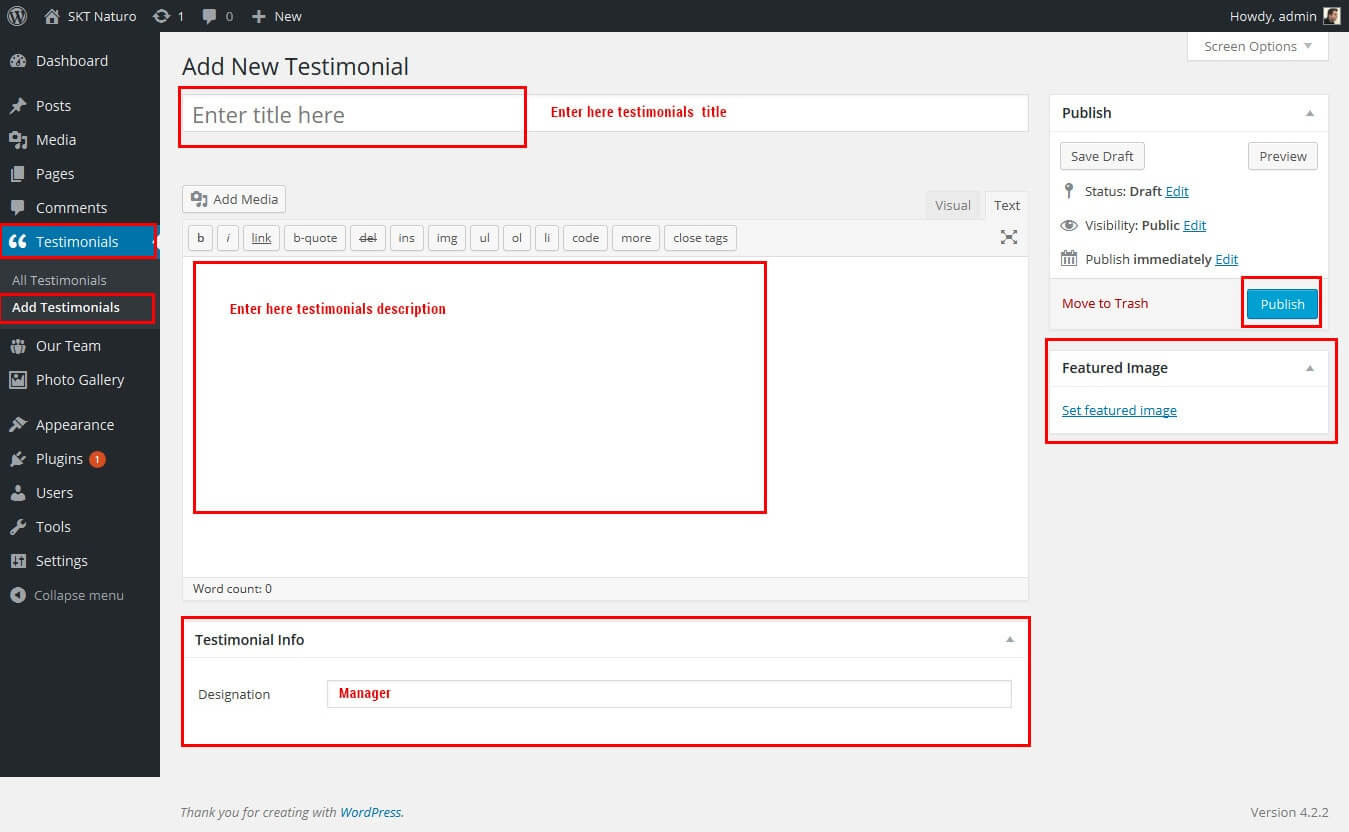
- Testimonials shortcode input in Appearance->Themes Options-> Section Tab -> section 5
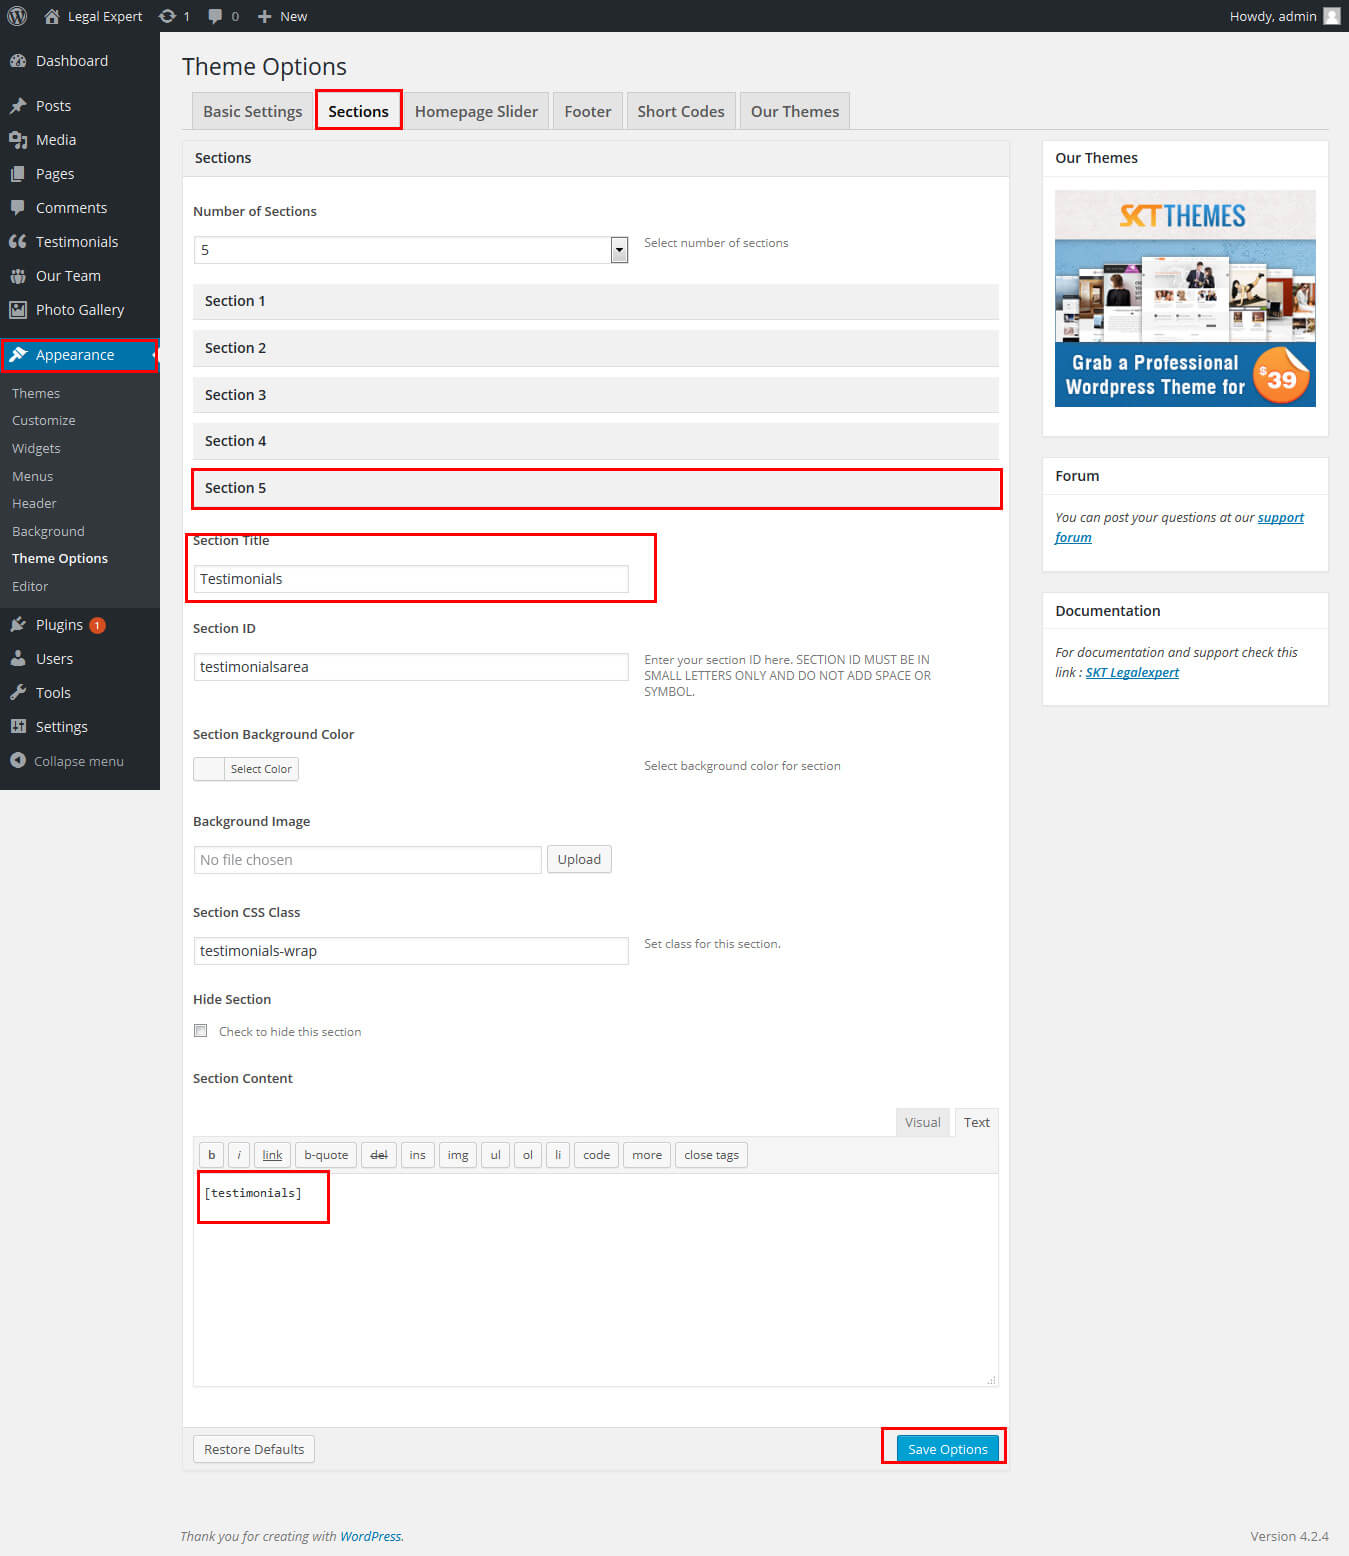
- Shortcode: [testimonials]
- How to manage testimonials see screenshot below.
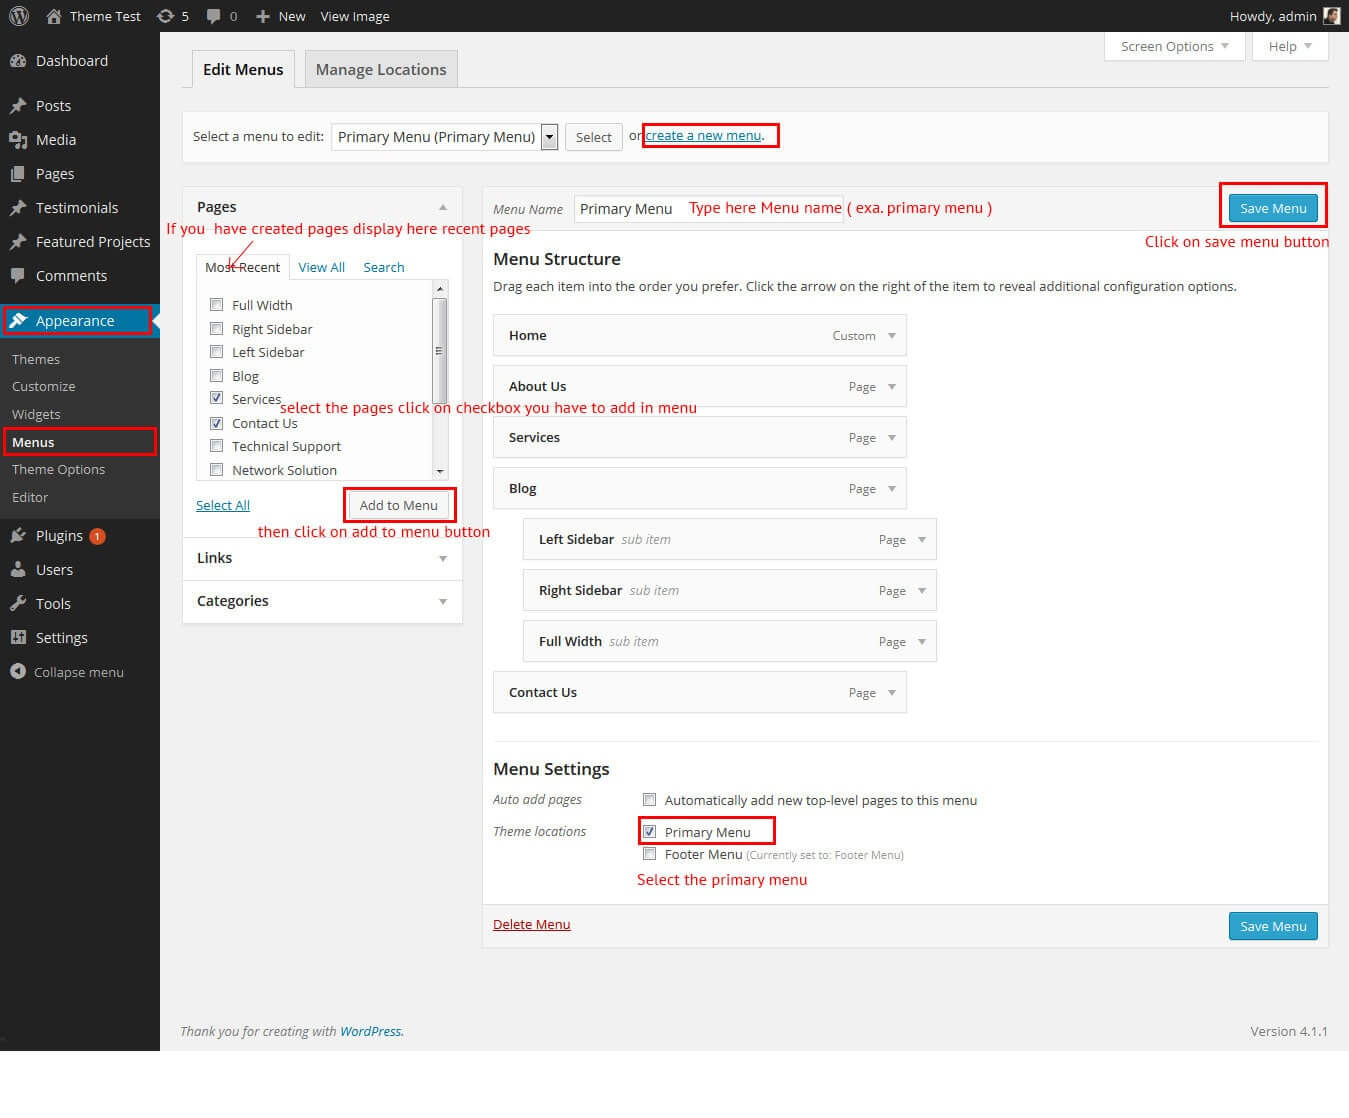
How to set up Navigation?
- Go to Appearance > in the WordPress menu
- If You Want Create new menu
- Click on Create a new menu link
- Give a name to your menu in Menu Name and click Create Menu button
- Now choose the pages, categories, custom links from the left side of your screen by selecting the checkbox and click on Add Menu
- Click Save Menu after adding required pages, categories in the menu
Playing with Theme Options
- Log in to the WordPress Dashboard.
- Click on Appearance>Theme Options
- Basic Settings
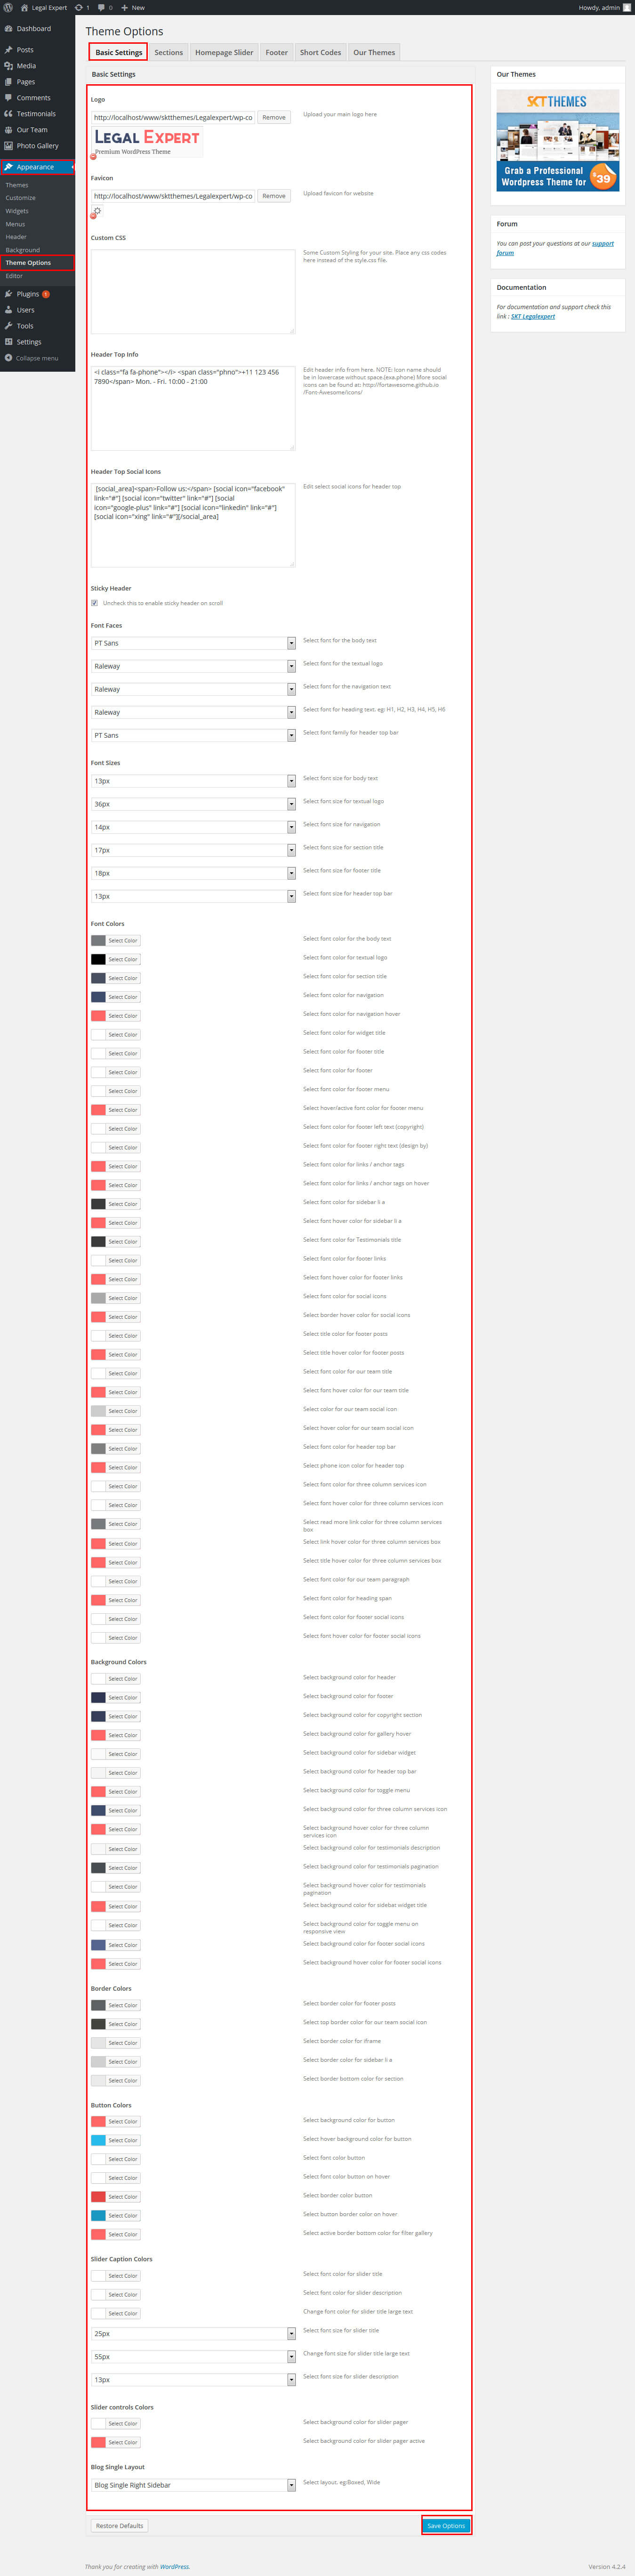
- Upload and set up Logo, Favicon
- Change Font Family, font size, font colors, border color, background color, Slider controls Colors
- Change navigation font family and font size
- Change navigation hover and active color
- Change Link and link hover color
- Sections
- You can add content in the section for homepage.
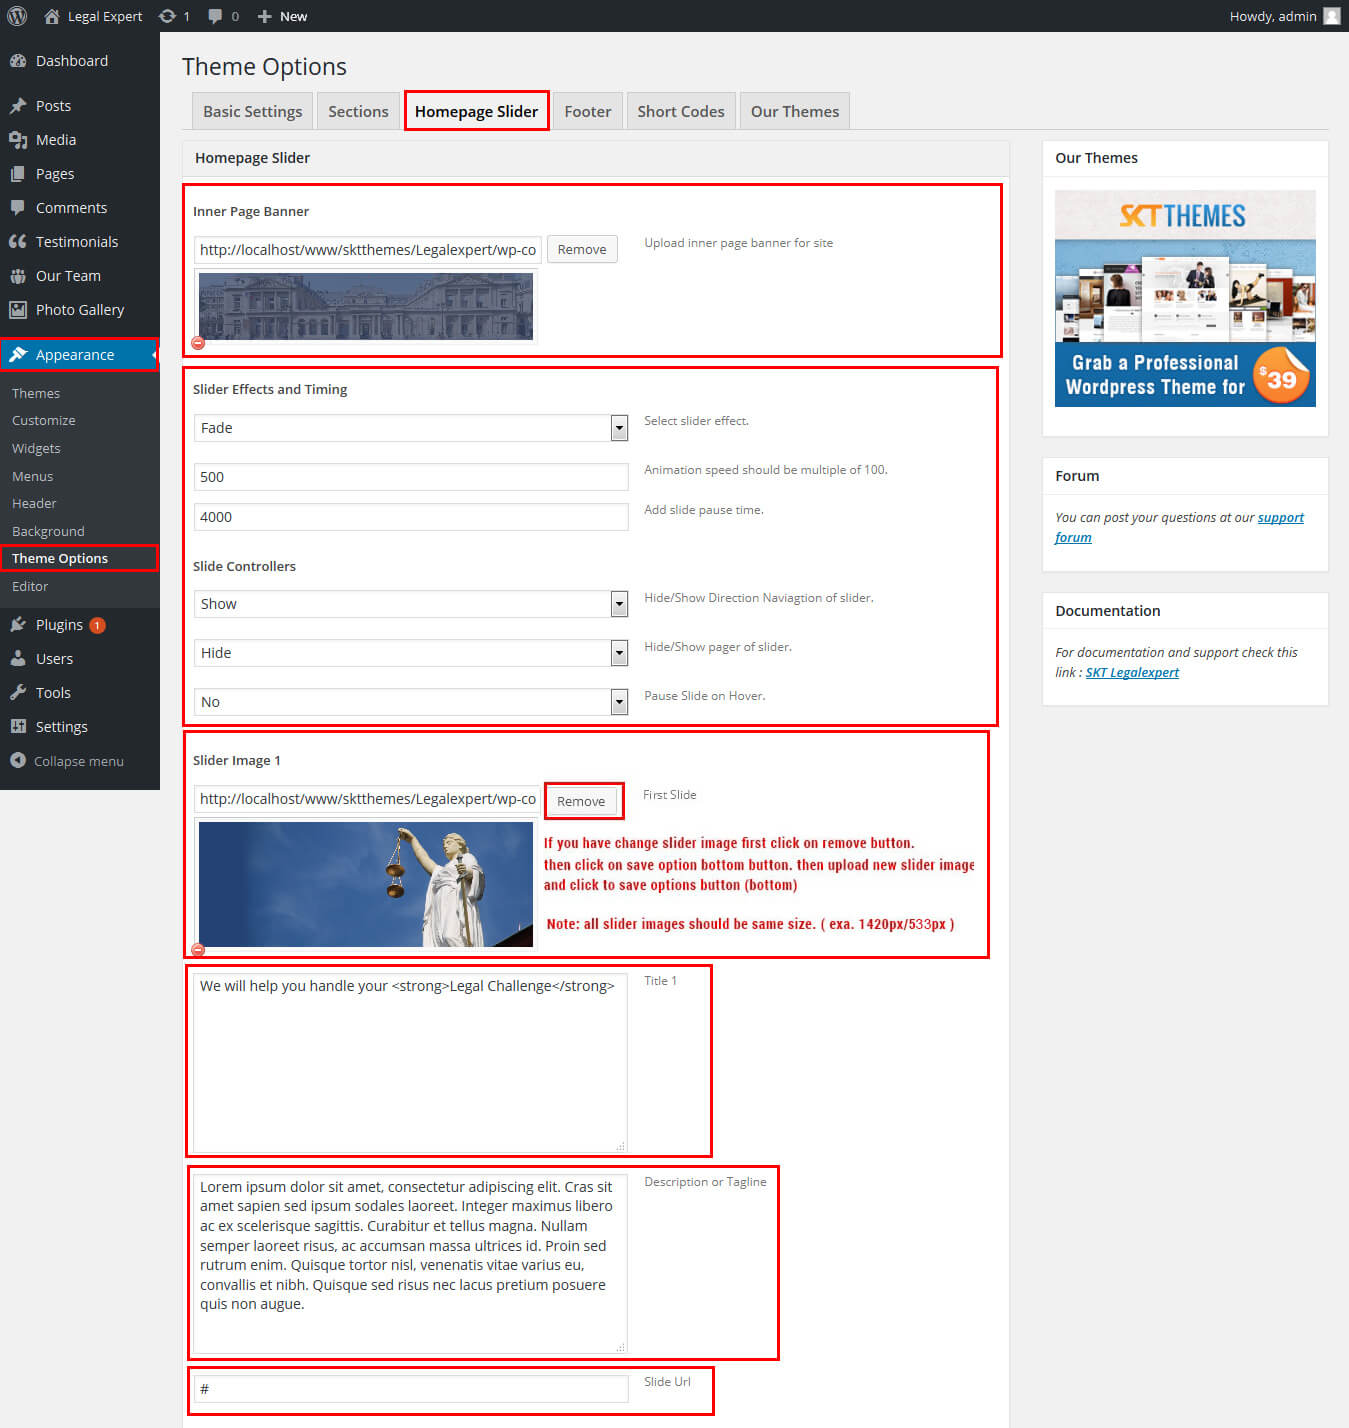
- Homepage Slider
- Can set front page slider for inner page
- Can set Slider Effects and Timing, Slide Controllers
- Ability to set up to 5 slider images in FREE and up to 10 in .
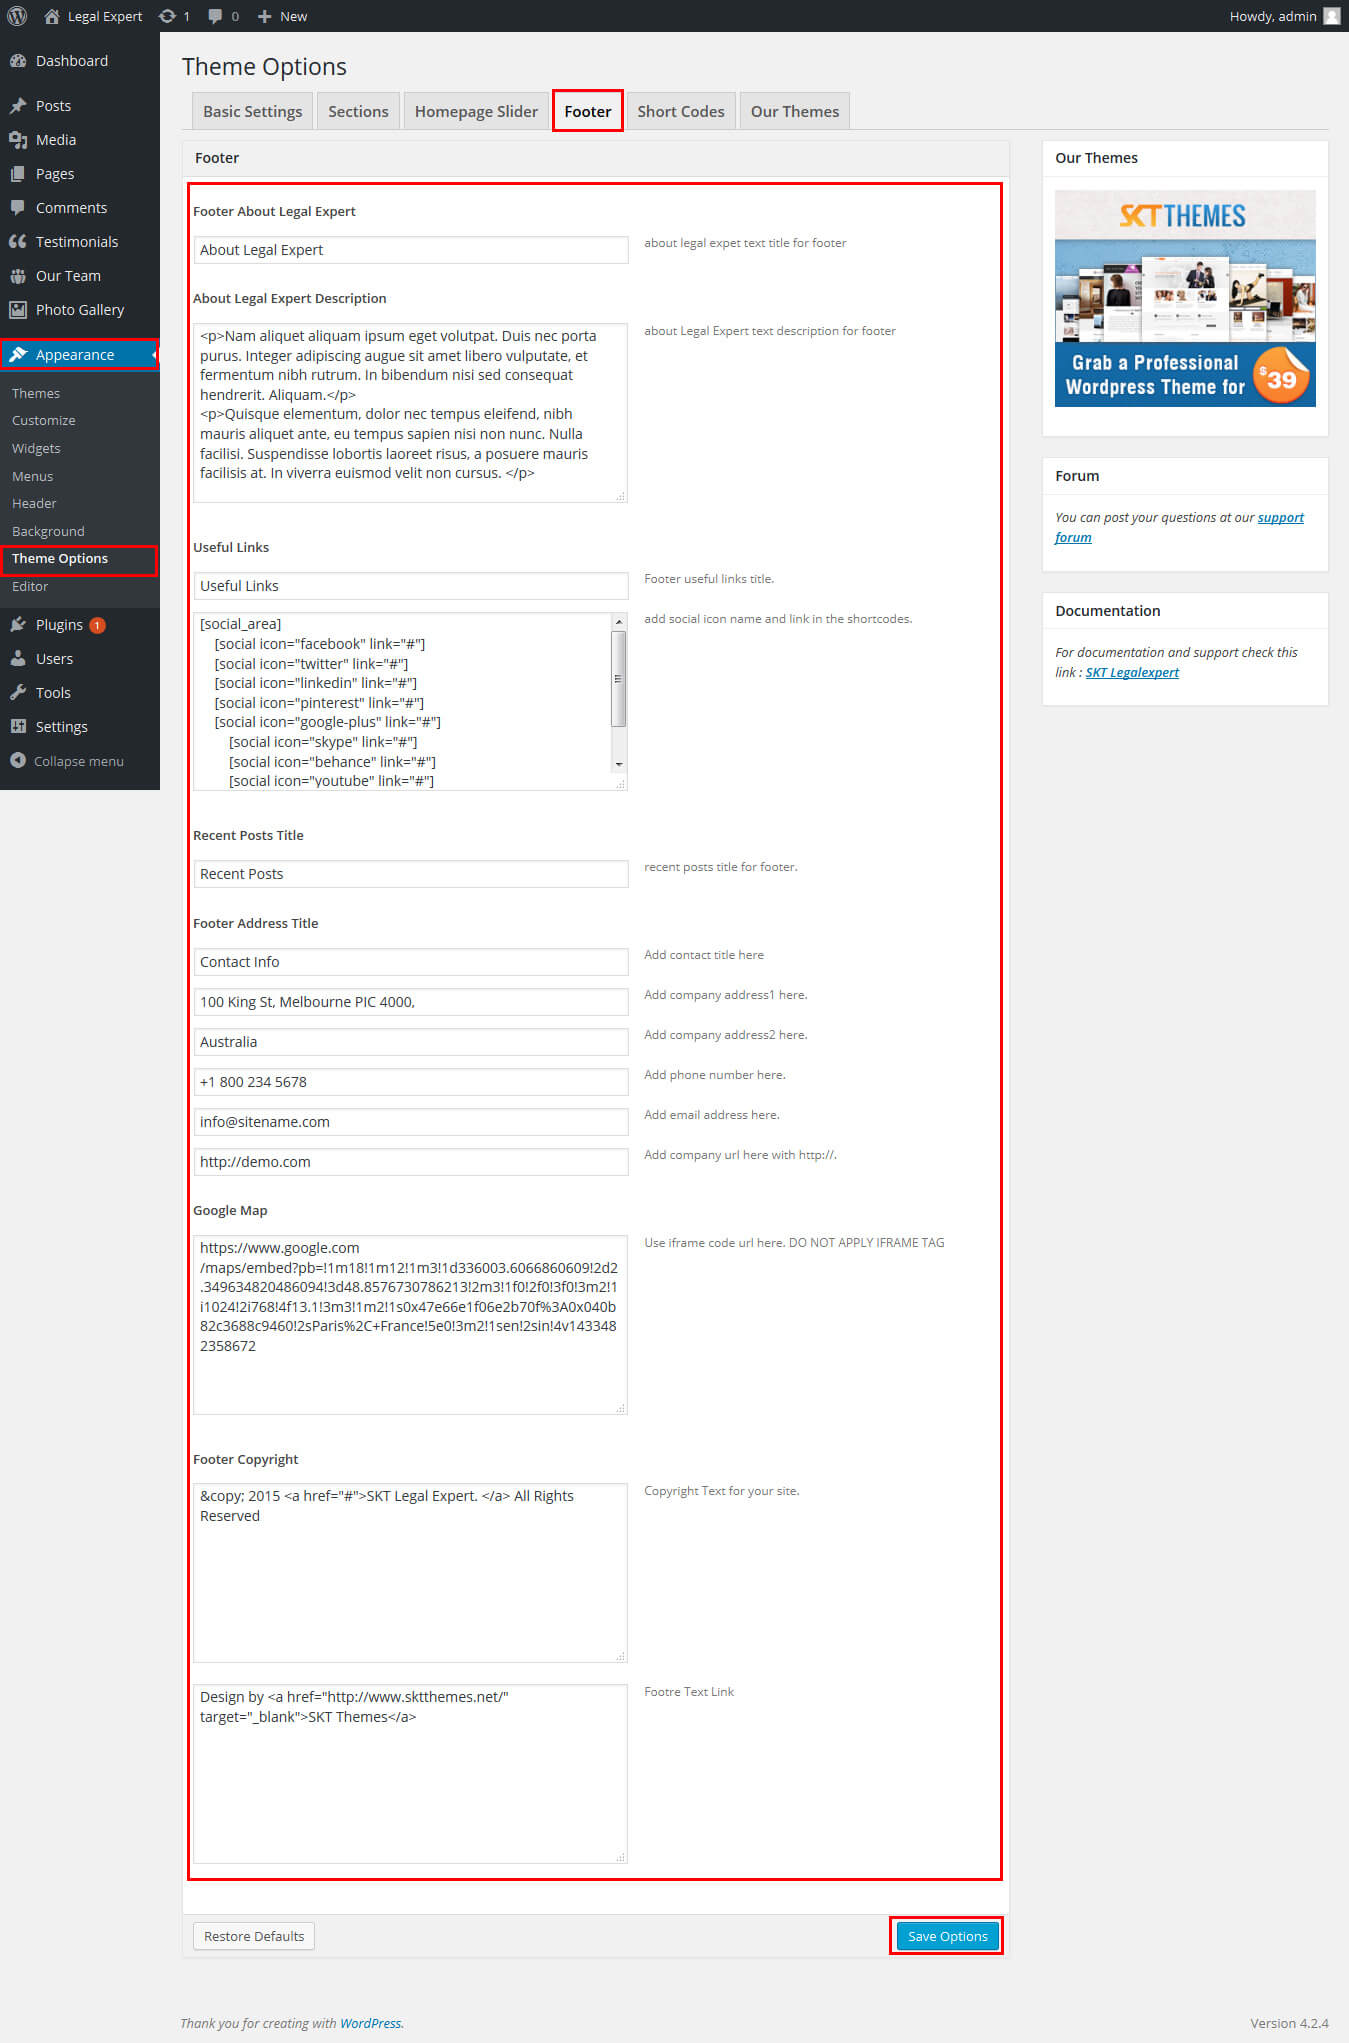
- Footer
- Can manage footer about description
- Can change footer heading color
- Can change footer color
- Can change footer color
- Can change footer contact info and social links from footer tab.
- Shortcodes
- All Shortcodes available Go to Appearance->Themes Option->Shortcode Tab see screenshot below...

How to change Slider Settings?
- WordPress Admin -> Appearance -> Theme Options -> Homepage Slider Tab
- You can change Slider Effects and Timing.
- You can change Slider Effect.
- You can change Slider Animation speed.
- You can change Slider pause time.
- You can change Slide Controllers.
- You can change Slider Hide/Show Direction Naviagtion of slider.
- You can change Slider Hide/Show pager of slider.
- You can change Slider Pause Slide on Hover.
- see screenshot below...
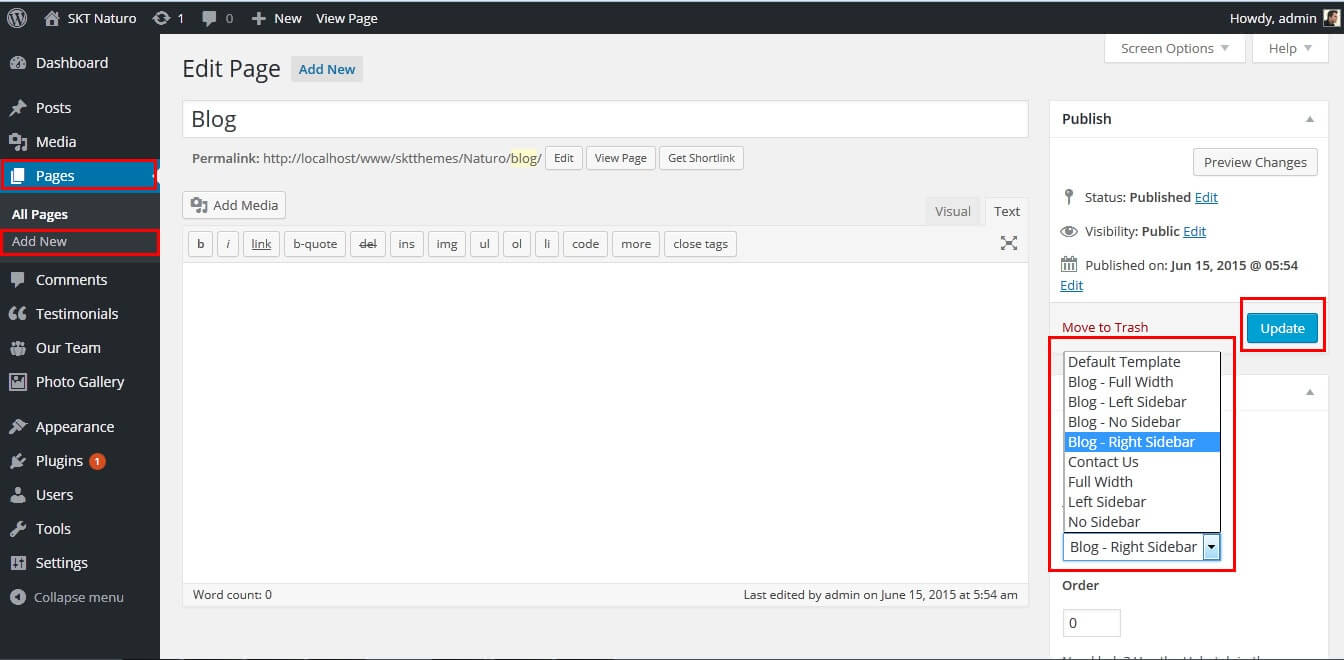
Page Templates
- Default Template
- Helps in setting up the content on any page with Right Sidebar
- Left Sidebar
- Helps in setting up the content on any page with Left Sidebar
- Full Width
- Helps in setting up the content on any page without Sidebar
- No Sidebar
- Helps in setting up the content on any page without Sidebar center align
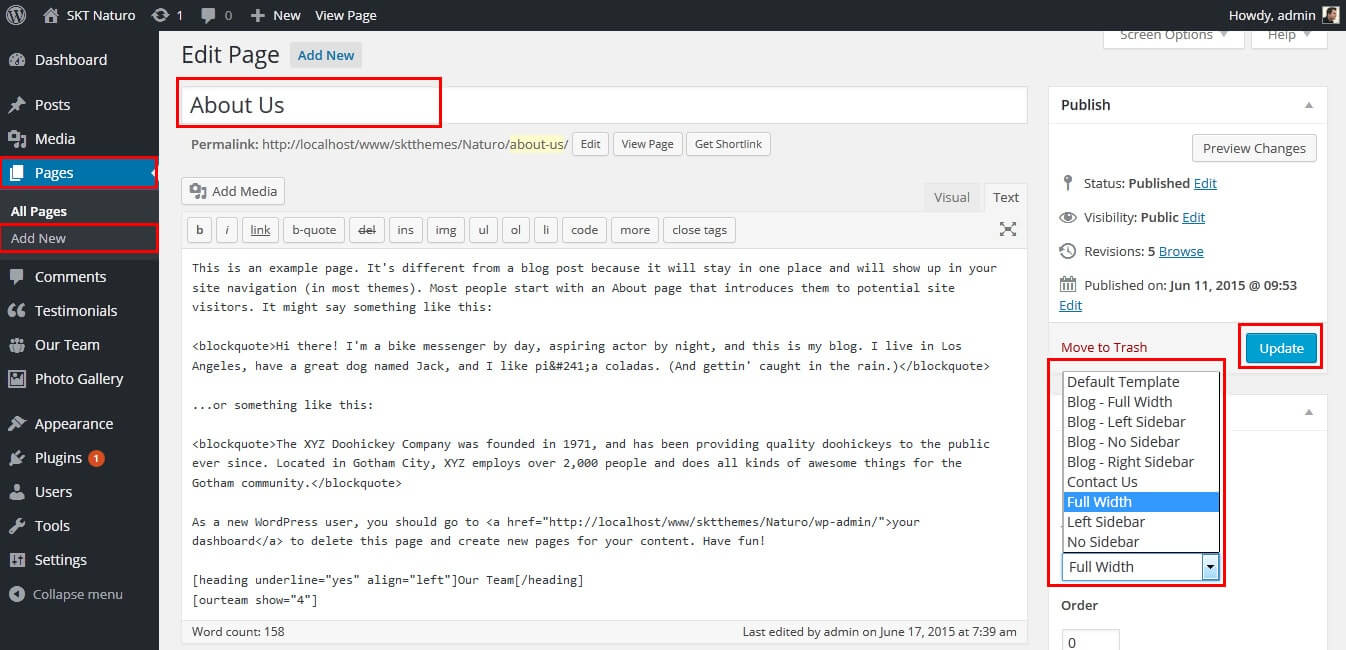
- Contact Us
- Helps in setting up the contact us page template for Contact page.
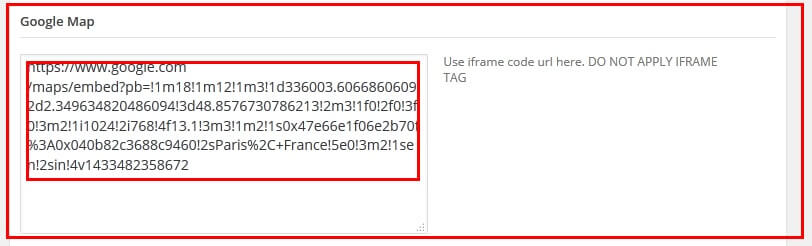
- Contact page google map manage from footer tab
- Use iframe code url (Do not apply iframe tag)
Set up Blog page
- Set up by using Page Template Blog on any page to show blog posts
- Blog Full Width, Blog Left Sidebar, Blog Right Sidebar page templates
Setting up Shop
- Go to Plugins -> Add New in the WordPress Admin panel
- Type WooCommerce is search box and click on search button
- Install and then Activate the plugin.
- It will ask whether to set up default pages. Kindly click on setting up default pages of the WooCommerce
- That’s it now you can go to shop page and check the default product.
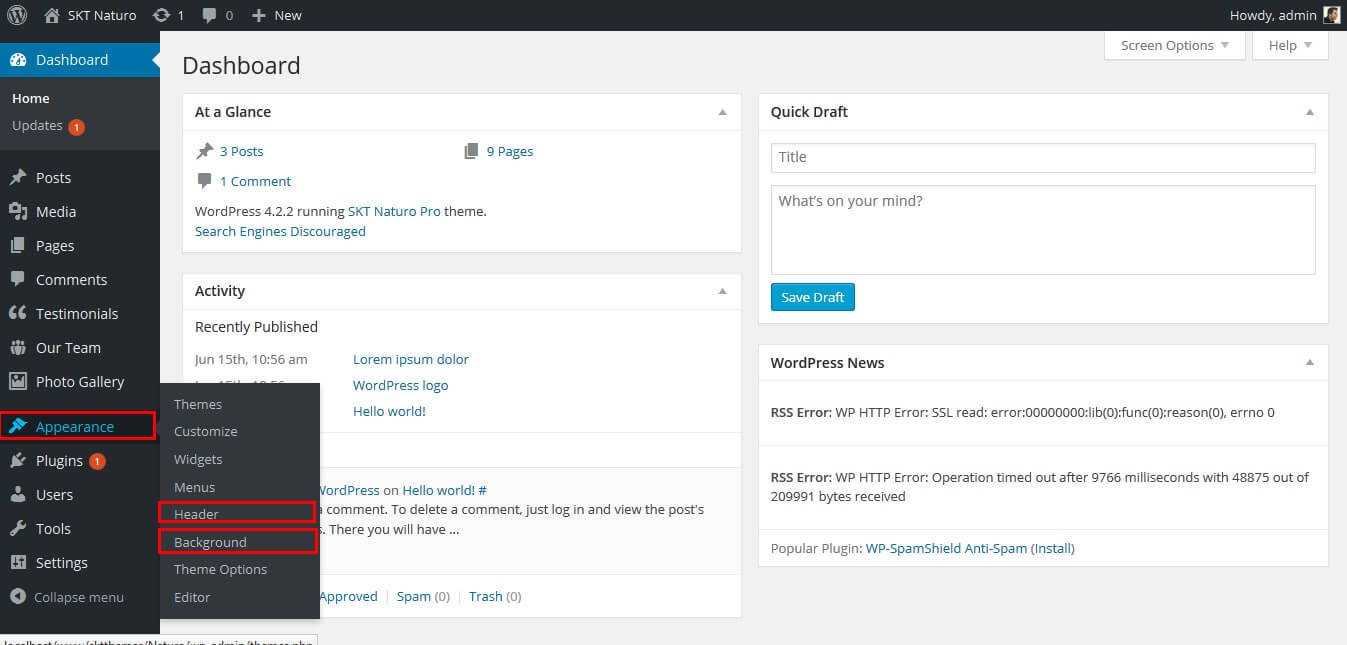
Custom Background
- Go to Appearance-> Background.
- You can set any image or color as background.
- You can see the background preview on the same setting page.
- Click on Save Changes.
- See screenshot below...
Copyright © 2015 Shri Krishna Technologies