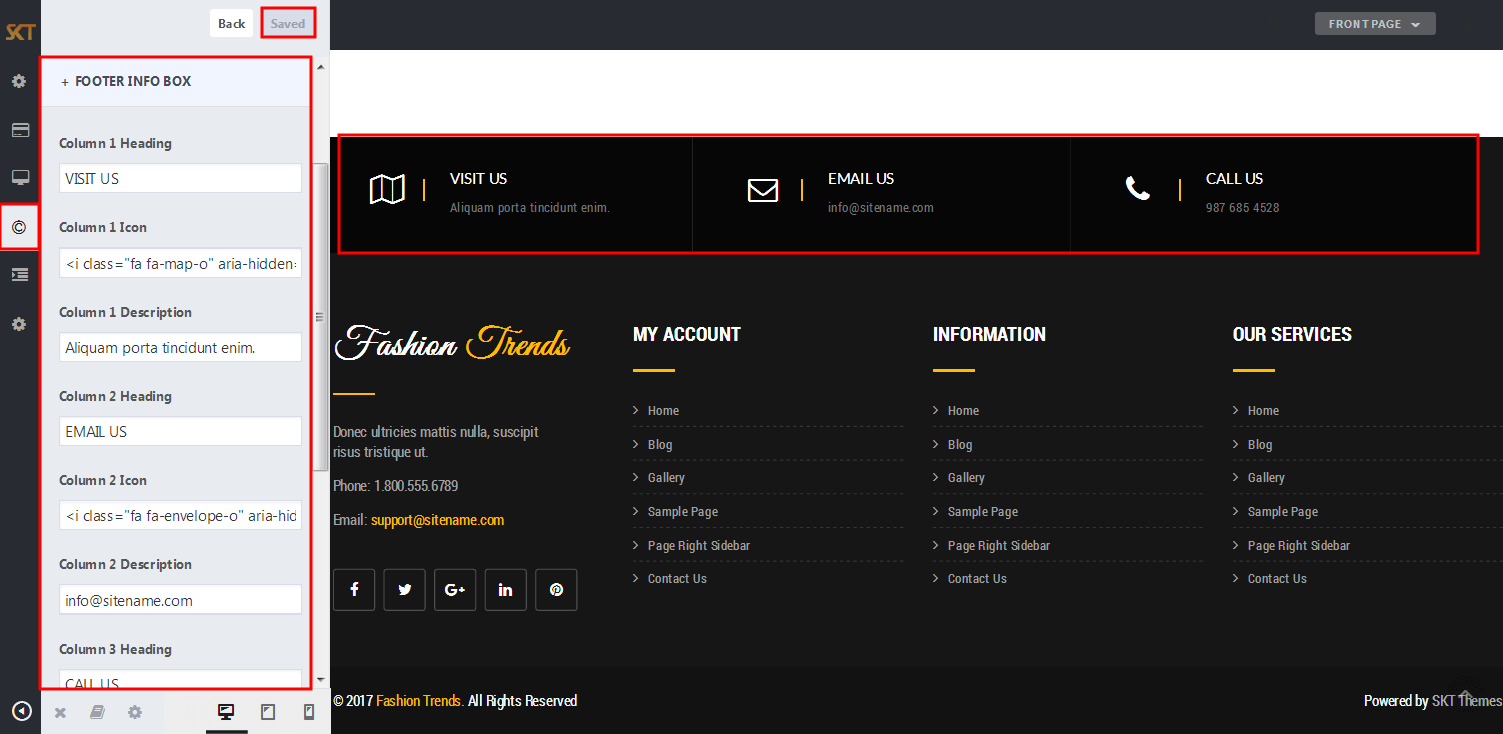
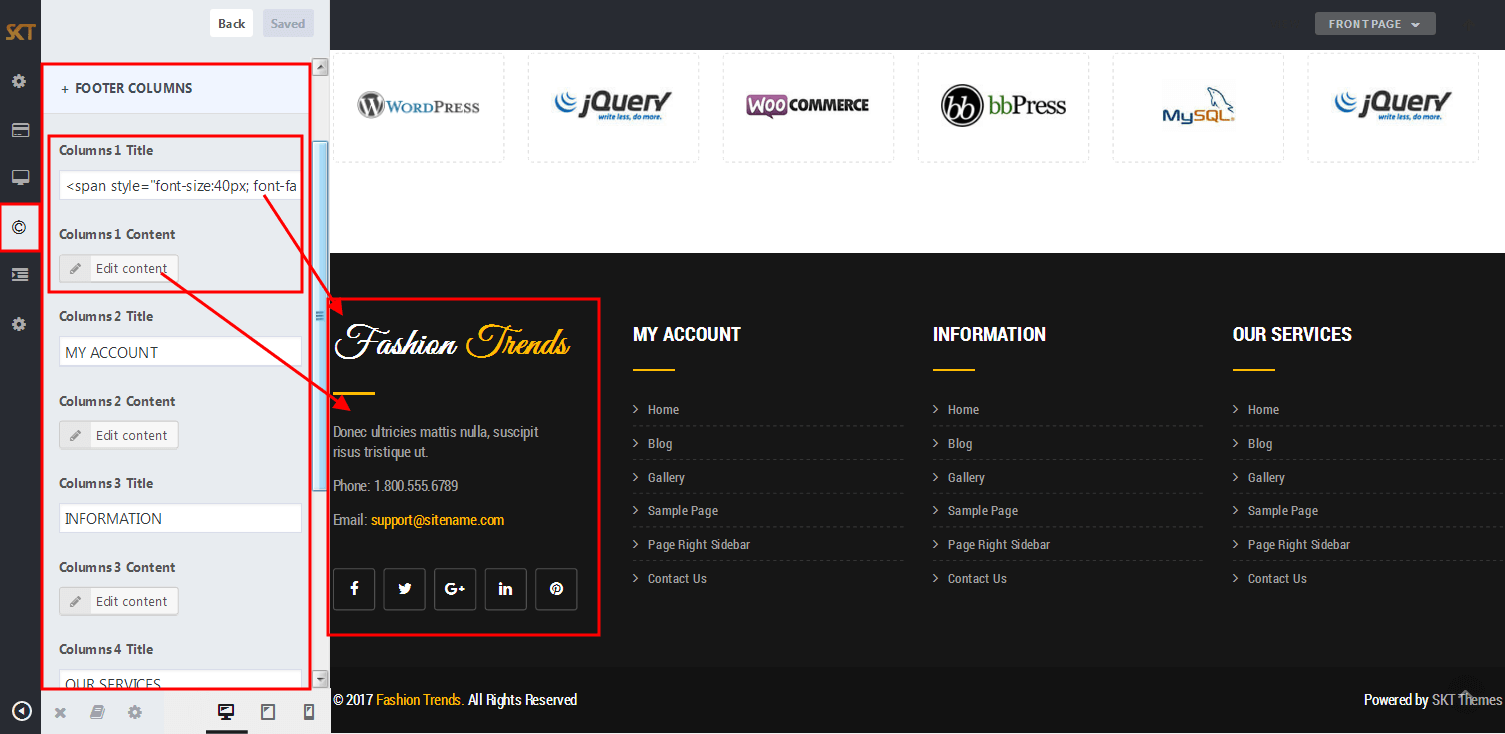
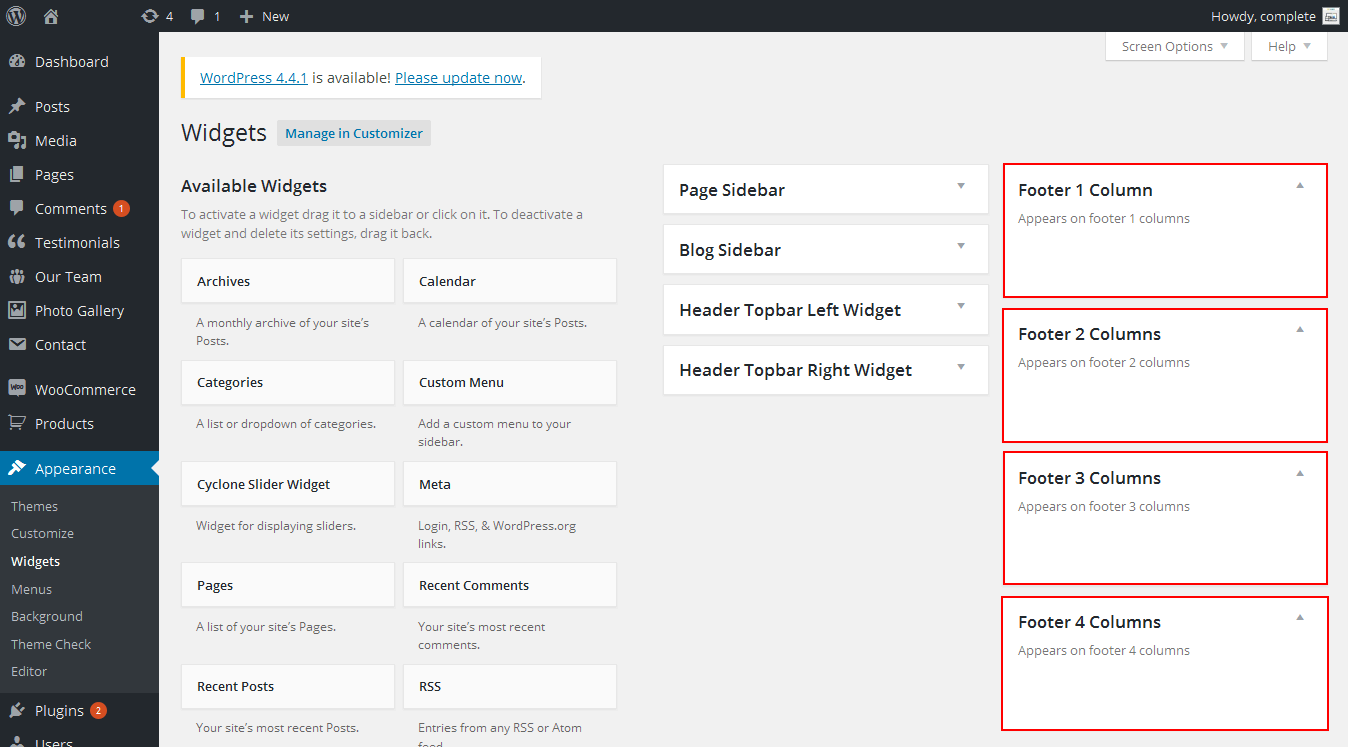
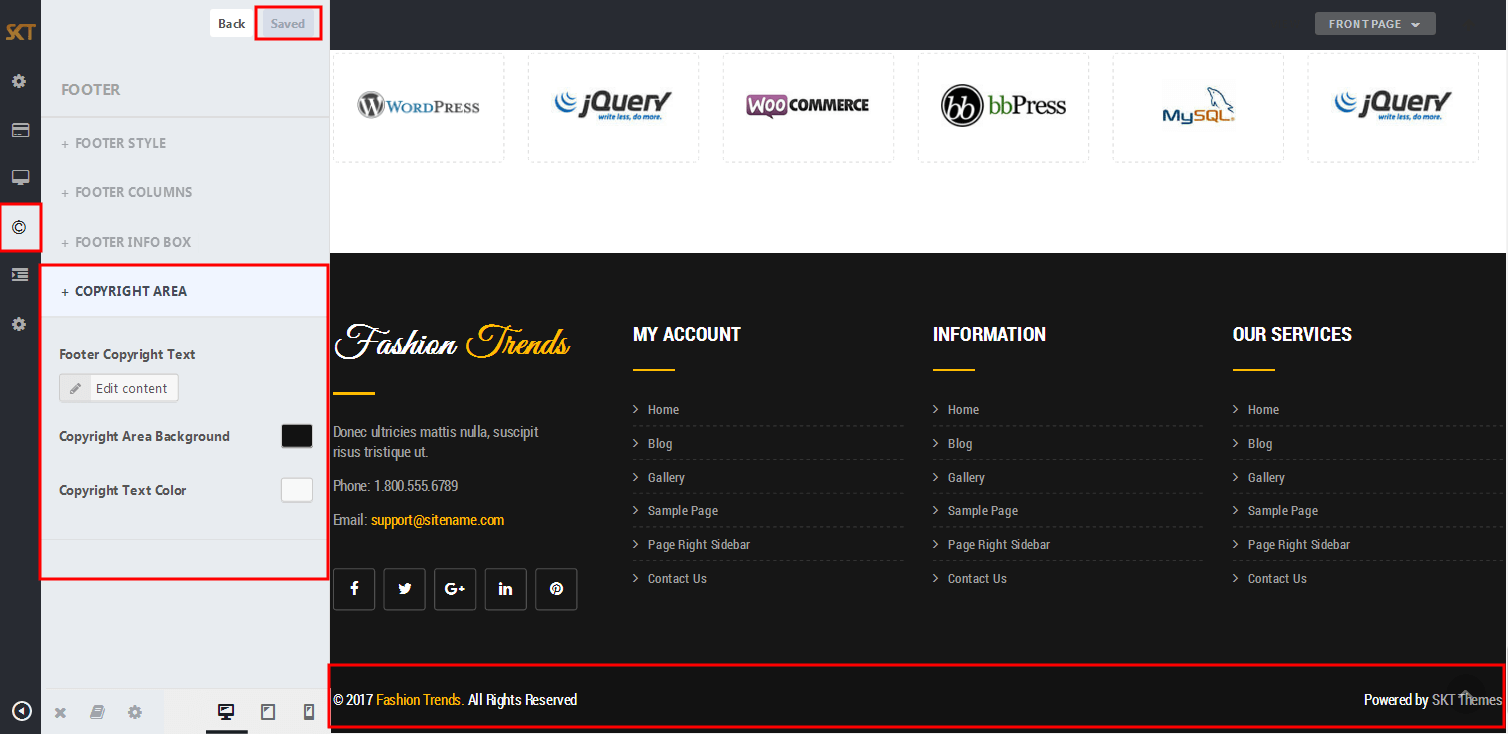
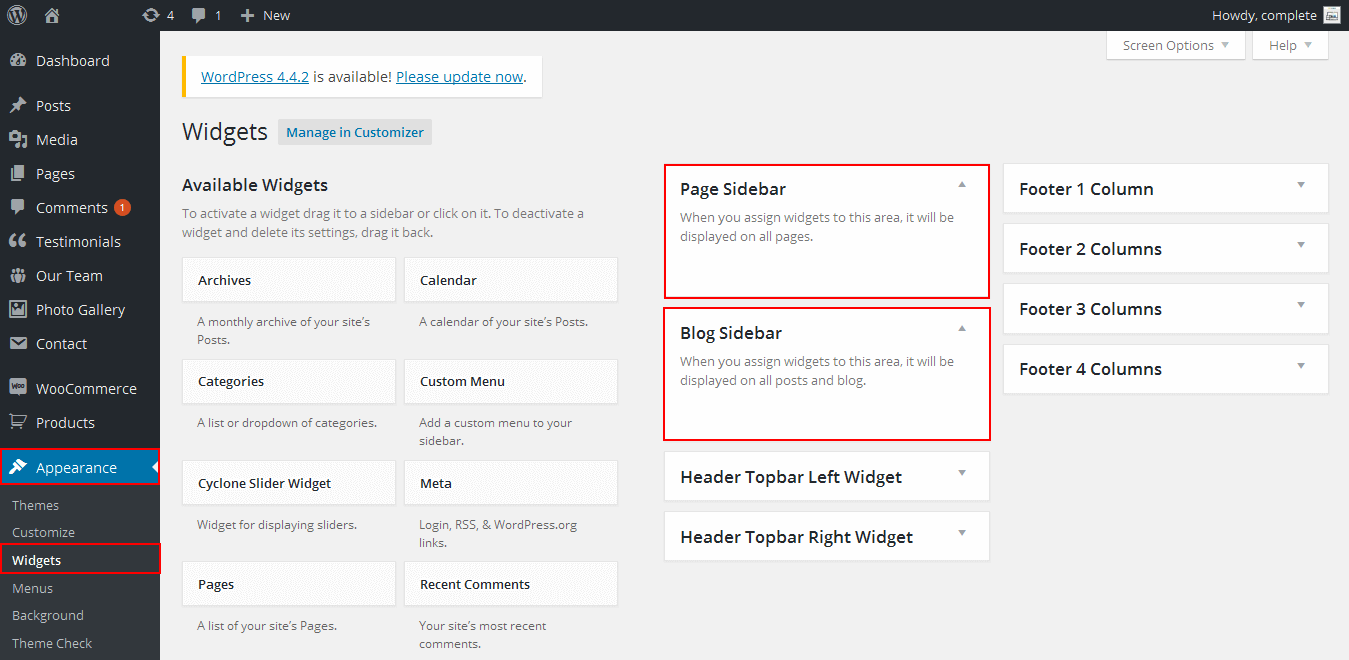
Through Dashboard
- Log in to the WordPress Dashboard.
- Go to Appearance->Themes.
- Active Fashion Trends themes.
Manual Installation using FTP
- Unzip fashion-trends.zip to your Desktop.
- Using an FTP client to access your host web server. Go to /wp-content/themes/
- Upload theme to /wp-content/themes/.
- Go to Appearance->Themes and activate theme from Dashboard.
How to import demo content?
Note: All the required plugins for this theme must be installed and activated before importing demo content.
- Go to Tools -> Import
- Install and run WordPress importer.
- Download demo content zip or get the file from demo-content folder included in theme's zip.
- Right click on fashiontrends.zip extract and import xml file demo data
- Click on browse, select XML file and click on Upload file and import.
- You will be asked to map the authors in this export file to users on your website. For each author, you may choose to map to an existing user on your website or to create a new user.
- You will then have the choice to import attachments, so click on the "Download and import file attachments" box.
- Please be patient while WordPress imports all the content. Posts, Pages, Products, and Menus are imported. You will need assign the menu a theme location & you’ll need to configure widgets. This is a limitation of WordPress import system.
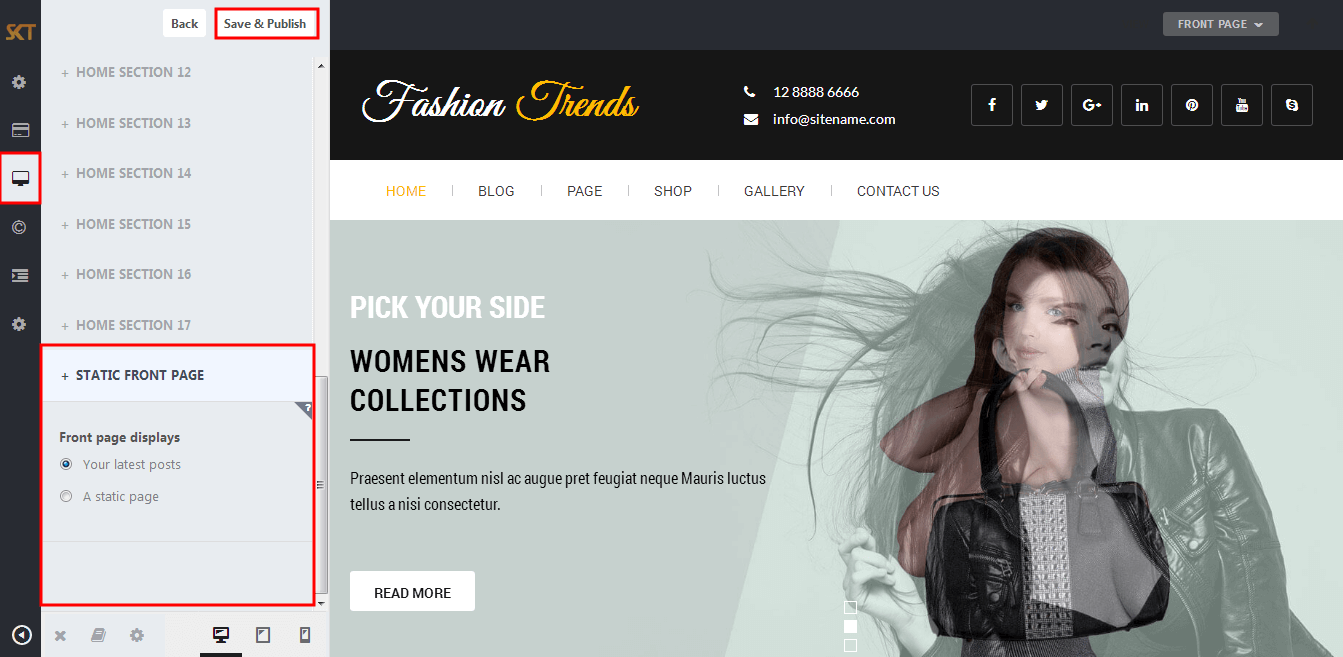
How to Set up Home Page?
- WordPress Admin -> Appearance -> Customize -> FRONT PAGE -> STATIC FRONTPAGE -> Your Latest Posts
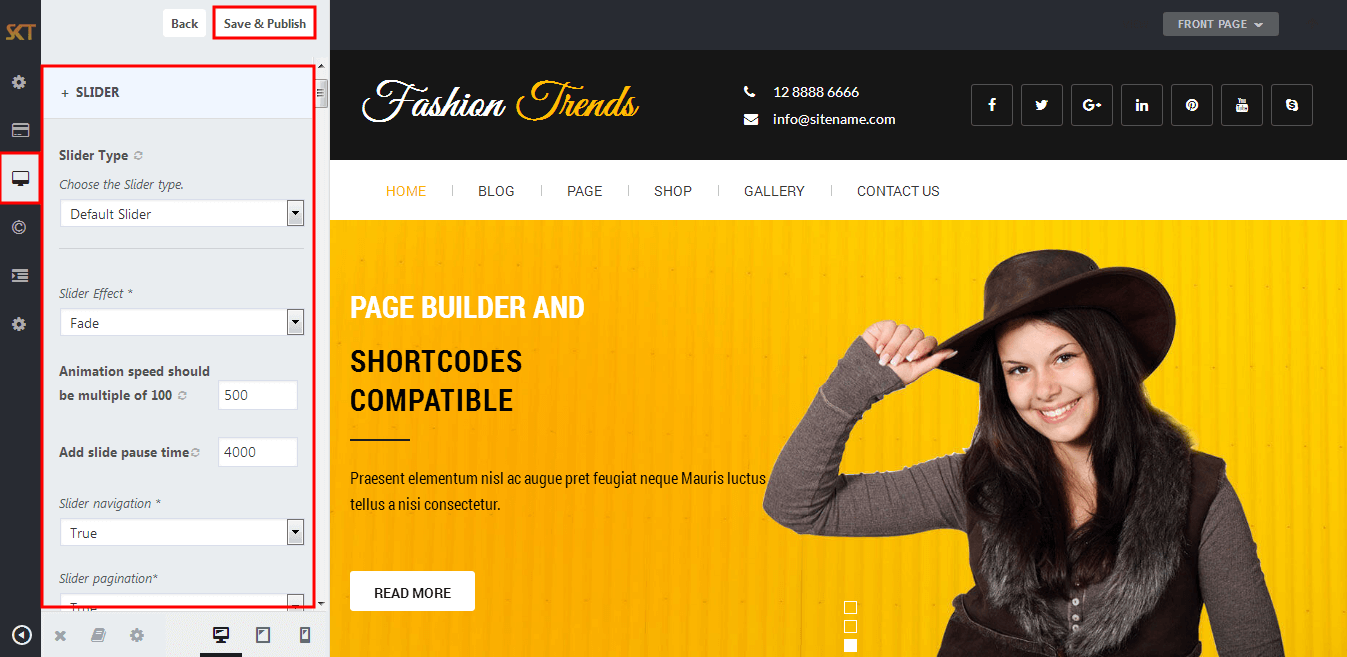
How to Manage Slider?
- WordPress Admin -> Appearance -> Customize -> FRONT PAGE -> SLIDER
- Under Heading "Slider Font Typography & Colors" manage slide title, description, button font-family, color, and font-size.
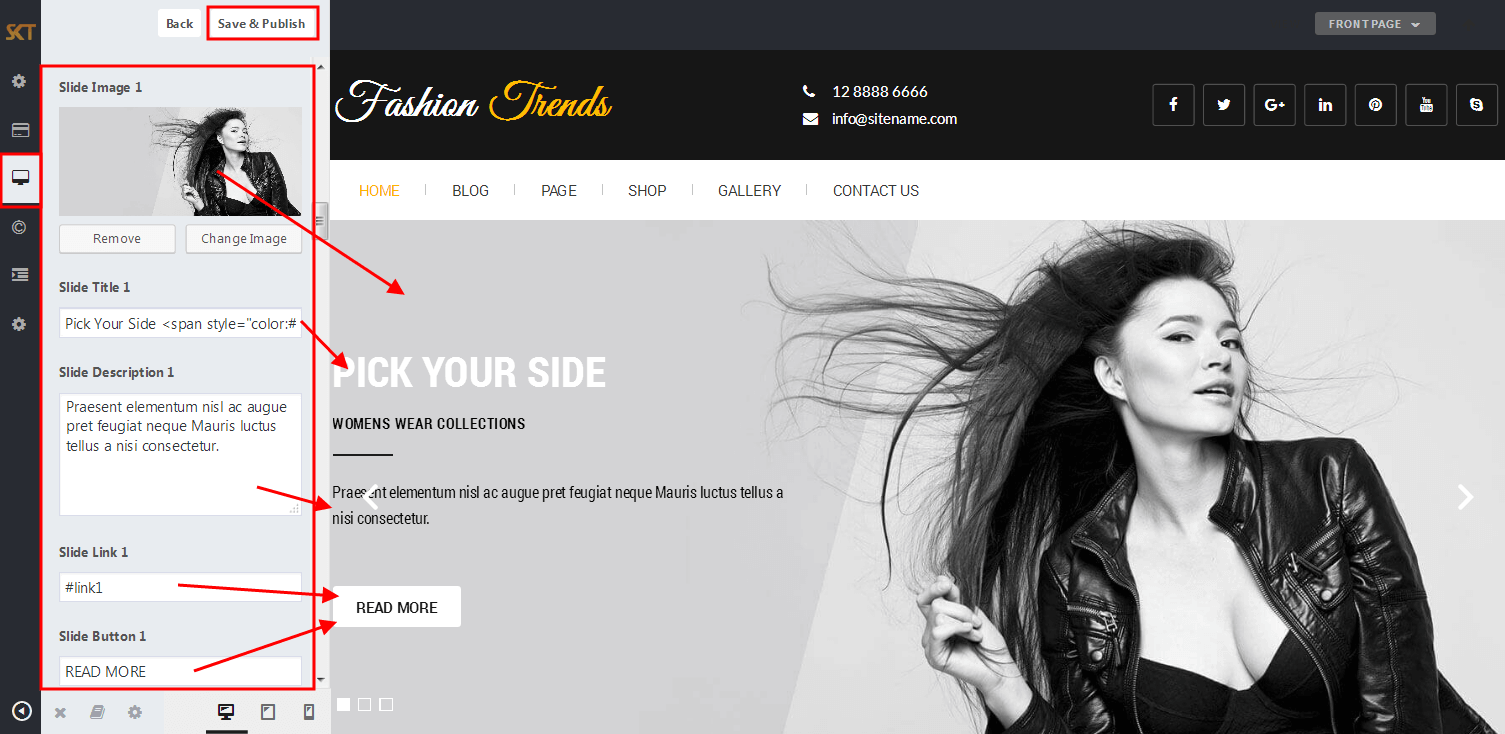
- When you add new slide instead of default so first removed all three slides field data Slide Image, Slide Title, Slide Link, Slide Button than add your new slides data.
How to Manage Home Sections ?
- First Create Page For Each Sections. Eg: For "Home Section One" Add Page "Home Welcome Section" and for "Home Section Two" Add Page "Home Services Section"...
- So for add new Page under admin pannel click on "Pages" in top left navigation. than click on "Add New".
- After add pages back on customizer pannel and choose page for section.
- Check Below Steps:
- WordPress Admin Appearance -> Customize -> FRONT PAGE -> HOME SECTIONS
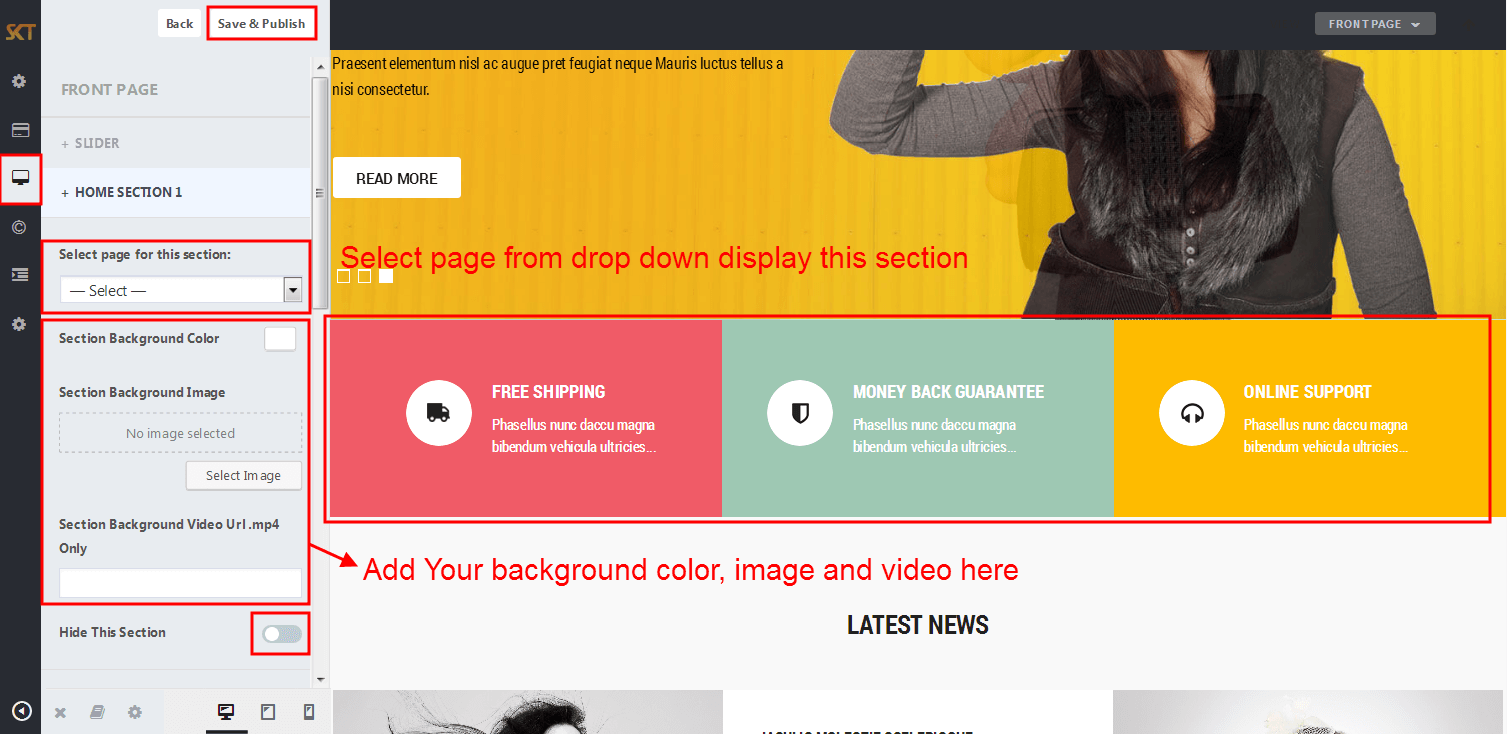
- Below is the screen of Welcome To Fashion Trends Theme "Edit Page"
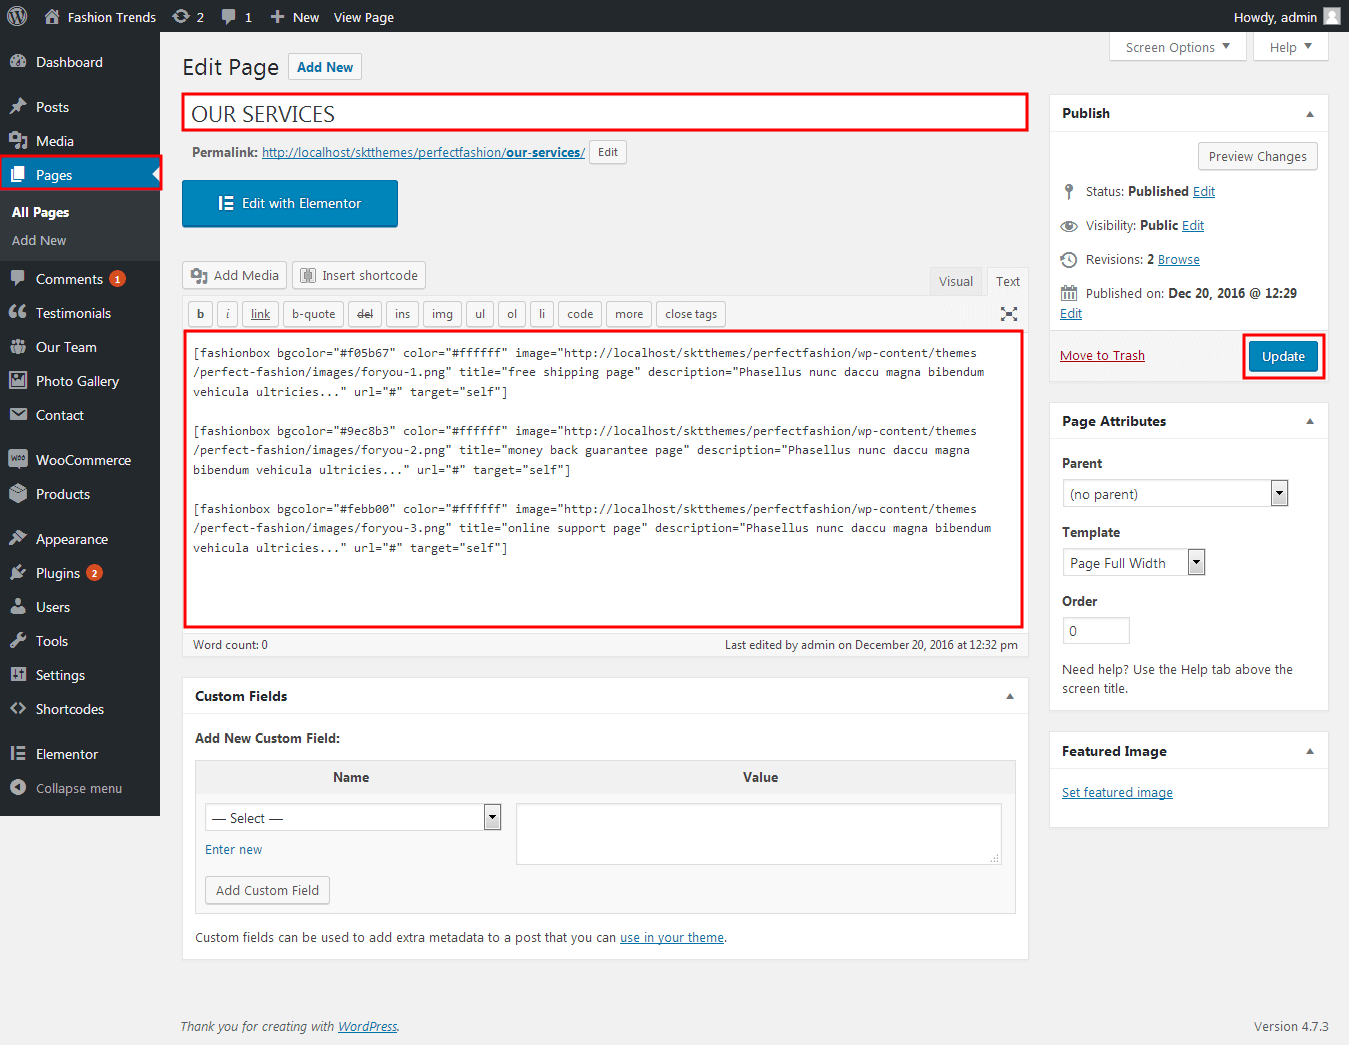
- Below is the code of all home sections. Just Copy and Paste it in newly created page.
- Home Section 1 Code:
-
[fashionbox bgcolor="#f05b67" color="#ffffff" image="Add Your site URL Here/wp-content/themes/perfect-fashion/images/foryou-1.png" title="free shipping" description="Phasellus nunc daccu magna bibendum vehicula ultricies..." url="#" target="self"]
[fashionbox bgcolor="#9ec8b3" color="#ffffff" image="Add Your site URL Here/wp-content/themes/perfect-fashion/images/foryou-2.png" title="money back guarantee" description="Phasellus nunc daccu magna bibendum vehicula ultricies..." url="#" target="self"]
[fashionbox bgcolor="#febb00" color="#ffffff" image="Add Your site URL Here/wp-content/themes/perfect-fashion/images/foryou-3.png" title="online support" description="Phasellus nunc daccu magna bibendum vehicula ultricies..." url="#" target="self"]
- Home Section 2 Code:
-
[centertitle text="RECENT PRODUCTS" titlecolor="#202020" seperatorcolor=""]
[space height="20"]
[recent_products per_page="4" columns="4"]
[clear]
- Home Section 3 Code:
-
[columns size="2"]
[newarrival align="center" title="NEW" subtitle="ARRIVALS" description="WOMENS SPECIAL COLLECTIONS" titlecolor="#ffffff" subtitlecolor="#ffffff" desctitlecolor="#000000" bordercolor="#1d1b15"]
[readmore align="left" icon="" button="SHOP NOW!" links="#" margintop="6%" target="_parent" color="#161616" bgcolor="#ffffff"]
[/columns]
[columns size="2"]
<div style="padding-left:8%;">
[newarrival align="center" title="NEW" subtitle="ARRIVALS" description="MENS SPECIAL COLLECTIONS" titlecolor="#ffffff" subtitlecolor="#ffffff" desctitlecolor="#000000" bordercolor="#1d1b15"]
[readmore align="left" icon="" button="SHOP NOW!" links="#" margintop="6%" target="_parent" color="#161616" bgcolor="#ffffff"]
</div>
[/columns]
- Home Section 4 Code:
-
[centertitle text="LATEST PRODUCTS" titlecolor="#202020" seperatorcolor=""]
[newproduct filter="true" allproduct="All" show="8"]
- Home Section 5 Code:
-
[columns size="2"]&nbsp;[/columns]
[columns size="2"]
[lefttitle text="HAPPY CUSTOMERS" titlecolor="#202020" seperatorcolor="#1d1d1d"]
[space height="30"]
[testimonials-rotator show="-1"]
[readmore align="left" icon="" button="VIEW ALL" links="#" margintop="4%" target="_parent" color="#FFFFFF" bgcolor="#373737"]
[/columns]
- Home Section 6 Code:
-
[client url="#" image="Add Your site URL Here/wp-content/themes/perfect-fashion/images/wp.png"]
[client url="#" image="Add Your site URL Here/wp-content/themes/perfect-fashion/images/jquery.jpg"]
[client url="#" image="Add Your site URL Here/wp-content/themes/perfect-fashion/images/woocommerce.jpg"]
[client url="#" image="Add Your site URL Here/wp-content/themes/perfect-fashion/images/bbpress-client.jpg"]
[client url="#" image="Add Your site URL Here/wp-content/themes/perfect-fashion/images/mysql.jpg"]
[client url="#" image="Add Your site URL Here/wp-content/themes/perfect-fashion/images/jquery.jpg"]
- Home Section 7 Code:
-
[titlearea align="center" title="ONLINE RESERVATION" titlelast="" subtitle="Fashion Trends NOW" titlecolor="#282828" titlelastcolor="" seperatorcolor="transparent"]
<div class="homecontact">[contact-form-7 id="1866" title="Booking Form"][clear]</div>
//* Add Field Contact Form *//
<div class="contleft">
<label> Full Name: [text* your-name]</label>
<label> Email Address: [email* your-email] </label>
<div class="clear"></div>
</div>
<div class="contright">
<label> Contact Phone Number: [tel your-phone] </label>
<div class="left">
<label> Date From: [date your-date class:your-datepicker date-format:dd/mm/yy]</label>
</div>
<div class="right">
<label> Date To: [date your-to-date class:your-datepicker date-format:dd/mm/yy]</label>
</div>
<div class="clear"></div>
</div>
<label> Message: [textarea your-message]</label>
[submit "SUBMIT"]
<div class="clear"></div>
How to make translate ready ?
- First Install Plugin qTranslate X from WordPress plugin.
- Used following code for making text translate ready : [:en]English Text[:de]Deutsch Text[:]
- Viewing in Dutch used website url : http://www.yourwebsiteurl.com/de/
- Viewing in English used website url : http://www.yourwebsiteurl.com/en/
- Check below screen shot for making slider translation ready.
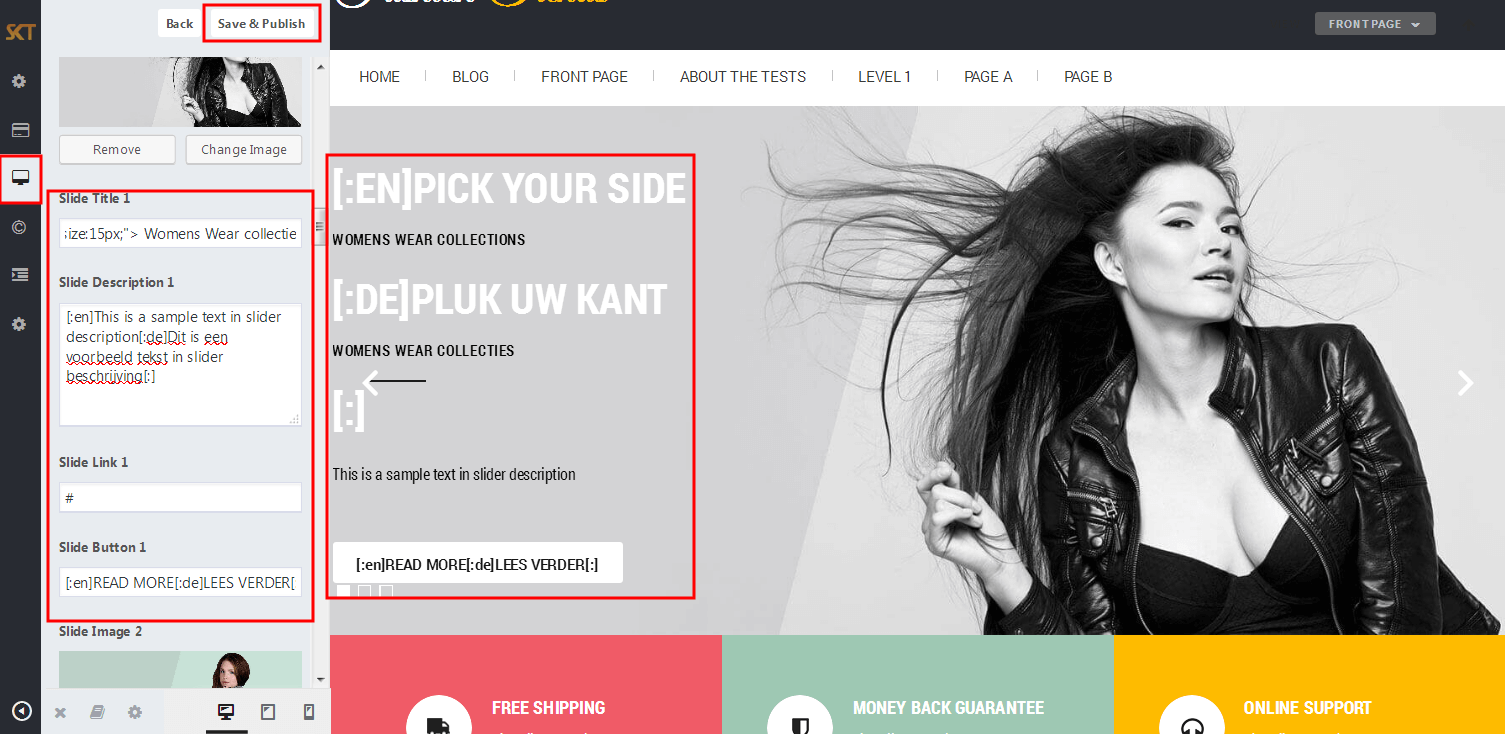
Dutch Translated 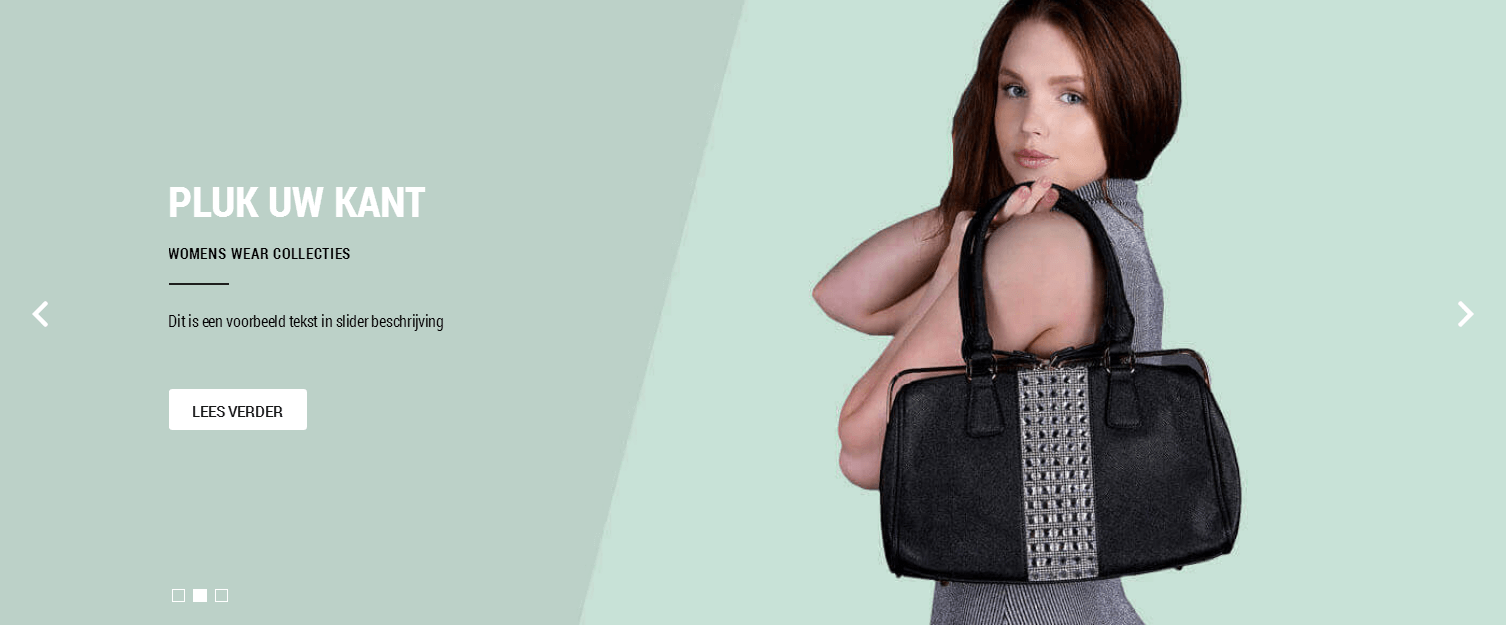
English Translated 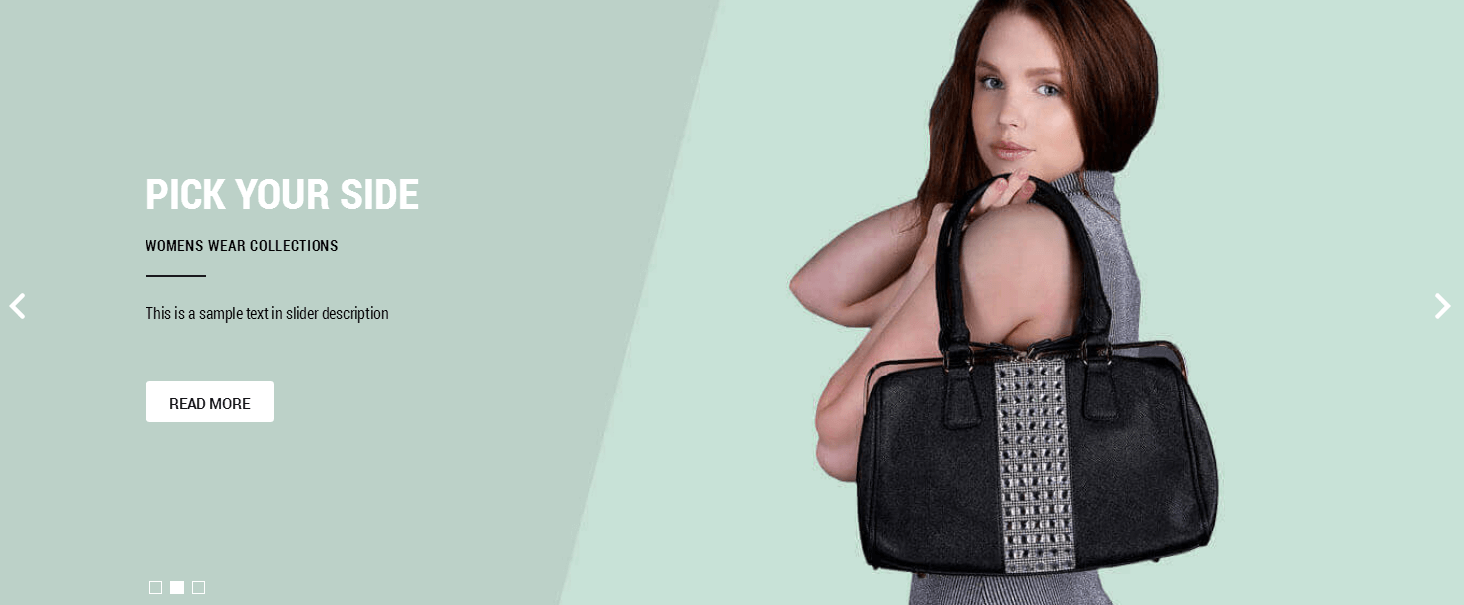
How to set up Navigation?
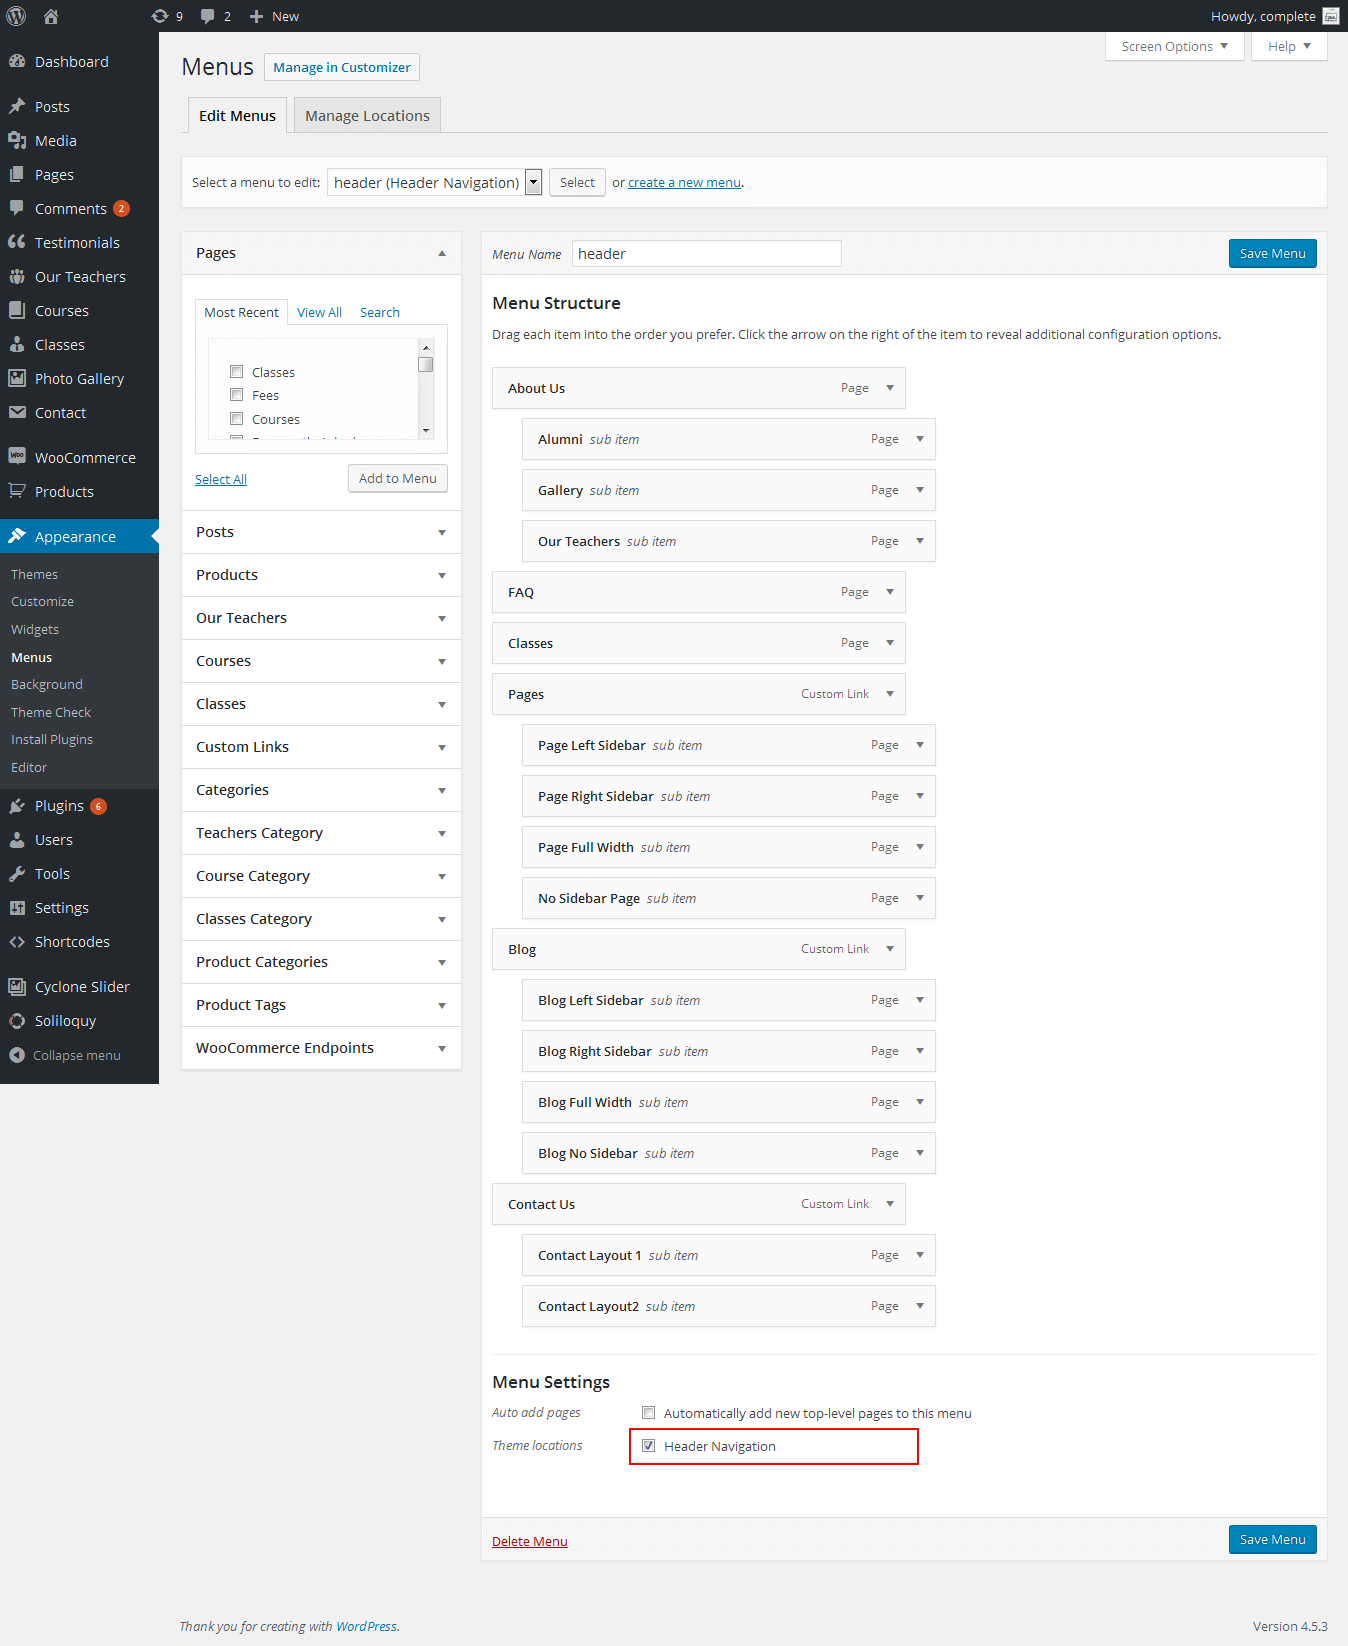
- Below steps will guide you how to set up header or top navigation.
- Kindly go to Appearance -> Menu -> Before moving on you have to create primary menu first and set theme location to primary menu please see the below screenshot
Customize Basic Options
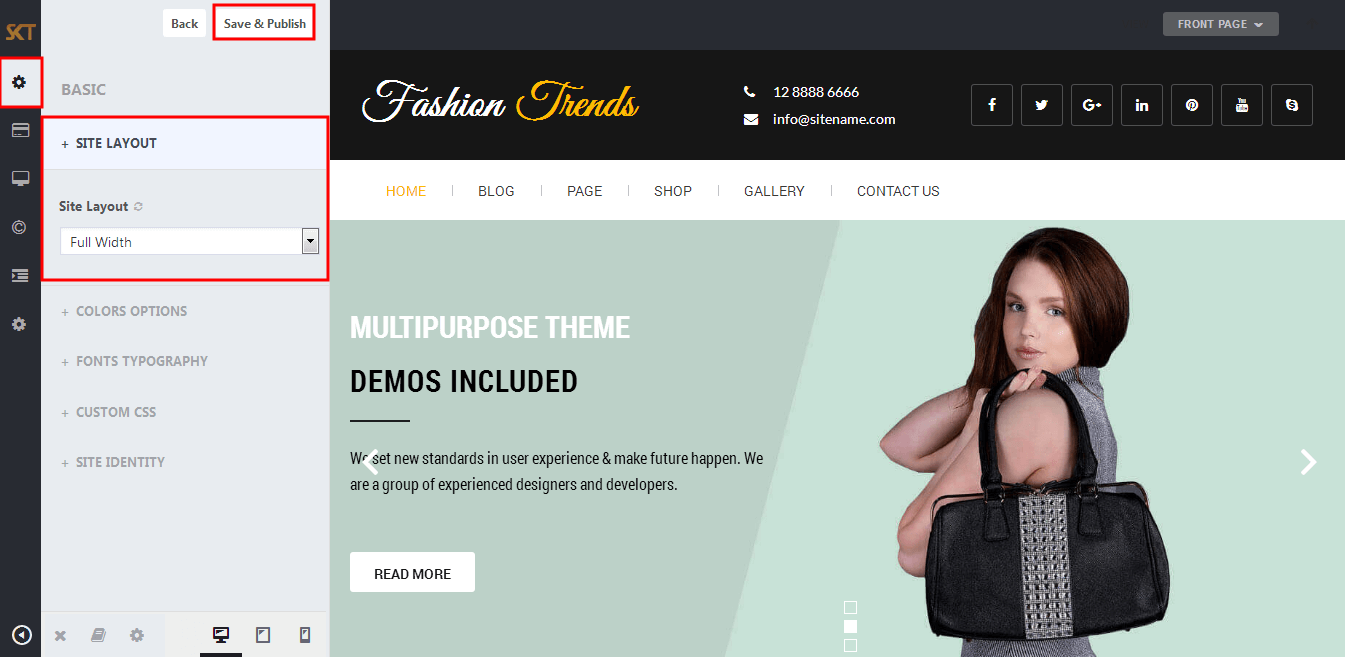
- Click on Appearance>Customize>Basic
- Basic

- SITE LAYOUT
- Site Layout Boxed
- COLORS OPTIONS
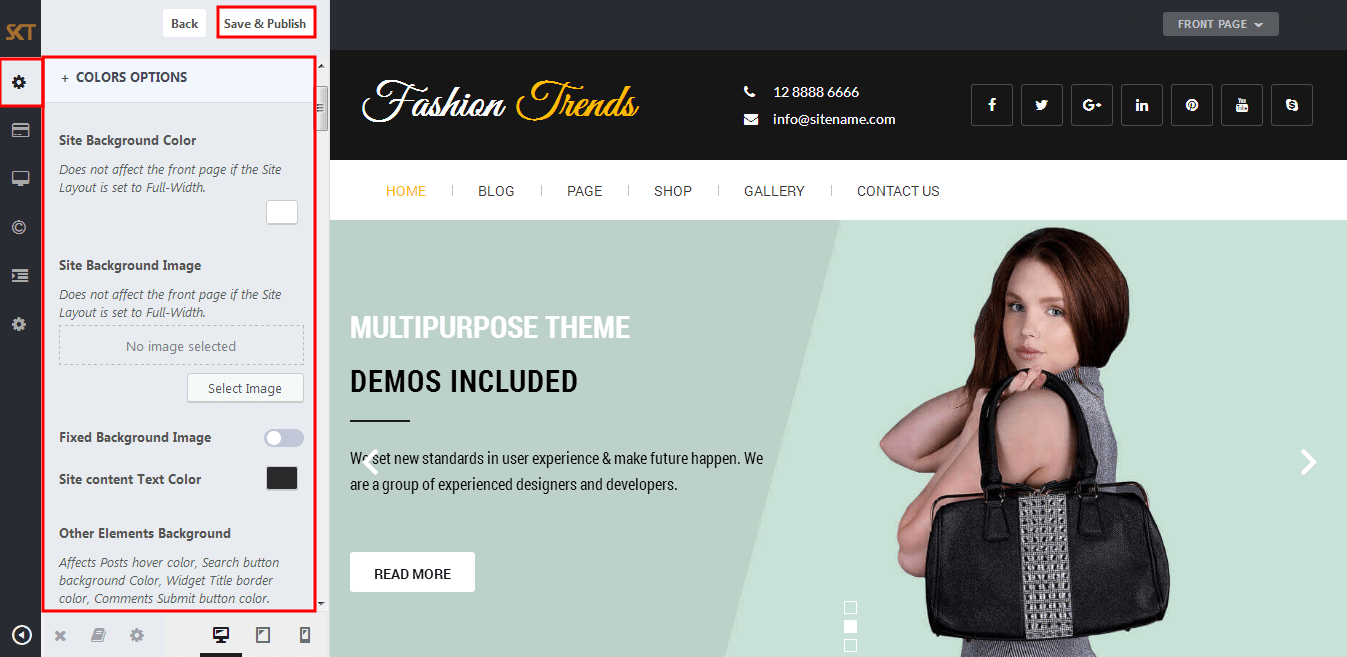
- Managed Following Under Color Options:
- Site Background Color
Site Background Image
Site content Text Color
Other Elements Background
Other Elements Text Color
Default Anchor Color
Default Anchor Hover Color
H1, H2, H3, H4, H5, H6 Color
H1, H2, H3, H4, H5, H6 Hover Color
Team Box Background Color
Social Icon Bgcolor
Social Icon Hover Bgcolor
Testimonial Box Bgcolor
Testimonial Pager Color
Testimonial Active Pager Color
Gallery Active Filter Bgcolor
Skills Bar Background Color
Skills Bar Text Color
Post Title Color
Sidebar Widgets Background Color
Sidebar Widget Title Color
Sidebar Widget Text Color
Sidebar Widget Link Color
- FONT TYPOGRAPHY
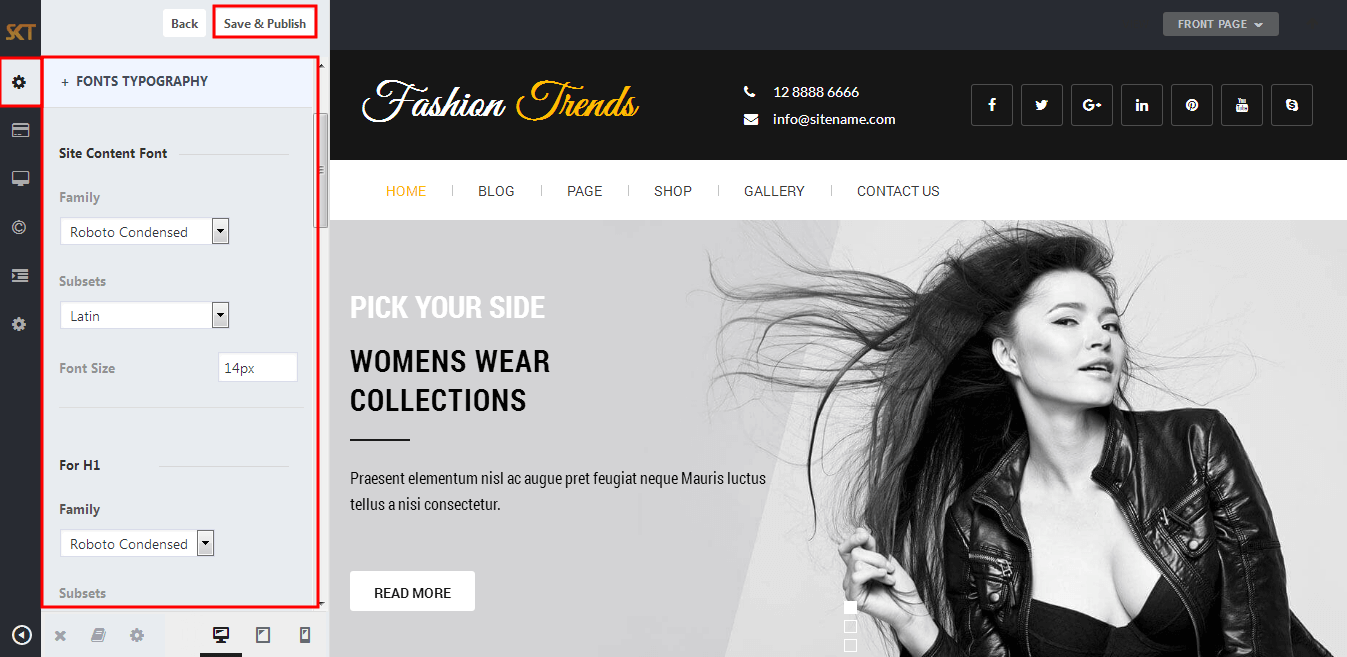
- Managed Following Under Font Typography:
- Site Content Font [family, subsets, size]
H1, H2, H3, H4, H5, H6 [family, subsets, size]
Turn All Headings to Uppercase
- CUSTOM CSS
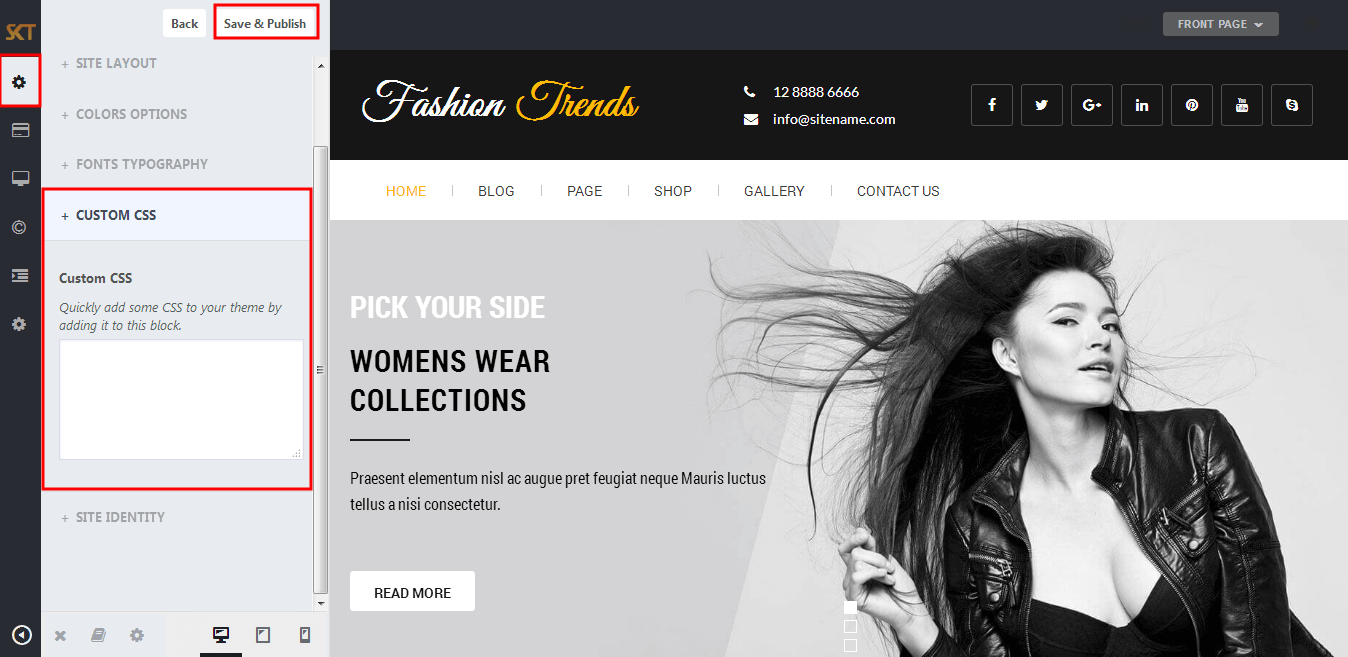
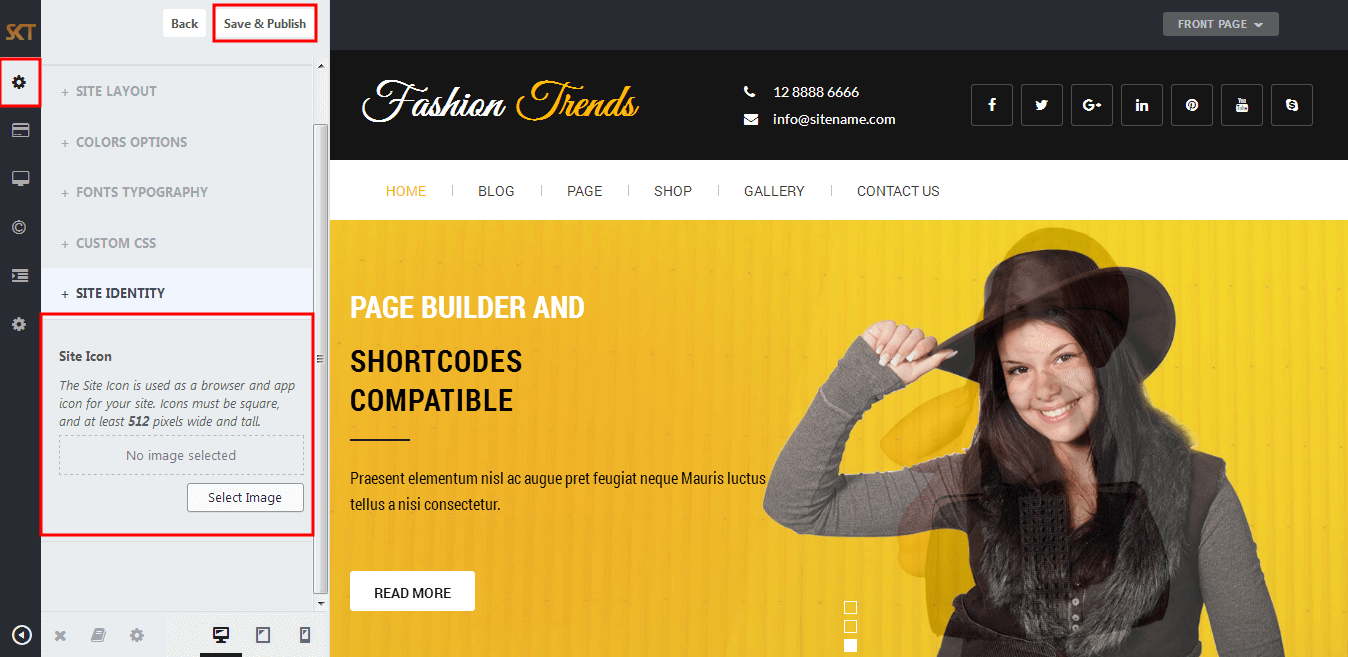
- SITE IDENTITY
Customize Post & Page Options
- Click on Appearance>Customize>Post & Page
- Post & Page
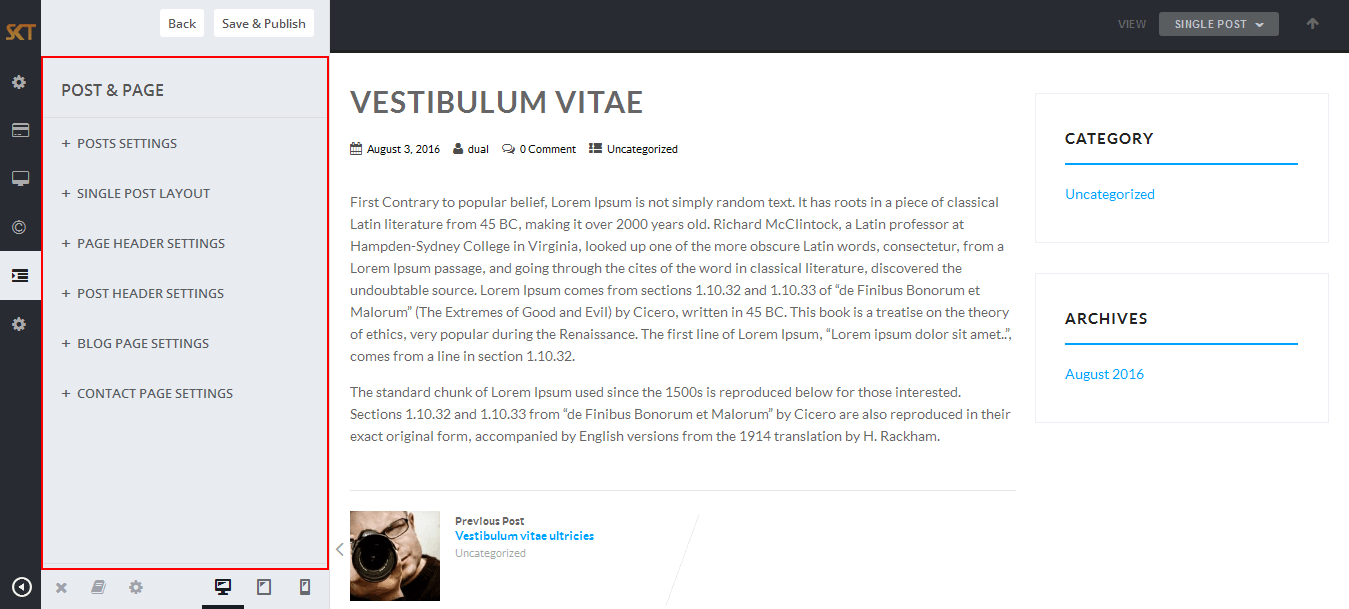
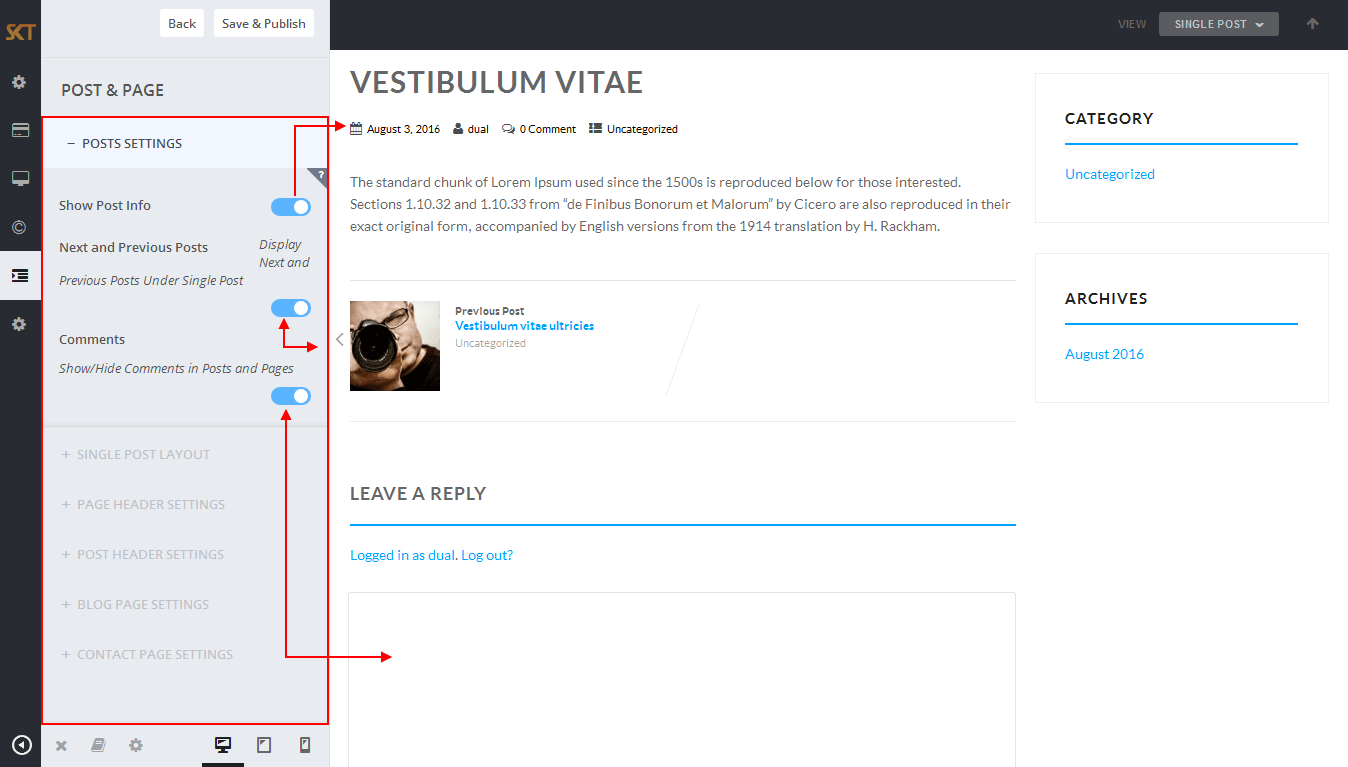
- POSTS SETTINGS
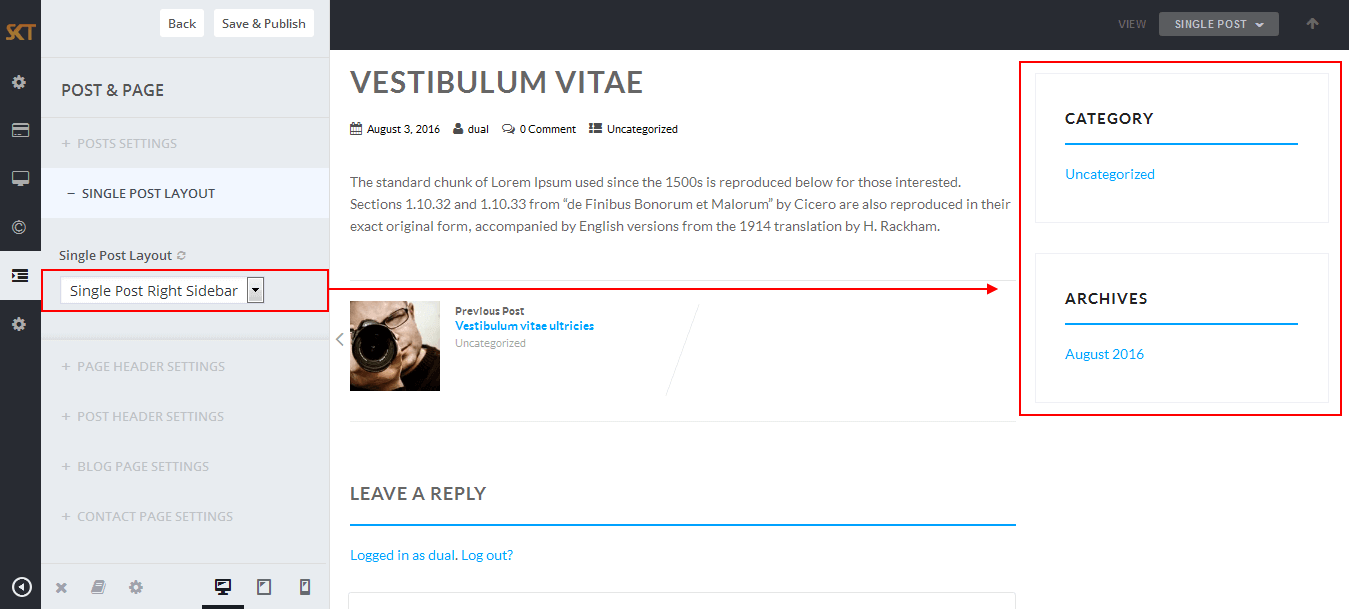
- SINGLE POST LAYOUT
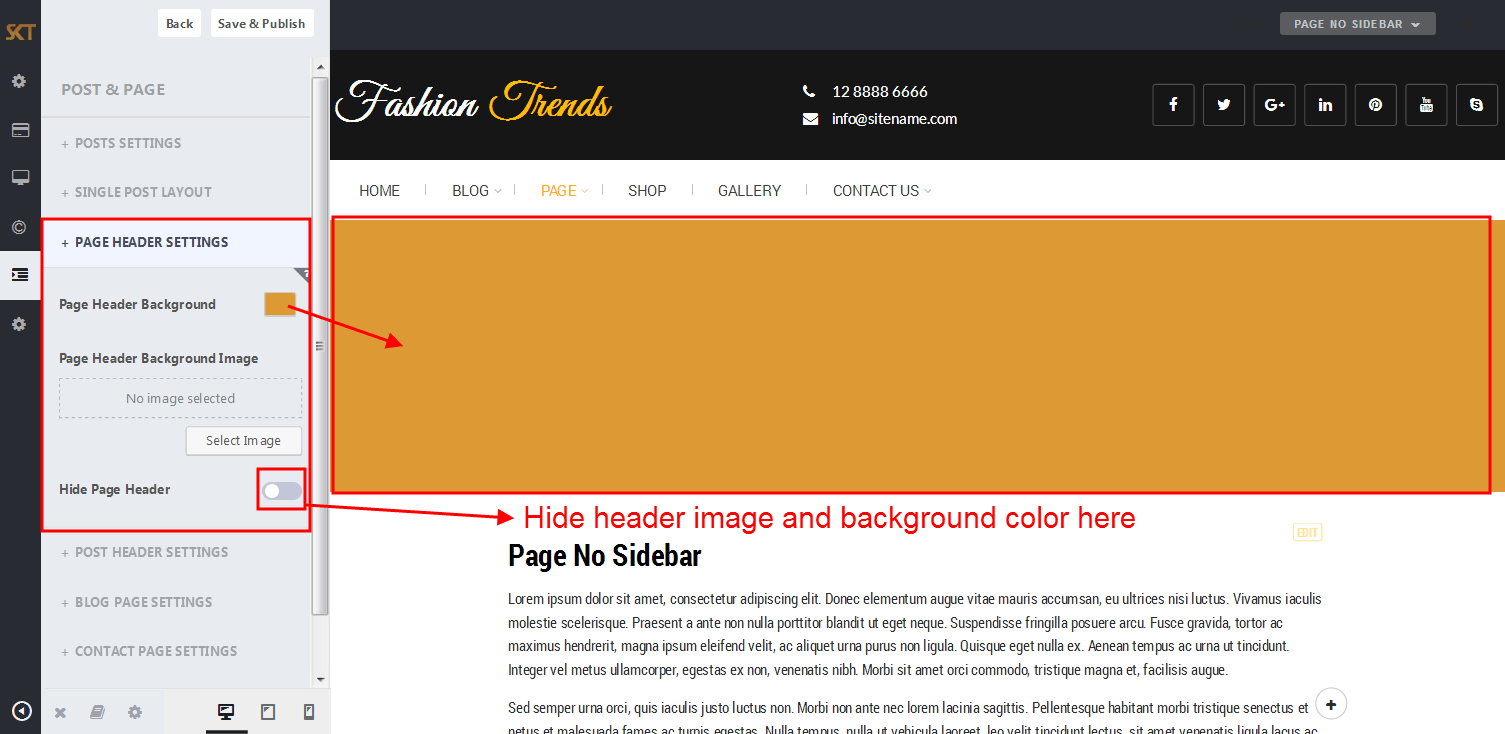
- PAGE HEADER SETTINGS
- Page Header With Featured Image
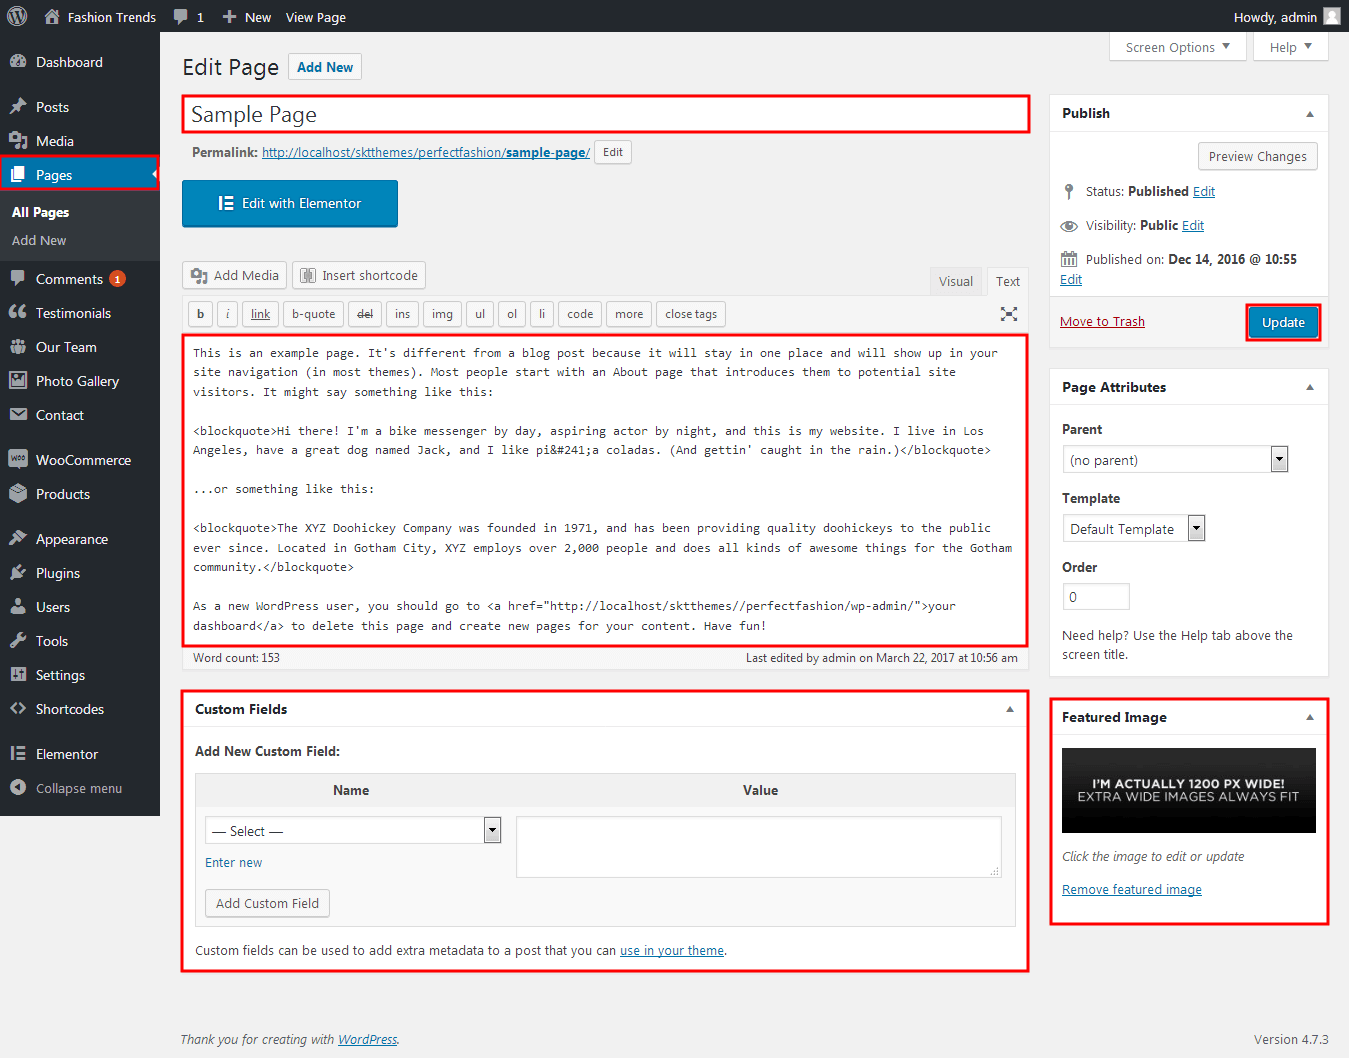
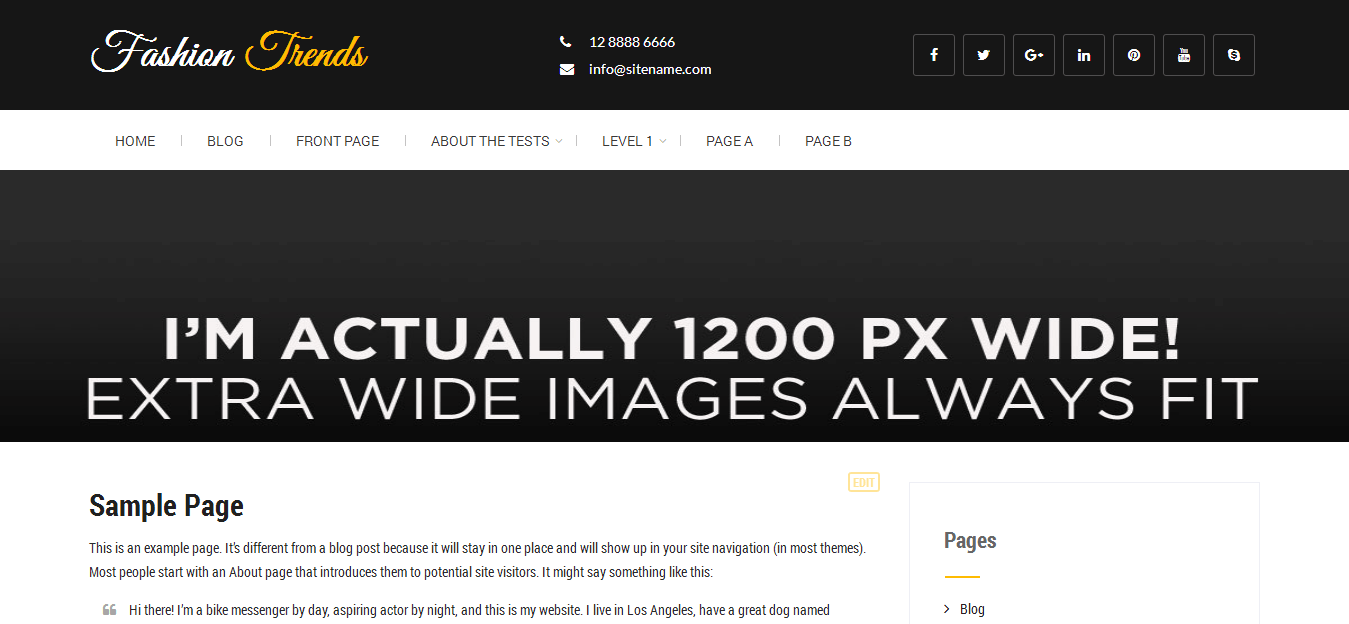
- If page have not assign featured image. so from page header settings have set background color or background image for header. also there is have hide page header option for hide header.
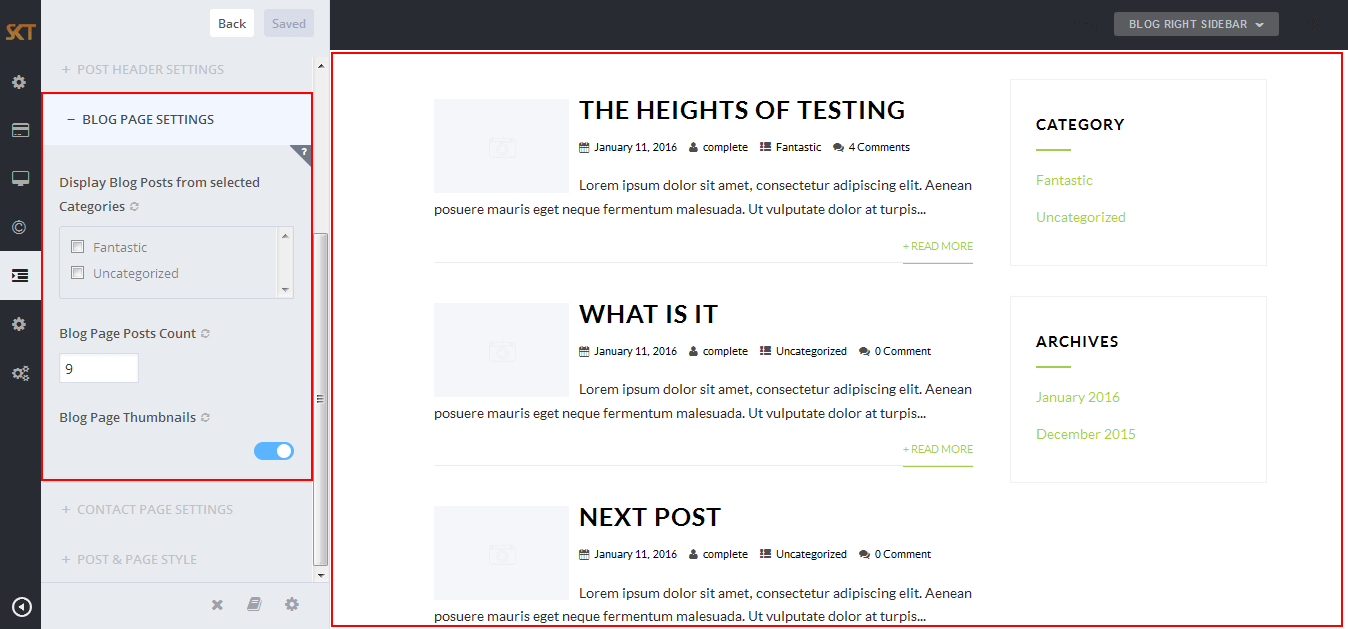
- BLOG PAGE SETTINGS
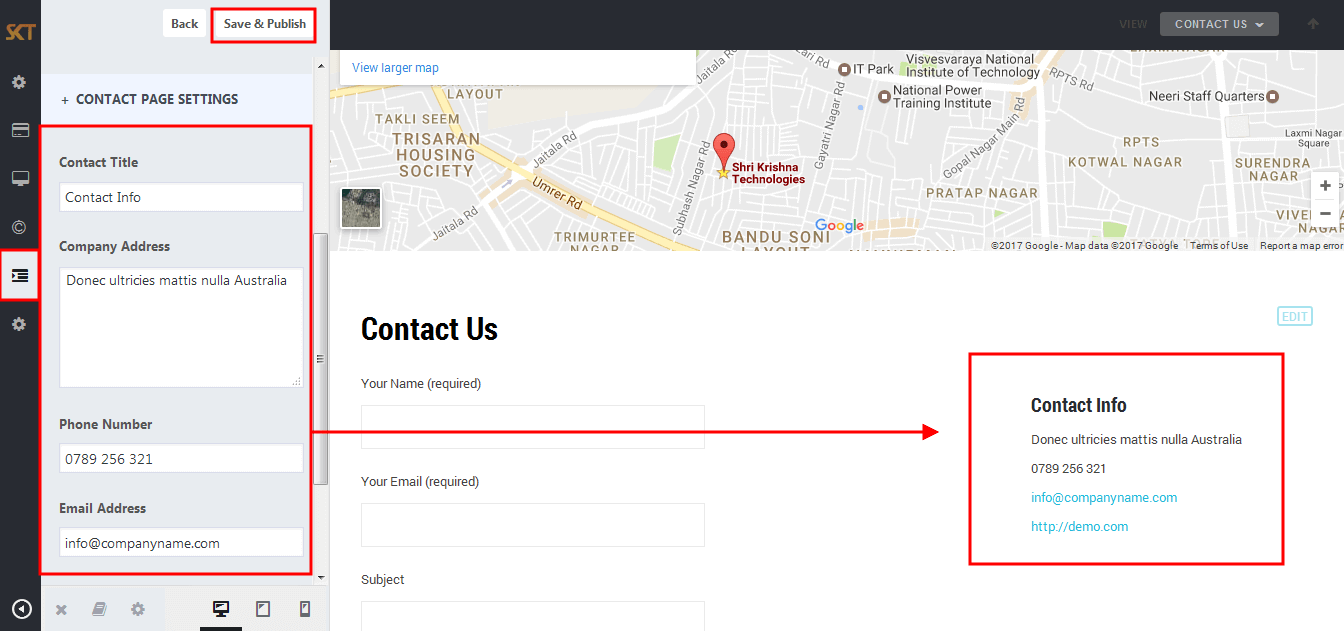
- CONTACT PAGE SETTINGS
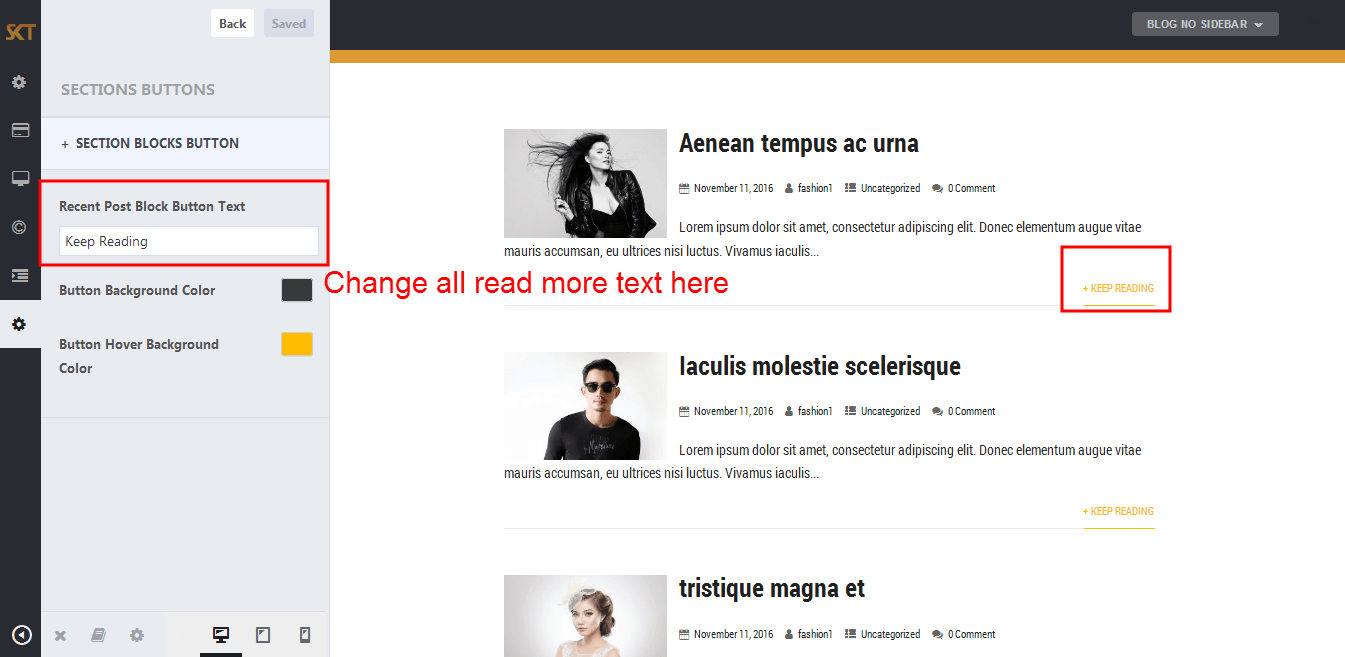
Customize Section Buttons
- Click on Appearance>Customize>Sections Buttons
- Section Buttons
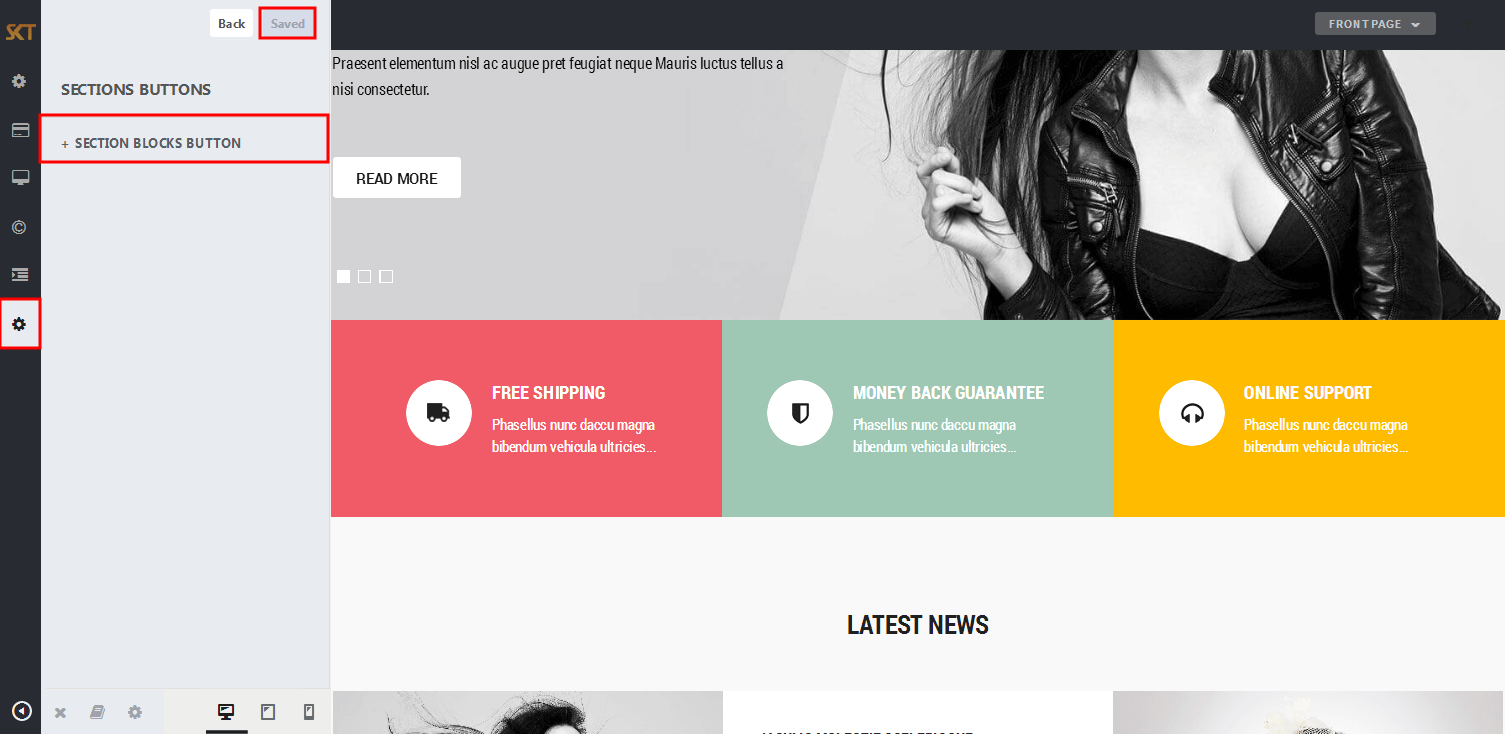
- SECTION BLOCKS BUTTON
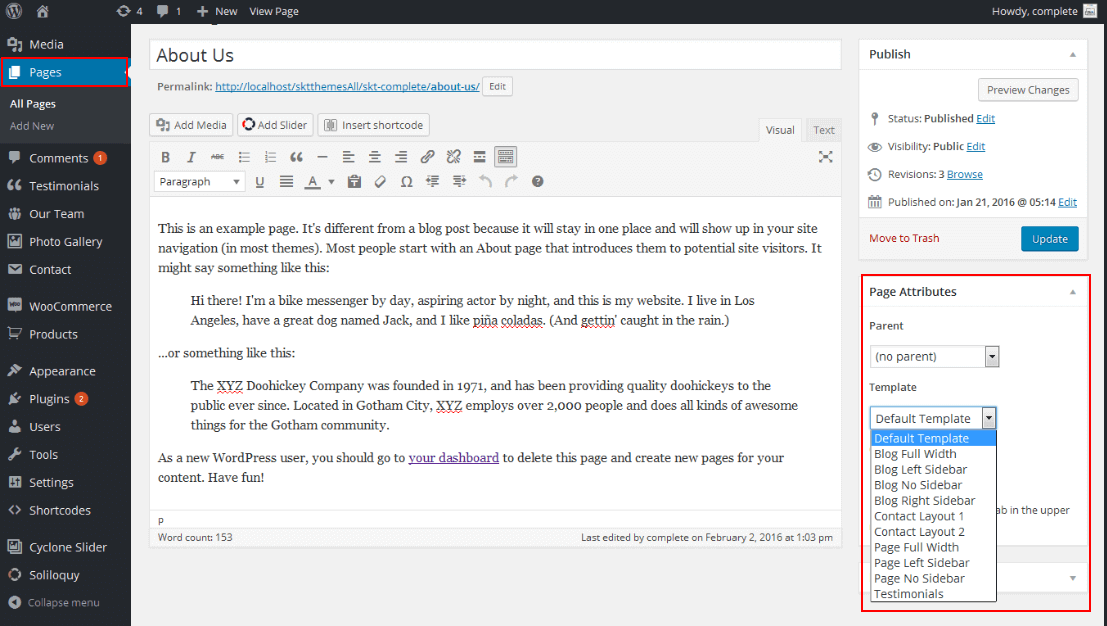
Page Templates
- Default Template
- Helps in setting up the content on any page with Right Sidebar
- Page Left Sidebar
- Helps in setting up the content on any page with Left Sidebar
- Page No Sidebar
- Helps in setting up the content on any page No Sidebar
- Page Full Width
- Helps in setting up the content on any page without Sidebar
- Contact Layout1 & Contact Layout2
- Select page template for set contact page layout.
- Testimonials
- Select testimonials template for showing all testimonials.
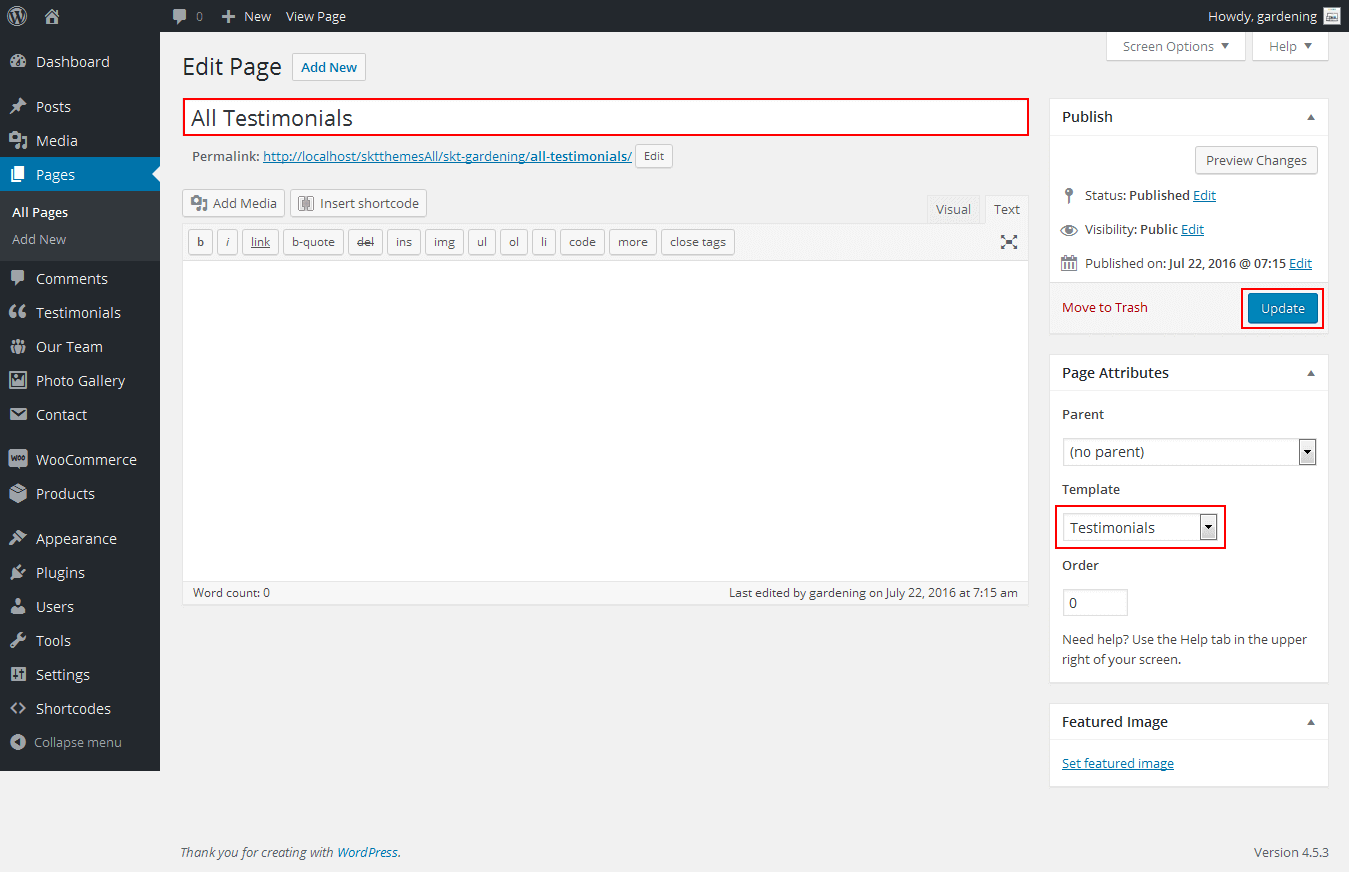
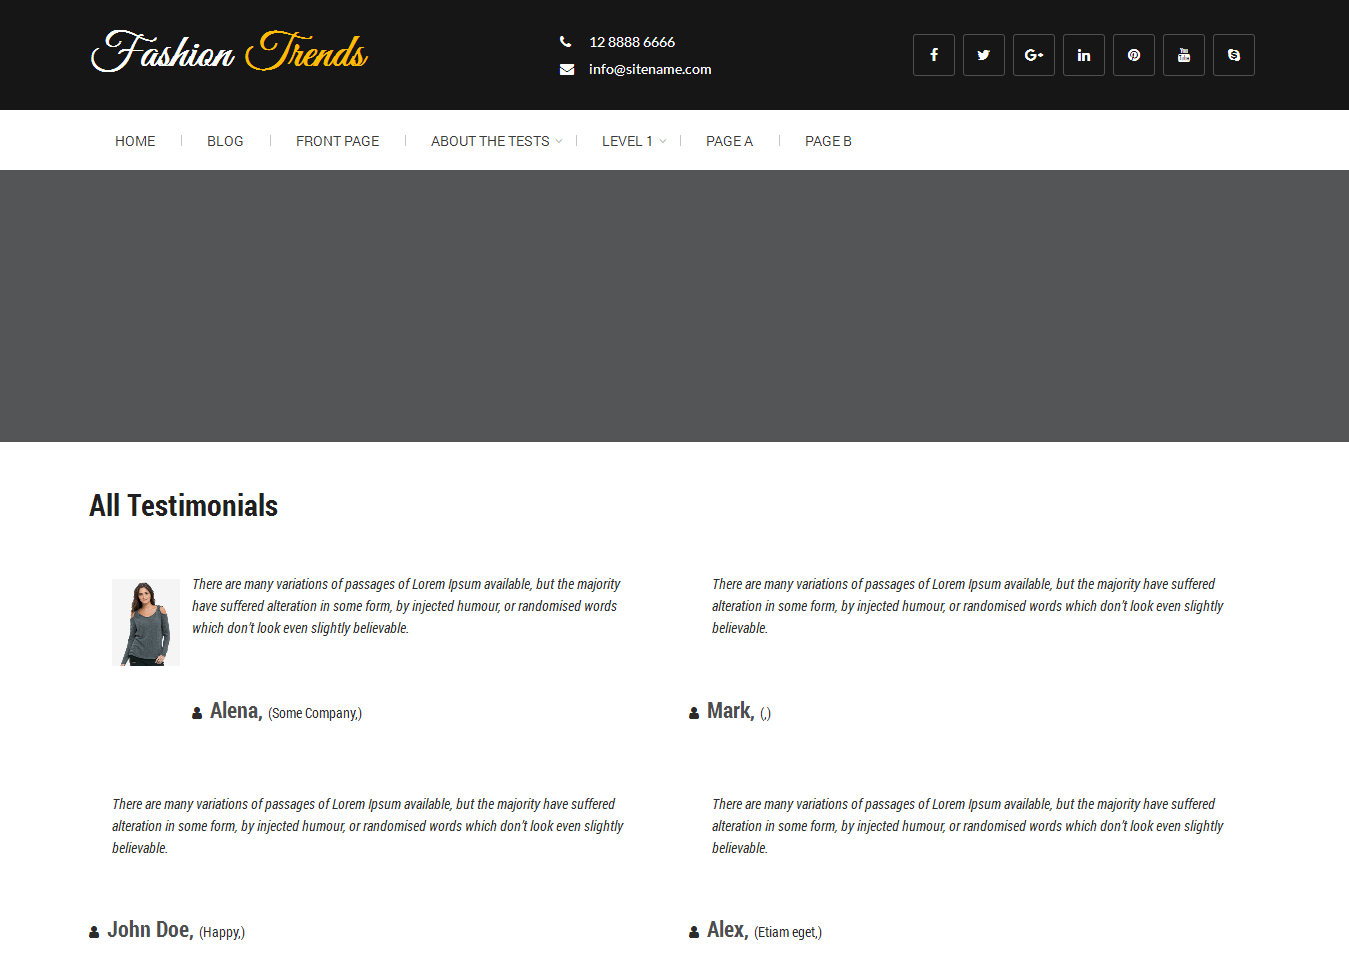
Set up Testimonials page
- Set up by using Page Template:
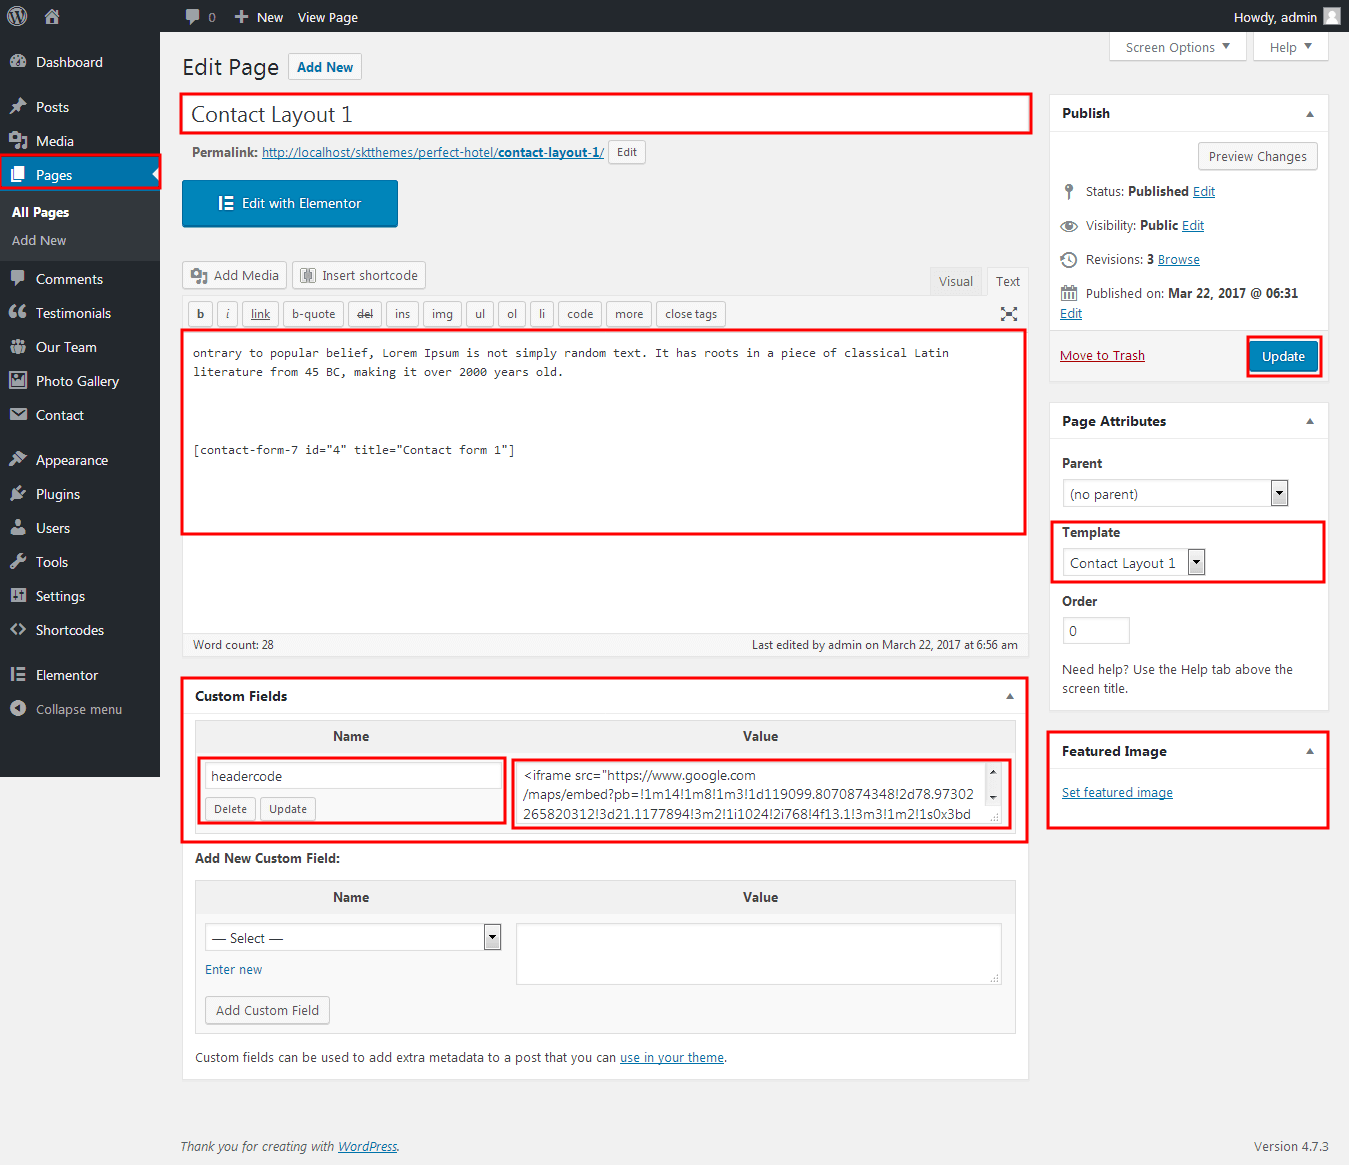
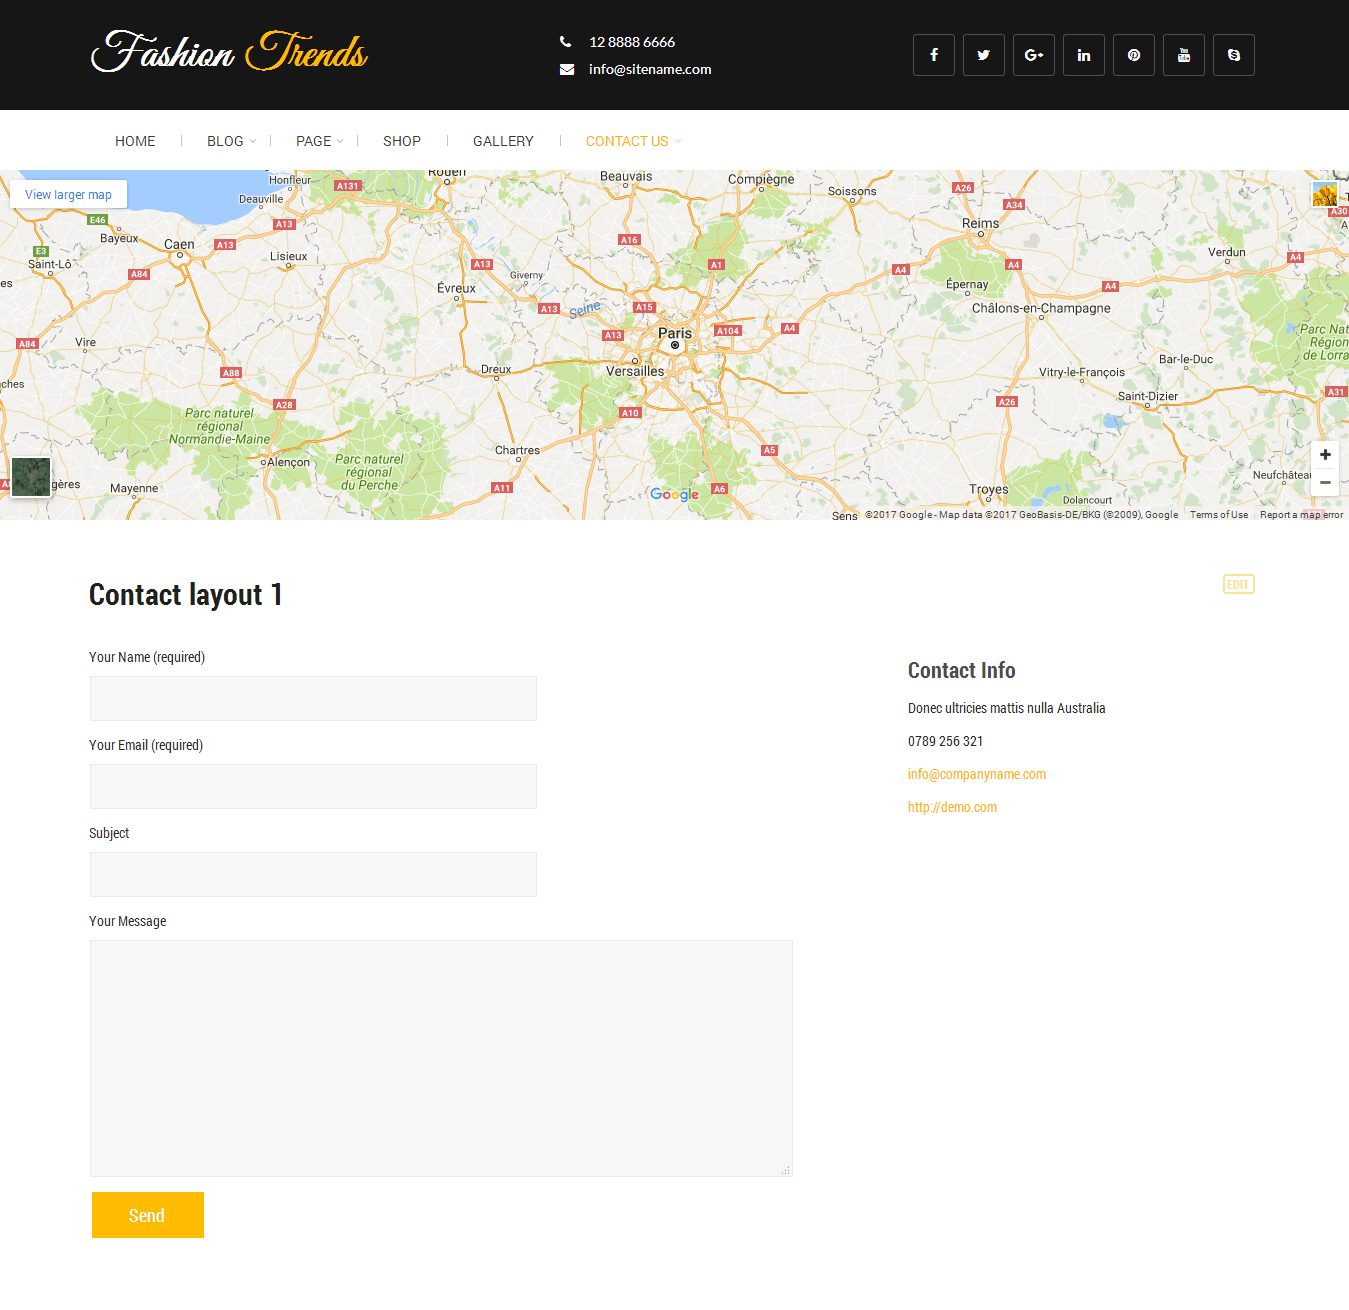
Set up Contact page
- Set up by using Page Template:
Set up Blog page
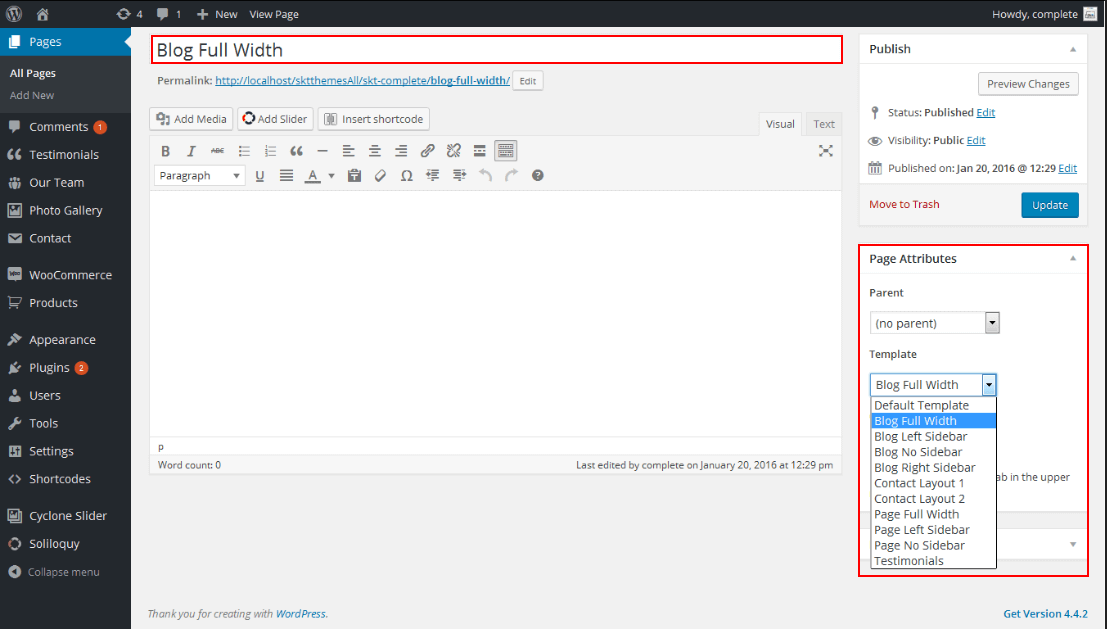
- Set up by using Page Template Blog on any page to show blog posts
- Blog Full Width, Blog Left Sidebar, Blog No Sidebar, Blog Right Sidebar page templates
Setting up Shop
- Go to Plugins -> Add New in the WordPress Admin panel
- Type WooCommerce is search box and click on search button
- Install and then Activate the plugin.
- It will ask whether to set up default pages. Kindly click on setting up default pages of the WooCommerce
- That’s it now you can go to shop page and check the default product.
Shortcodes
- Testimonial Rotator:
- [testimonials-rotator show="3"]

- Testimonial Box:
- [testimonials-box col="1" show="1"]
- [testimonials-box col="2" show="2"]
- [testimonials-box col="3" show="3"]
- [testimonials-box col="4" show="4"]


- Our Team:
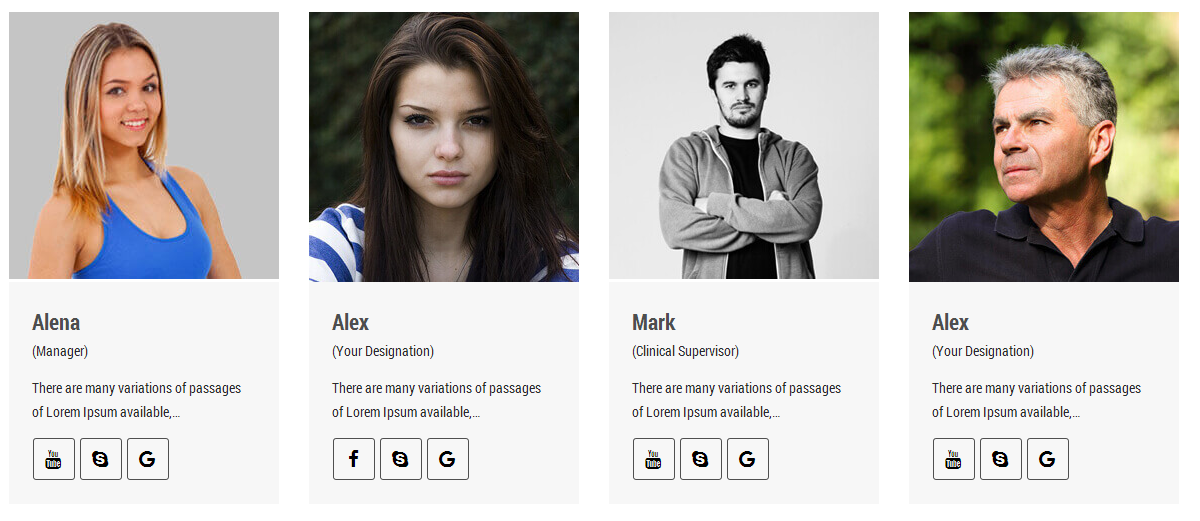
- [ourteam col="4" show="4" excerptlength="10"]
- [ourteam col="3" show="3" excerptlength="10"]
- [ourteam col="2" show="2" excerptlength="10"]
- [ourteam col="1" show="1" excerptlength="10"]
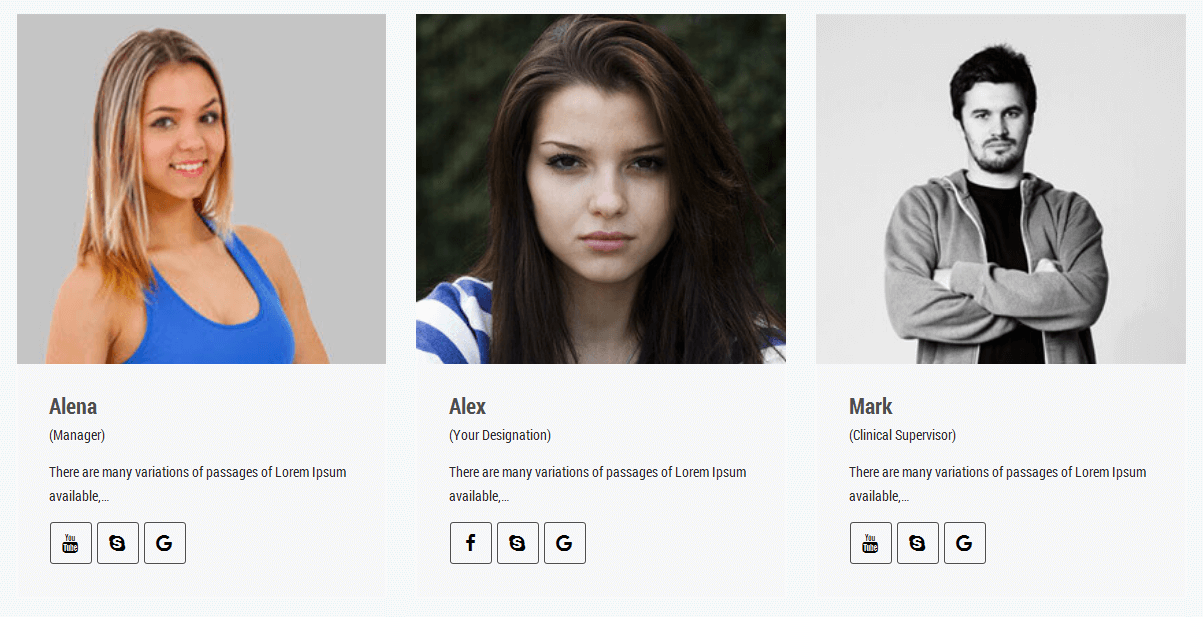
- col="4" means four columns in a single row and show="3" means number of team member show.
- [ourteam col="4" show="4" excerptlength="10"]
- [ourteam col="3" show="3" excerptlength="10"]
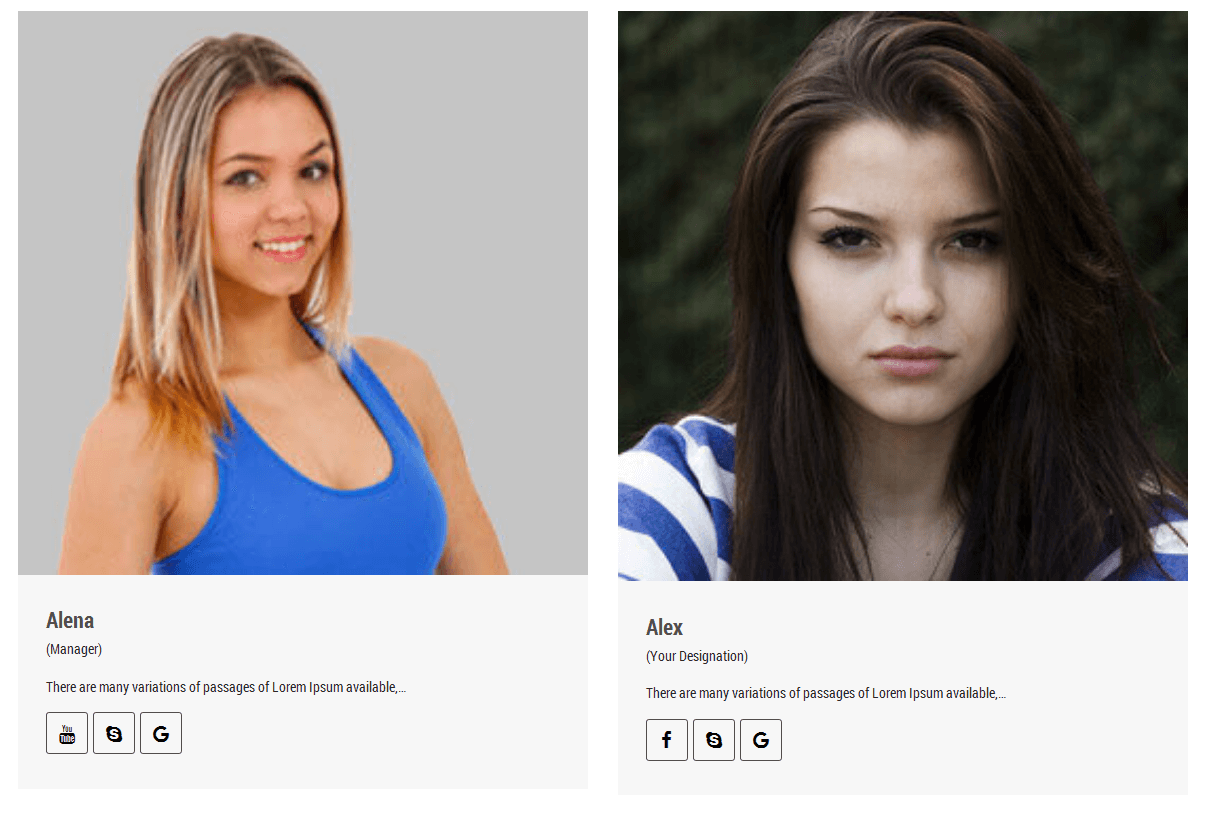
- [ourteam col="2" show="2" excerptlength="10"]
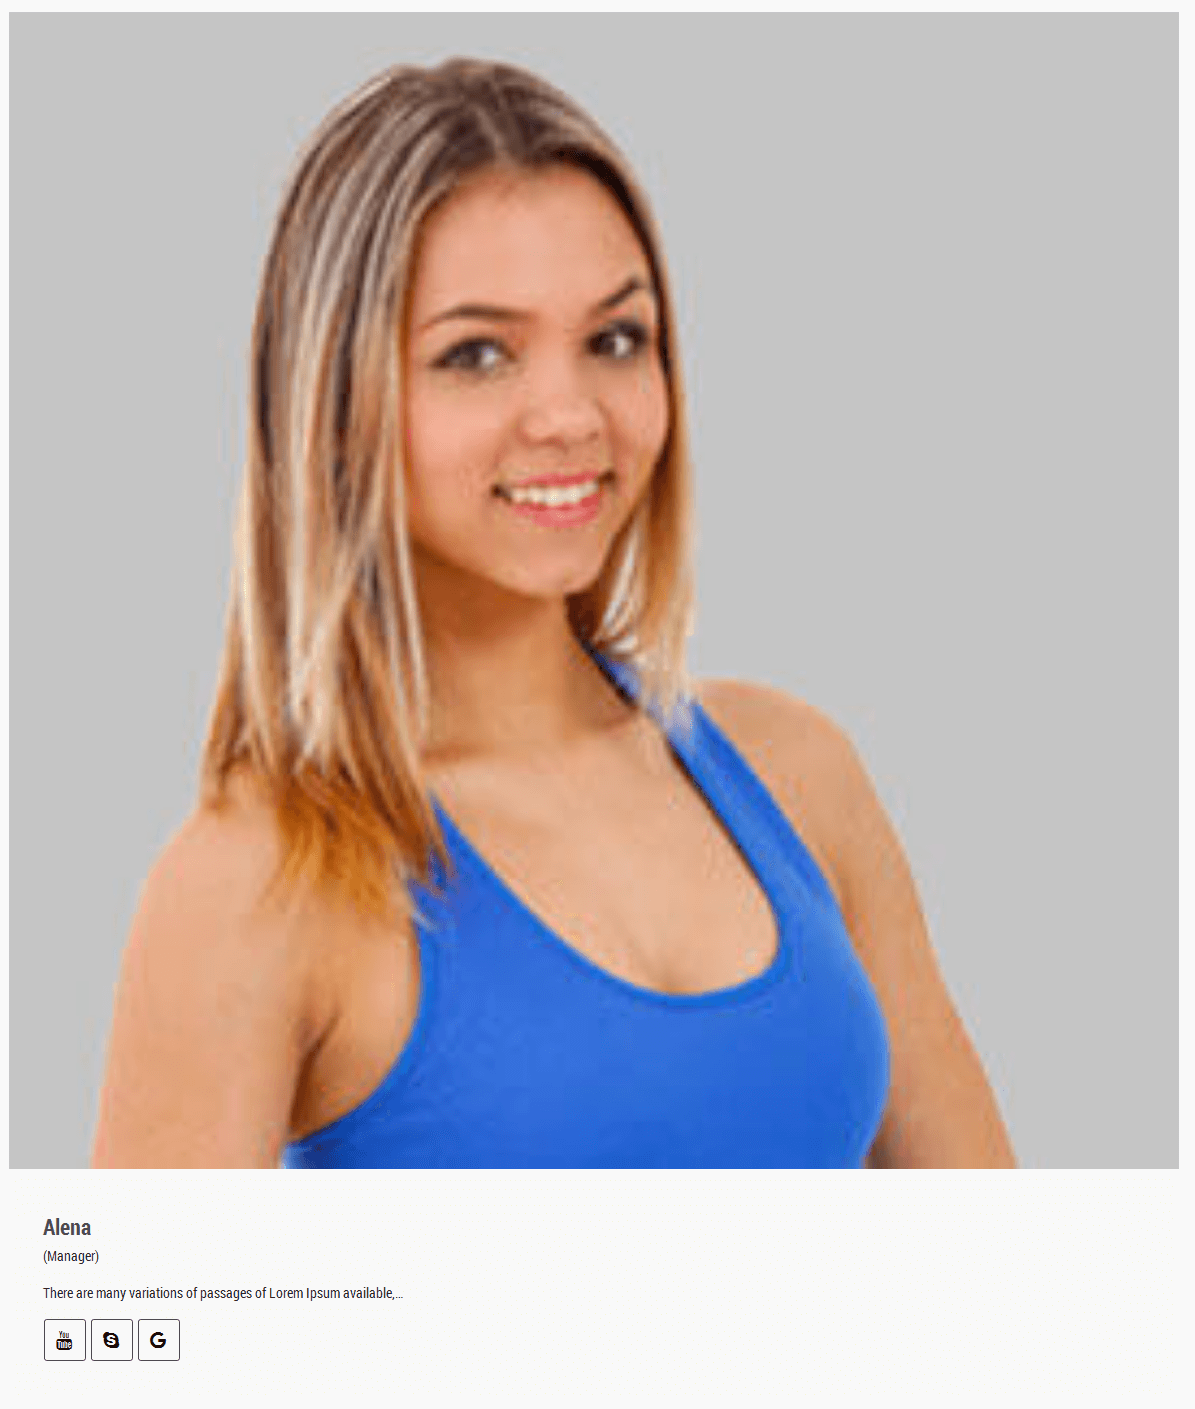
- [ourteam col="1" show="1" excerptlength="10"]
- Slider below box :
-
[fashionbox bgcolor="#f05b67" color="#ffffff" image="Add Your Image URL Here" title="free shipping" description="Phasellus nunc daccu magna bibendum vehicula ultricies..." url="#" target="self"]

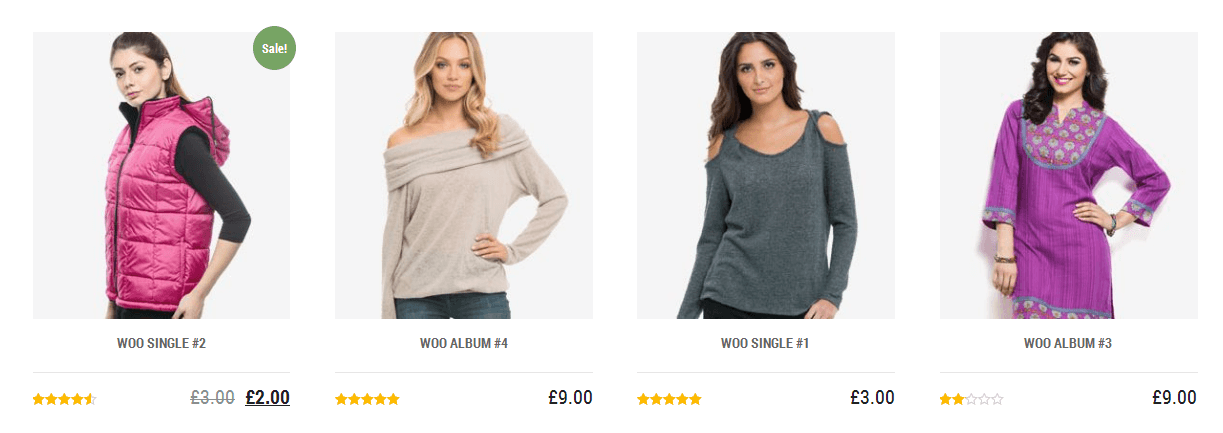
- RECENT PRODUCTS :
- [recent_products per_page="4" columns="4"]
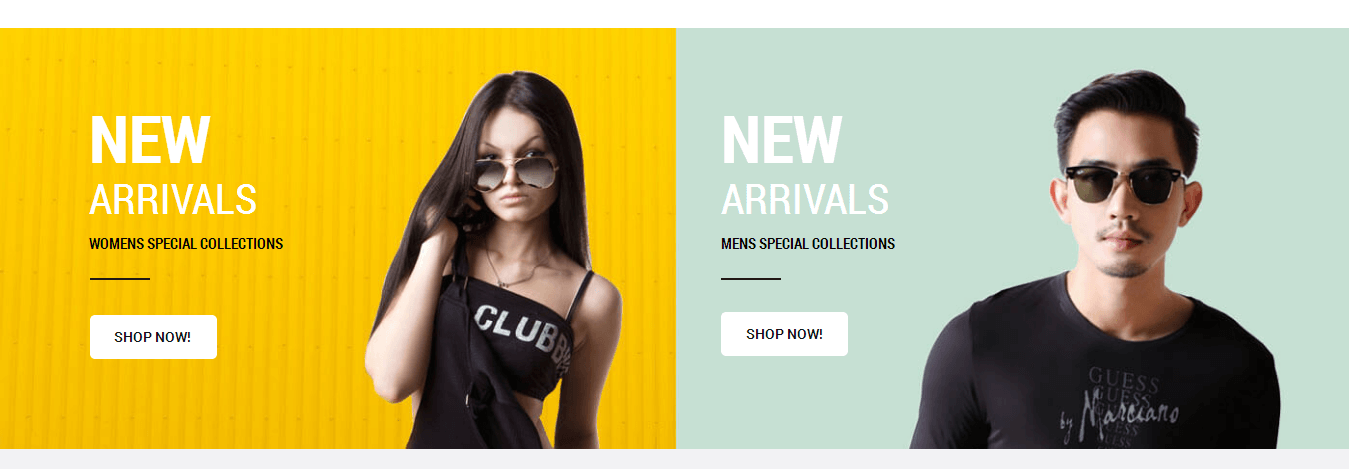
- NEW ARRIVAL:
- [columns size="2"]
[newarrival align="center" title="NEW" subtitle="ARRIVALS" description="WOMENS SPECIAL COLLECTIONS" titlecolor="#ffffff" subtitlecolor="#ffffff" desctitlecolor="#000000" bordercolor="#1d1b15"]
[readmore align="left" icon="" button="SHOP NOW!" links="#" margintop="6%" target="_parent" color="#161616" bgcolor="#ffffff"]
[/columns]
[columns size="2"]
[newarrival align="center" title="NEW" subtitle="ARRIVALS" description="MENS SPECIAL COLLECTIONS" titlecolor="#ffffff" subtitlecolor="#ffffff" desctitlecolor="#000000" bordercolor="#1d1b15"]
[readmore align="left" icon="" button="SHOP NOW!" links="#" margintop="6%" target="_parent" color="#161616" bgcolor="#ffffff"]
[/columns]
- NEW LATEST PRODUCTS :
- [newproduct filter="true" allproduct="All" show="8"]

- Clear:
- [clear]
- Photo Gallery:
- [photogallery filter="true"]
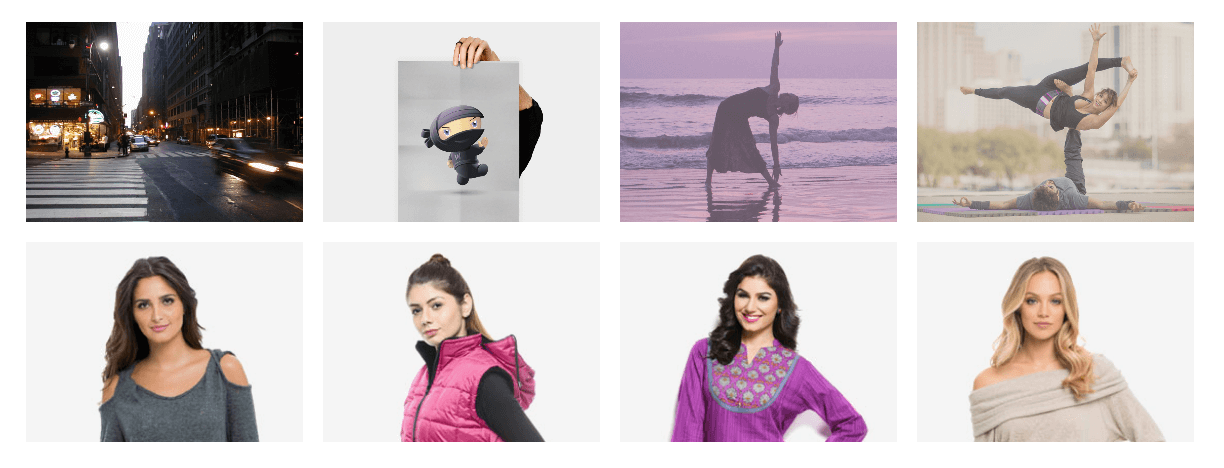
- Show Without Filters Use Shortcode : [photogallery filter="false"]
- Photo Gallery Carousel:
- [gallery-carousel]

- Recent Posts:
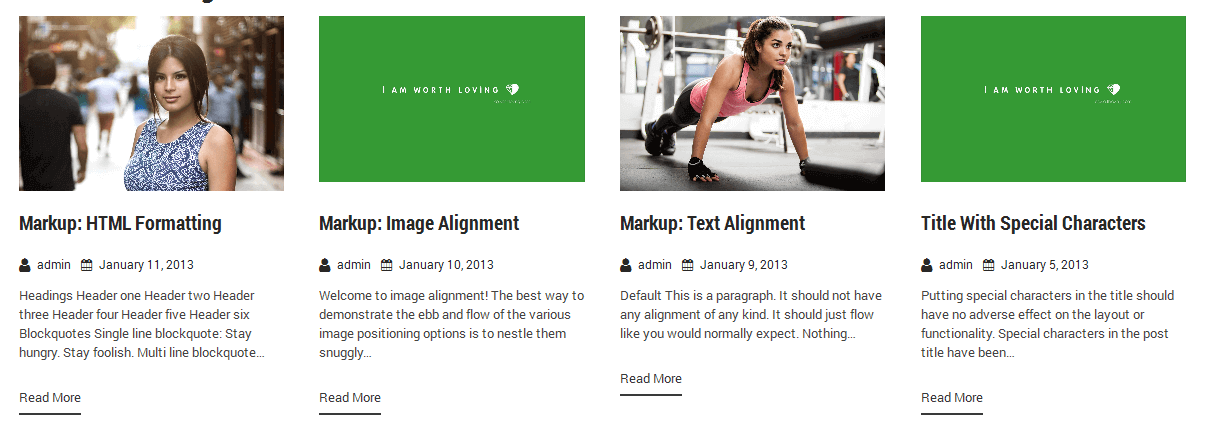
- [posts-style1 show="4" cat="1" excerptlength="24"]
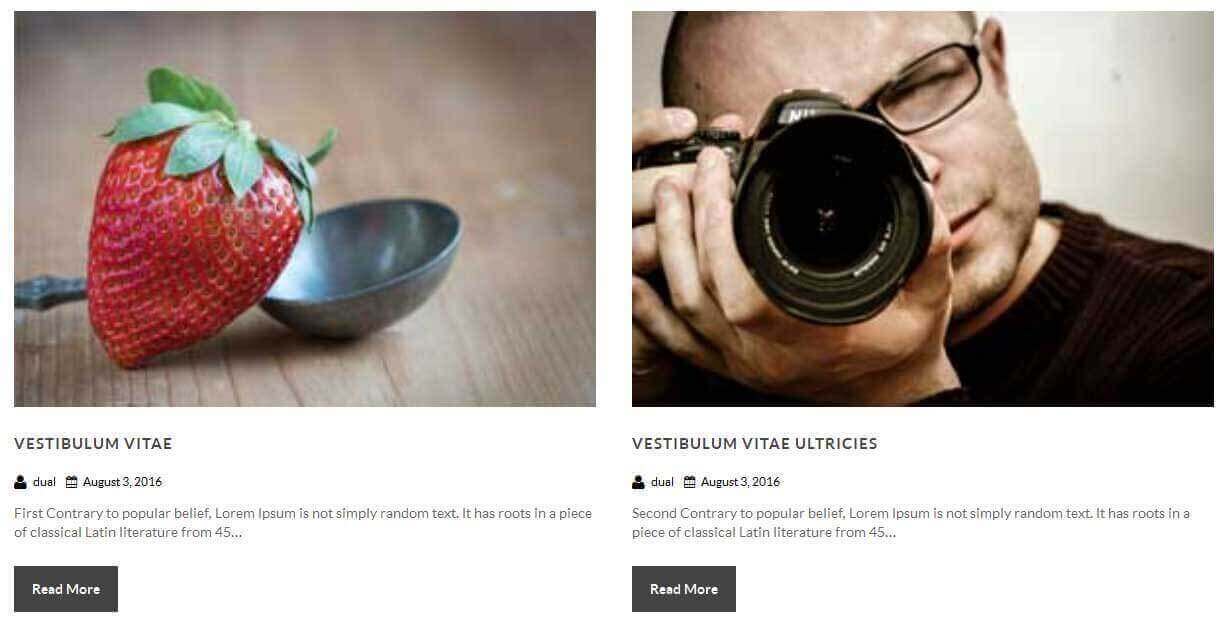
- [posts-style2 show="2" cat="1" excerptlength="24"]
- [posts-style3 show="4" cat=""]
- [posts-style4 show="3" cat="" excerptlength="30"]
- Above listed two types of posts style shortcode.
- [posts-style1 show="4" cat="1" excerptlength="24"] "show=4" means display four posts if you want to display 6 or 8 or etc. so just change show=6 or show=8. and "excerptlength=24" set box character length. and "cat=1" ID of display posts category
- [posts-style2 show="2" cat="1" excerptlength="24"] "show=2" means display two posts if you want to display 4 or 6 or etc. so just change show=4 or show=6. and "excerptlength=24" set box character length. and "cat=1" ID of display posts category
- Post Timeline:
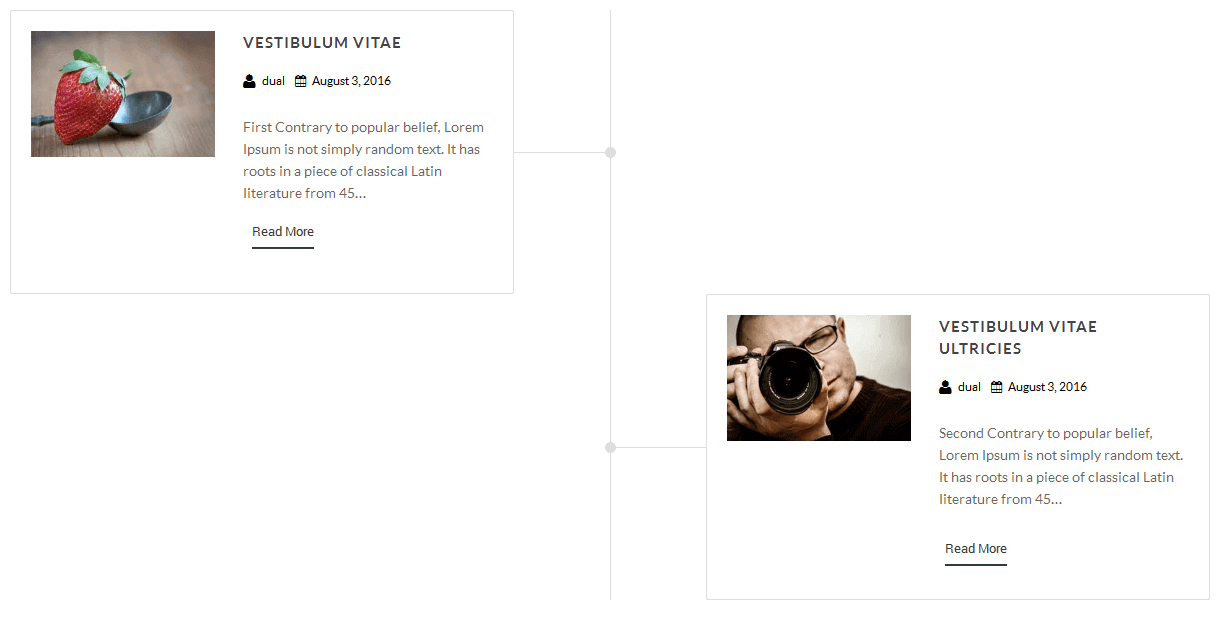
- [posts-timeline show="4" cat="1" excerptlength="24"]
- Post Grid:
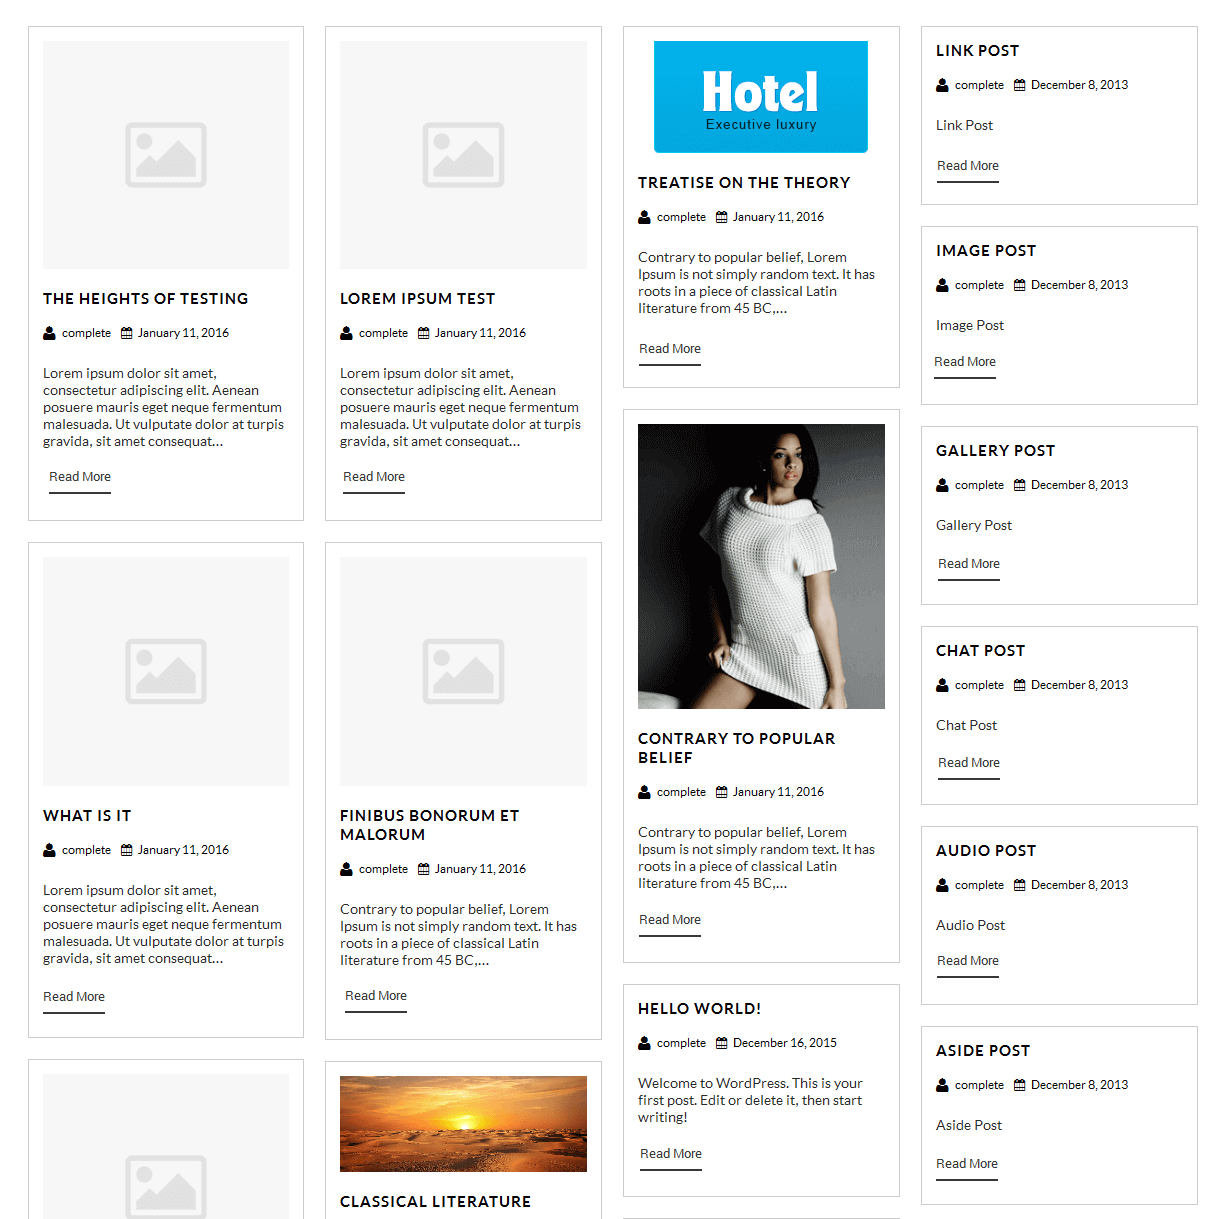
- [posts-grid show="4" cat="1" excerptlength="24"]
- Skill:
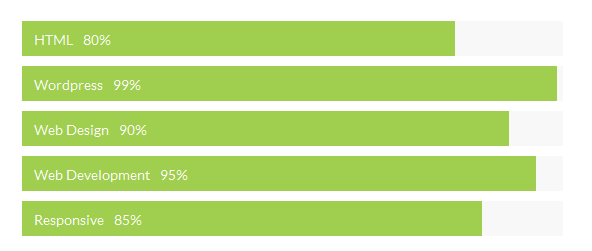
- [skill title="HTML" percent="80" bgcolor="#a0ce4e"][skill title="Wordpress" percent="99" bgcolor="#a0ce4e"][skill title="Web Design" percent="90" bgcolor="#a0ce4e"][skill title="Web Development" percent="95" bgcolor="#a0ce4e"][skill title="Responsive" percent="85" bgcolor="#a0ce4e"]
- Clients
- [client url="#" image="image url"]

- Social Icons
- [social_area]
[social icon="facebook" link="#"]
[social icon="twitter" link="#"]
[social icon="google-plus" link="#"]
[social icon="linkedin" link="#"]
[social icon="pinterest" link="#"]
[/social_area]

- Flip Box
- Horizontal Flip:
[flipbox fliptype="h" frontimage="http://www.yoursite.com/wp-content/themes/perfect/images/model-429733_640.jpg" fronttitle="The Front Title" frontdescription="Some Lorem Content Description Goes Here" backtitle="The Back Title" backdescription="This is the back description for testing purpose will added some dummy description text. This is the back description for testing purpose will added some dummy description text.This is the back description for testing purpose will added some dummy description text." backurl="#" backbutton="Read More"] 
- Vertical Flip:
[flipbox fliptype="v" frontimage="http://www.yoursite.com/wp-content/themes/perfect/images/person-822552_1280.jpg" fronttitle="The Front Title" frontdescription="Some Lorem Content Description Goes Here" backtitle="The Back Title" backdescription="This is the back description for testing purpose will added some dummy description text. This is the back description for testing purpose will added some dummy description text.This is the back description for testing purpose will added some dummy description text." backurl="#" backbutton="Read Now"]
- Dividers:
- [divider style="divider1"]

- [divider style="divider2"]

- [divider style="divider3"]

- [divider style="divider4"]

- [divider style="divider5"]

- [divider style="divider6"]

- [headingdivider text="Heading Title"]

- Promotion Box:
- [promobox1 bgcolor="#f7f7f7" topbordercolor="#a0ce4e" otherbordercolor="#e8e6e6"]Lorem ipsum dolor sit amet, consectetur adipiscing elit, sed do eiusmod tempor incididunt ut labore et dolore magna aliqua. Ut enim ad minim veniam, quis nostrud exercitation ullamco laboris nisi ut aliquip ex ea commodo consequat. Duis aute irure dolor in reprehenderit in voluptate velit esse cillum dolore eu fugiat nulla pariatur. Excepteur sint occaecat cupidatat non proident, sunt in culpa qui officia deserunt mollit anim id est laborum.[/promobox1]

- [promobox2 bgcolor="#f7f7f7" leftbordercolor="#a0ce4e" button="Hello Text" url="#"]Lorem ipsum dolor sit amet, consectetur adipiscing elit, sed do eiusmod tempor incididunt ut labore et dolore magna aliqua. Ut enim ad minim veniam, quis nostrud exercitation ullamco laboris nisi ut aliquip ex ea commodo consequat. Duis aute irure dolor in reprehenderit in voluptate velit esse cillum dolore eu fugiat nulla pariatur. Excepteur sint occaecat cupidatat non proident, sunt in culpa qui officia deserunt mollit anim id est laborum.[/promobox2]

- [promobox3 bgcolor="#f7f7f7" bottombordercolor="#a0ce4e" button="Hello Text" url="#"]Lorem ipsum dolor sit amet, consectetur adipiscing elit, sed do eiusmod tempor incididunt ut labore et dolore magna aliqua. Ut enim ad minim veniam, quis nostrud exercitation ullamco laboris nisi ut aliquip ex ea commodo consequat. Duis aute irure dolor in reprehenderit in voluptate velit esse cillum dolore eu fugiat nulla pariatur. Excepteur sint occaecat cupidatat non proident, sunt in culpa qui officia deserunt mollit anim id est laborum.[/promobox3]

- [promobox4 bgcolor="#f7f7f7" bordercolor="#a0ce4e"]Lorem ipsum dolor sit amet, consectetur adipiscing elit, sed do eiusmod tempor incididunt ut labore et dolore magna aliqua. Ut enim ad minim veniam, quis nostrud exercitation ullamco laboris nisi ut aliquip ex ea commodo consequat. Duis aute irure dolor in reprehenderit in voluptate velit esse cillum dolore eu fugiat nulla pariatur. Excepteur sint occaecat cupidatat non proident, sunt in culpa qui officia deserunt mollit anim id est laborum.[/promobox4]

- [squarebox image="image" title="title" url="#" target="blank"]
- [ourteamexpanded show="4"]

- [perfectbox image="image" title="title" description="description" url="#" target="blank"]
- [blockbox url="url" image="image" title="title" titlecolor="titlecolor" target="self"]
-
[centertitle text="HAPPY CUSTOMERS" titlecolor="#202020" seperatorcolor="#1d1d1d"]
[lefttitle text="HAPPY CUSTOMERS" titlecolor="#202020" seperatorcolor="#1d1d1d"]
-
[readmore align="left" icon="" button="VIEW ALL" links="#" margintop="4%" target="_parent" color="#FFFFFF" bgcolor="#373737"]

- [headingseperator text="text"]

- [boxthumb name="name" url="#" image="image" target="blank"]
- Column Shortcodes:
- Two Columns:
-
[row]
[columns size="1/2"]
Lorem ipsum dolor sit amet, consectetur adipiscing elit. Ut commodo congue laoreet. Nullam cursus pretium nulla
[/columns]
[columns size="1/2"]Lorem ipsum dolor sit amet, consectetur adipiscing elit. Ut commodo congue laoreet. Nullam cursus pretium nulla
[/columns]
[/row]

- Three Columns:
-
[row]
[columns size="1/3"]
Lorem ipsum dolor sit amet, consectetur adipiscing elit. Ut commodo congue laoreet. Nullam cursus pretium nulla
[/columns]
[columns size="1/3"]Lorem ipsum dolor sit amet, consectetur adipiscing elit. Ut commodo congue laoreet. Nullam cursus pretium nulla
[/columns]
[columns size="1/3"]Lorem ipsum dolor sit amet, consectetur adipiscing elit. Ut commodo congue laoreet. Nullam cursus pretium nulla
[/columns]
[/row]

- For Other columns size like 4, 5, 6, 7, 8, 9, or 10 just change size in shortcode for four columns: size="1/4", for five columns: size="1/5", for six columns: size="1/6", for seven columns: size="1/7" , for eight columns: size="1/8", for nine columns: size="1/9", for ten columns: size="1/10"
- Columns Padding:
- You can also set padding of columns with following shortcodes:
-
[row]
[columns size="1/2" toppadding="10px" bottompadding="10px" rightpadding="10px" leftpadding="10px"]
[/columns]
[/row]
- Chagne Padding px As per your settings.
Copyright © 2017 Shri Krishna Technologies


