SKT Cookie Consent
A comprehensive GDPR, CCPA, LGPD & ePrivacy compliant cookie consent plugin for WordPress. Manage banners, script blocking, geo-targeting and full consent audit logs — all from one dashboard.
Table of Contents
Introduction & Features
SKT Cookie Consent is a lightweight yet powerful WordPress plugin developed by SKT Themes. It helps website owners comply with international cookie consent laws by displaying a fully customizable consent banner, blocking third-party scripts until users give consent, and maintaining a detailed audit log of every consent action.
System Requirements
Before installing the plugin, ensure your server meets the following minimum requirements:
| Requirement | Minimum Version | Notes |
|---|---|---|
| WordPress | 5.5 or higher | Tested up to WordPress 6.9 |
| PHP | 7.2 or higher | PHP 8.0+ recommended |
| MySQL | 5.6 or higher | Required for consent log tables |
| Browser | Any modern browser | Chrome, Firefox, Safari, Edge |
| User Role | Administrator | All settings require manage_options capability |
Installation Guide
There are two ways to install SKT Cookie Consent. Choose the method that works best for you.
Method 1 — Upload via WordPress Admin (Recommended)
Download the skt-cookie-consent.zip file from WordPress.org Plugins.
In your WordPress admin, go to Plugins → Add New → Upload Plugin
Click Choose File, select your skt-cookie-consent.zip, then click Install Now
Once installed, click Activate Plugin
After activation, a new SKT Cookie menu will appear in your WordPress admin sidebar. Click it to open the Dashboard.
Method 2 — Upload via FTP
Extract the downloaded skt-cookie-consent.zip to get the skt-cookie-consent folder.
Using an FTP client (FileZilla, etc.), upload the folder to /wp-content/plugins/ on your server.
Go to Plugins → Installed Plugins, find SKT Cookie Consent and click Activate
Dashboard
The Dashboard is your central hub for viewing consent statistics at a glance. It shows real-time totals of how your visitors are responding to the cookie banner.
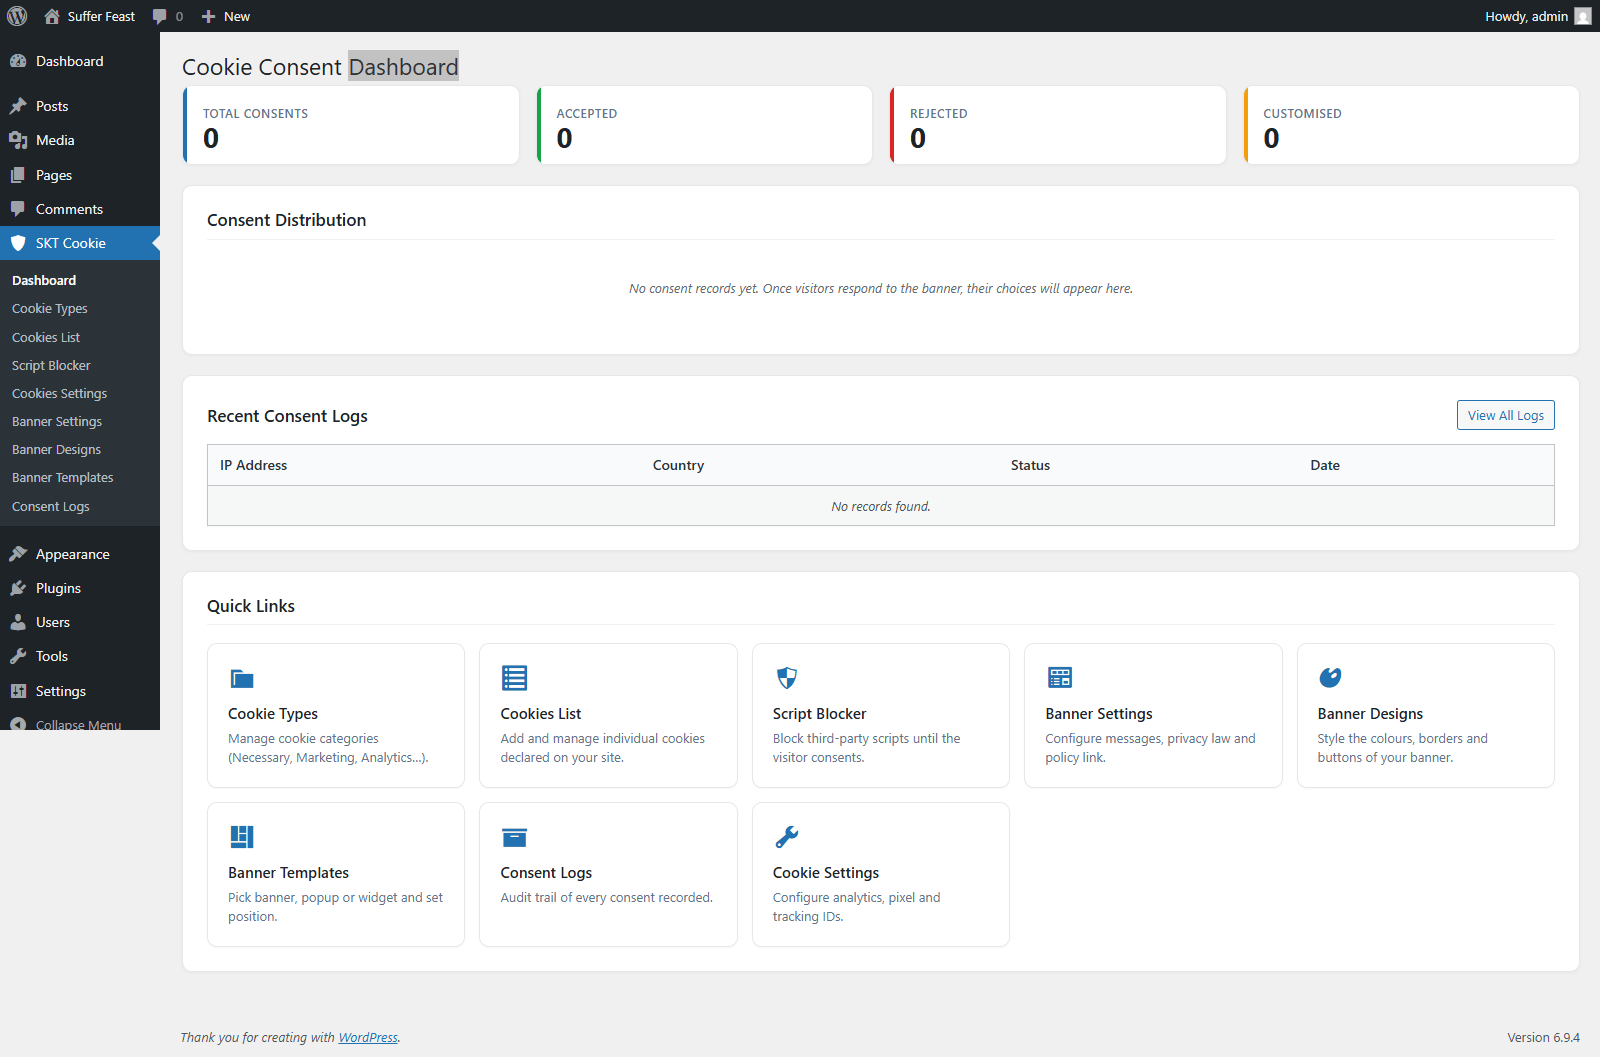
Consent Statistics Cards
At the top of the Dashboard you will see four stat cards:
| Card | What It Shows |
|---|---|
| Total Consents | The total number of times visitors have responded to the cookie banner. |
| Accepted | Count of visitors who clicked "Accept All" or accepted all cookie categories. |
| Rejected | Count of visitors who clicked "Reject All" or declined all non-essential cookies. |
| Customised | Count of visitors who chose specific categories (partial consent). |
Consent Distribution Chart
Below the stat cards, a doughnut chart visually shows the percentage breakdown of Accepted, Rejected, and Customised consents. The chart only appears once you have recorded at least one consent.
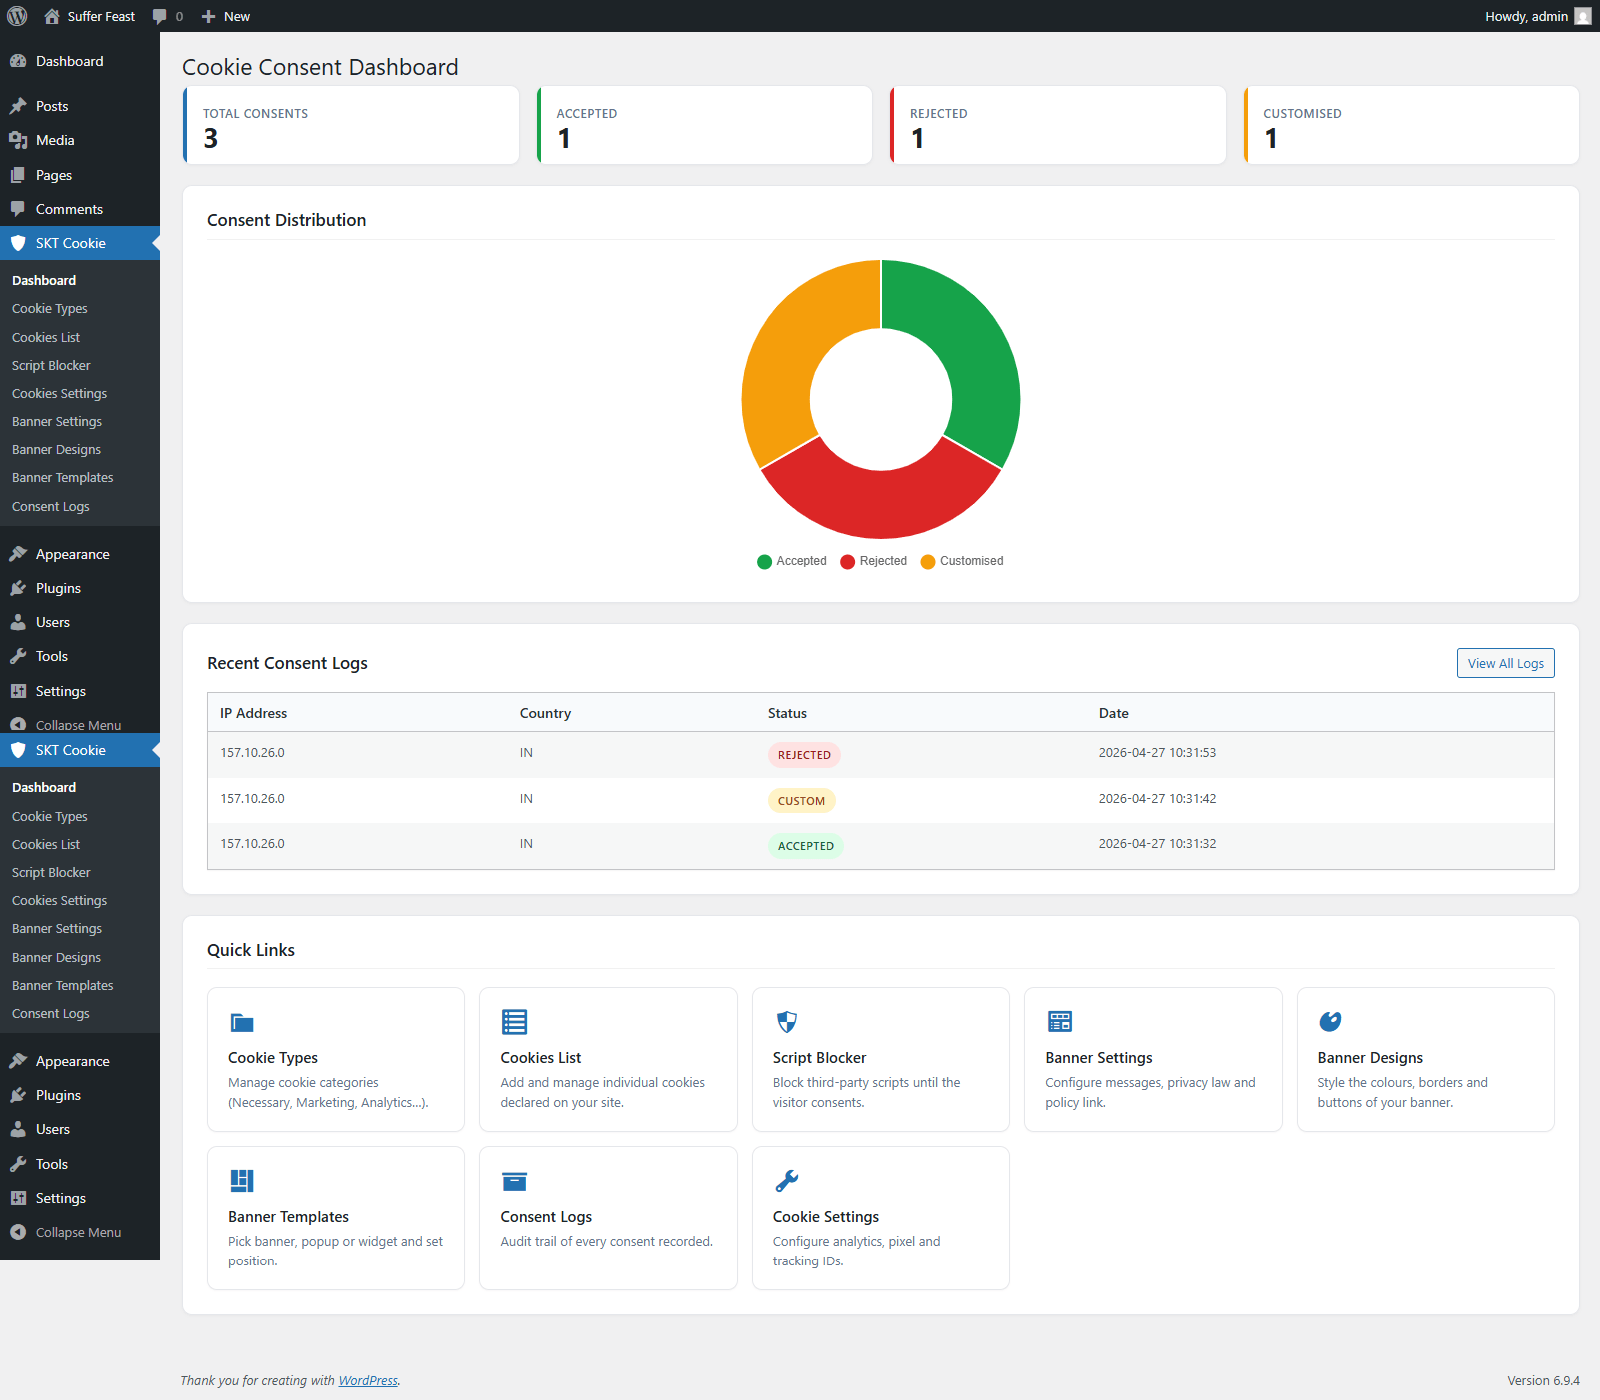
Recent Consent Logs
The dashboard also displays the 5 most recent consent records in a table showing the visitor's IP address, country, consent status, and date. Click View All Logs to see the full consent log.
Quick Links
Eight quick-link cards at the bottom give you one-click access to every section of the plugin: Cookie Types, Cookies List, Script Blocker, Banner Settings, Banner Designs, Banner Templates, Consent Logs, and Cookie Settings.
Cookie Types
Cookie Types (also called categories) allow you to group cookies by their purpose. These categories are displayed to visitors inside the consent popup, letting them choose which groups they accept.
Available Categories
| Category | Description | Status |
|---|---|---|
| Necessary | Essential cookies required for basic site functionality (login, cart, security). | Always On |
| Marketing | Cookies used for advertising and retargeting (e.g. Meta Pixel, Google Ads). | Optional |
| Analytics | Cookies that track visitor behavior for site improvement (e.g. Google Analytics). | Optional |
| Preferences | Cookies that remember user settings like language or region. | Optional |
| Unclassified | Cookies that haven't been categorized yet. | Optional |
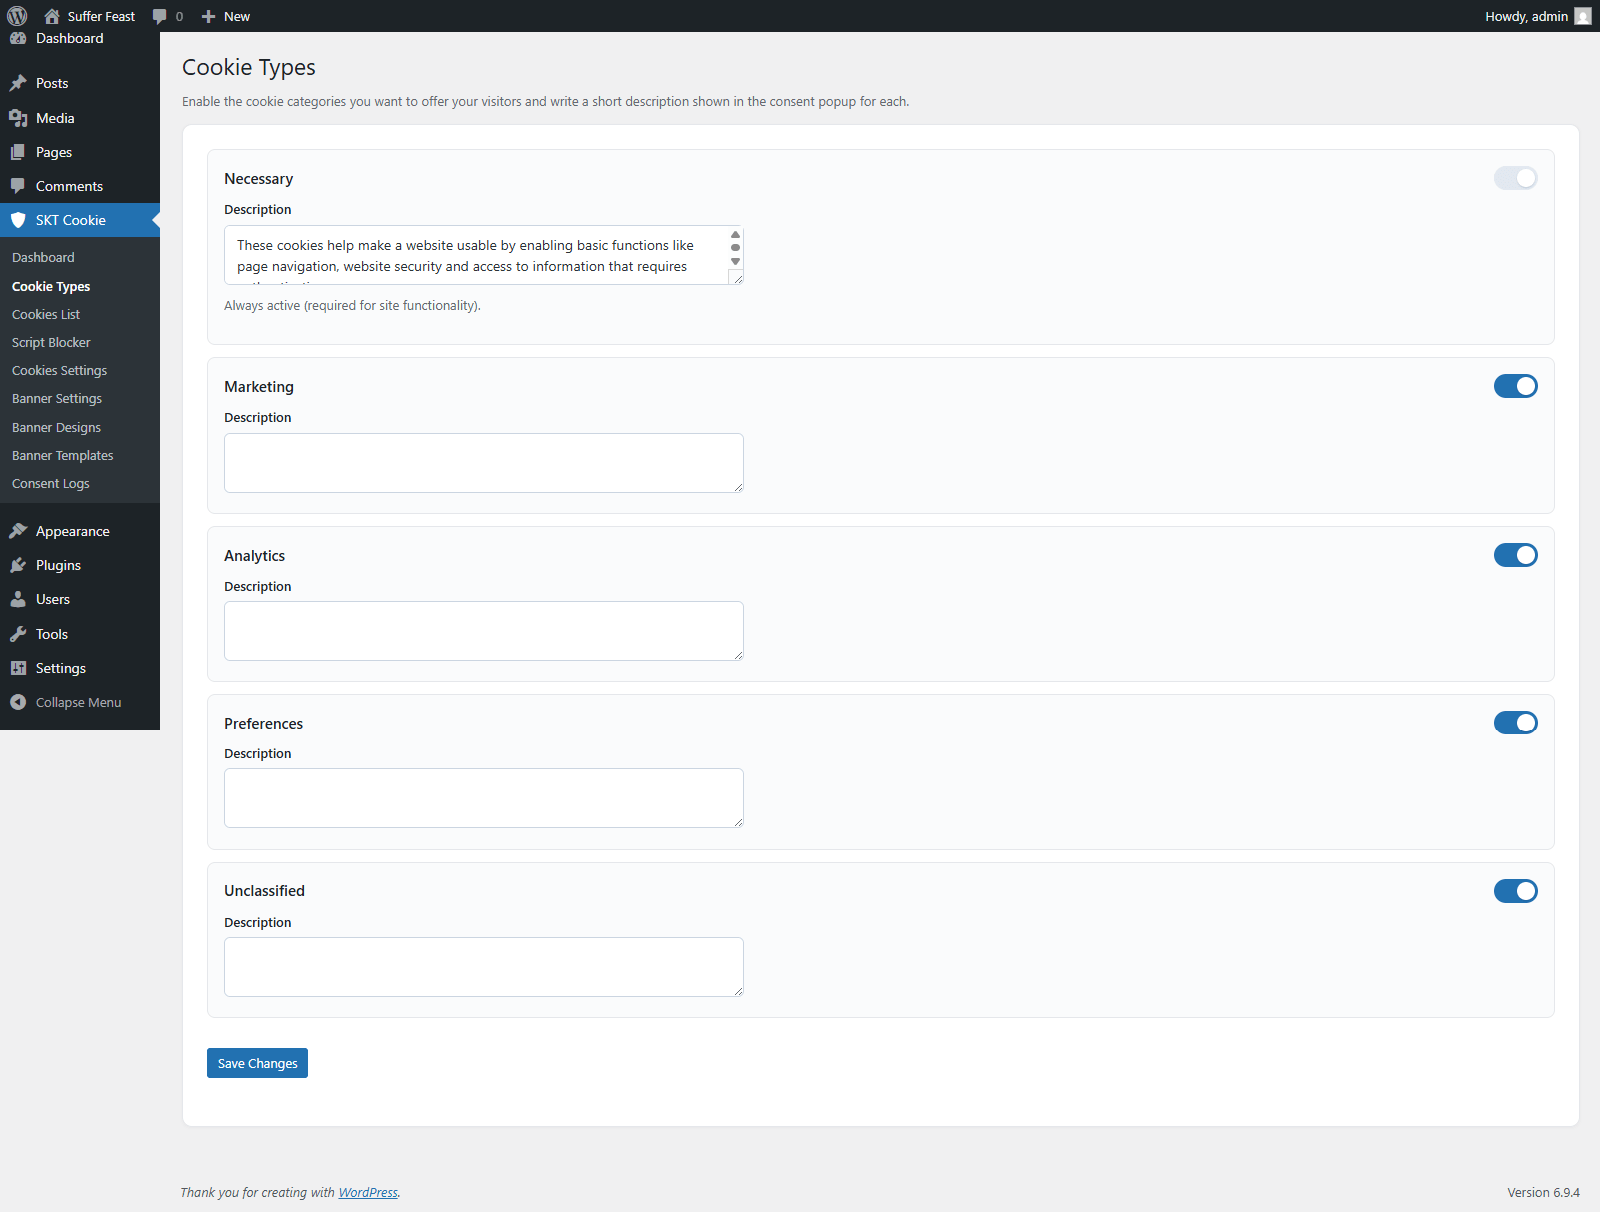
How to Configure Cookie Types
In your WordPress admin sidebar, click SKT Cookie then select Cookie Types
Use the toggle switch next to each category name to enable or disable it. The Necessary category is always enabled and cannot be turned off.
In the text area below each category toggle, write a short description explaining what types of cookies belong to that category. This description is shown to visitors in the consent popup.
Click the Save Changes button at the bottom to save your category configuration.
Only enabled categories are shown in the cookie consent popup on your frontend. Disabling a category removes it from visitor view but does not delete any cookie declarations linked to it.
Cookies List
The Cookies List page is your cookie inventory — a register of every individual cookie your website uses. This is required for compliance with GDPR and similar laws, which mandate that websites declare all cookies they set.
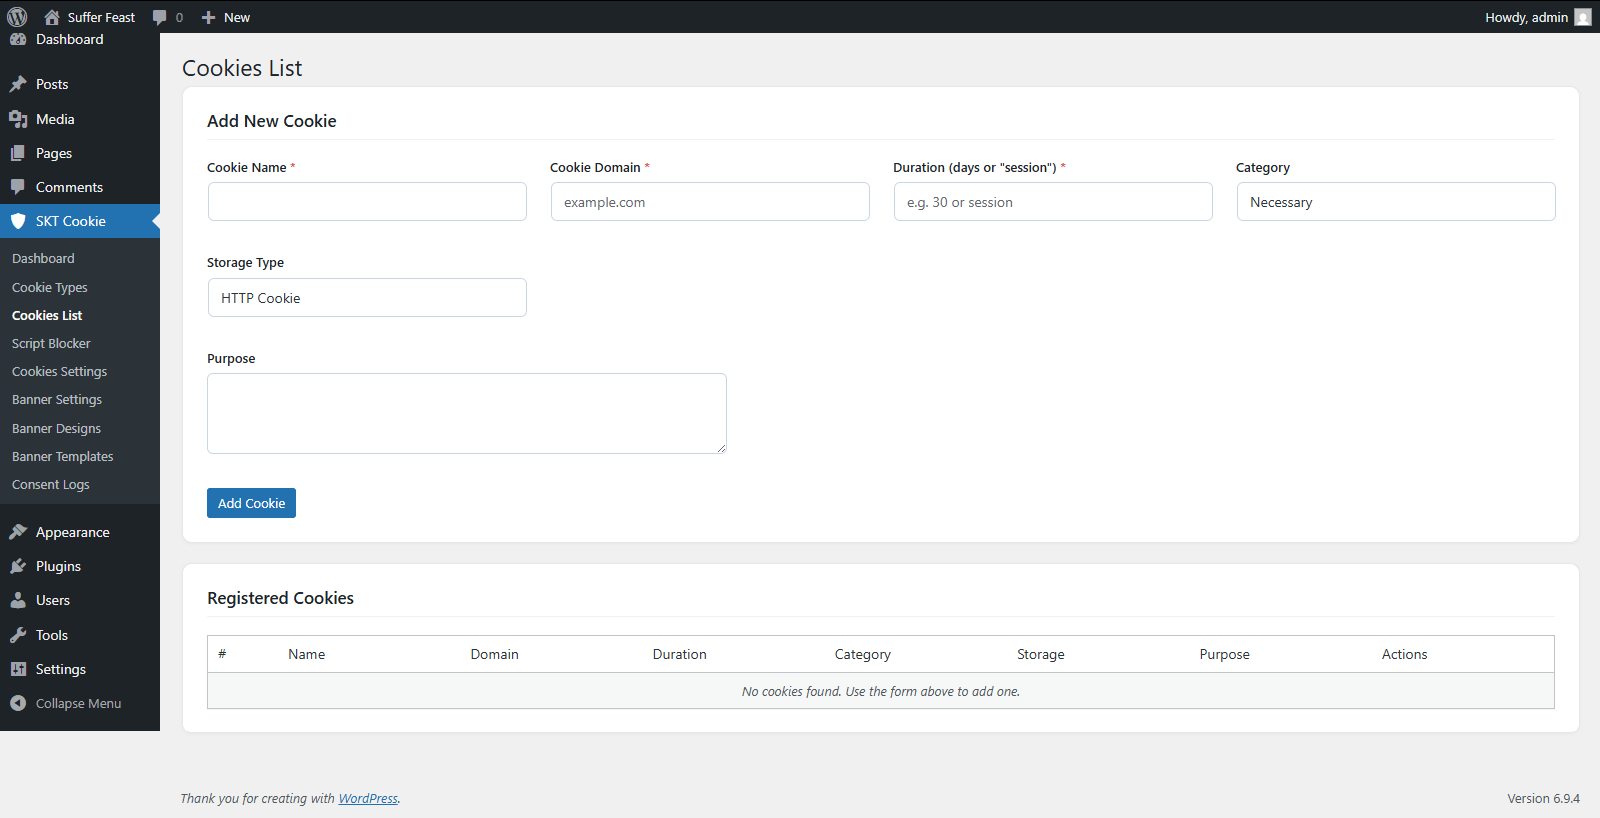
Adding a New Cookie
Go to SKT Cookie → Cookies List. The "Add New Cookie" form appears at the top of the page.
Complete all fields in the form (see the field reference table below).
Submit the form. The cookie will appear in the table below the form.
Cookie Form Fields
| Field | Description | Example |
|---|---|---|
| Cookie Name Required | The exact name of the cookie as set in the browser. | _ga |
| Cookie Domain Required | The domain that sets this cookie. | .yoursite.com |
| Duration Required | How long the cookie persists in the browser. | 2 years |
| Cookie Type Required | Select a category (Necessary, Analytics, Marketing, etc.). | Analytics |
| Storage Type Required | How the cookie data is stored in the browser. | HTTP Cookie |
| Cookie Purpose Required | A human-readable description of what the cookie does. | Used to distinguish users for Google Analytics |
Storage Type Options
| Option | When to Use |
|---|---|
| HTTP Cookie | Standard browser cookie sent with every HTTP request. Most common type. |
| HTML Local Storage | Data stored in the browser's localStorage API. Not sent with requests. |
| IndexedDB | Browser database storage for larger structured data. |
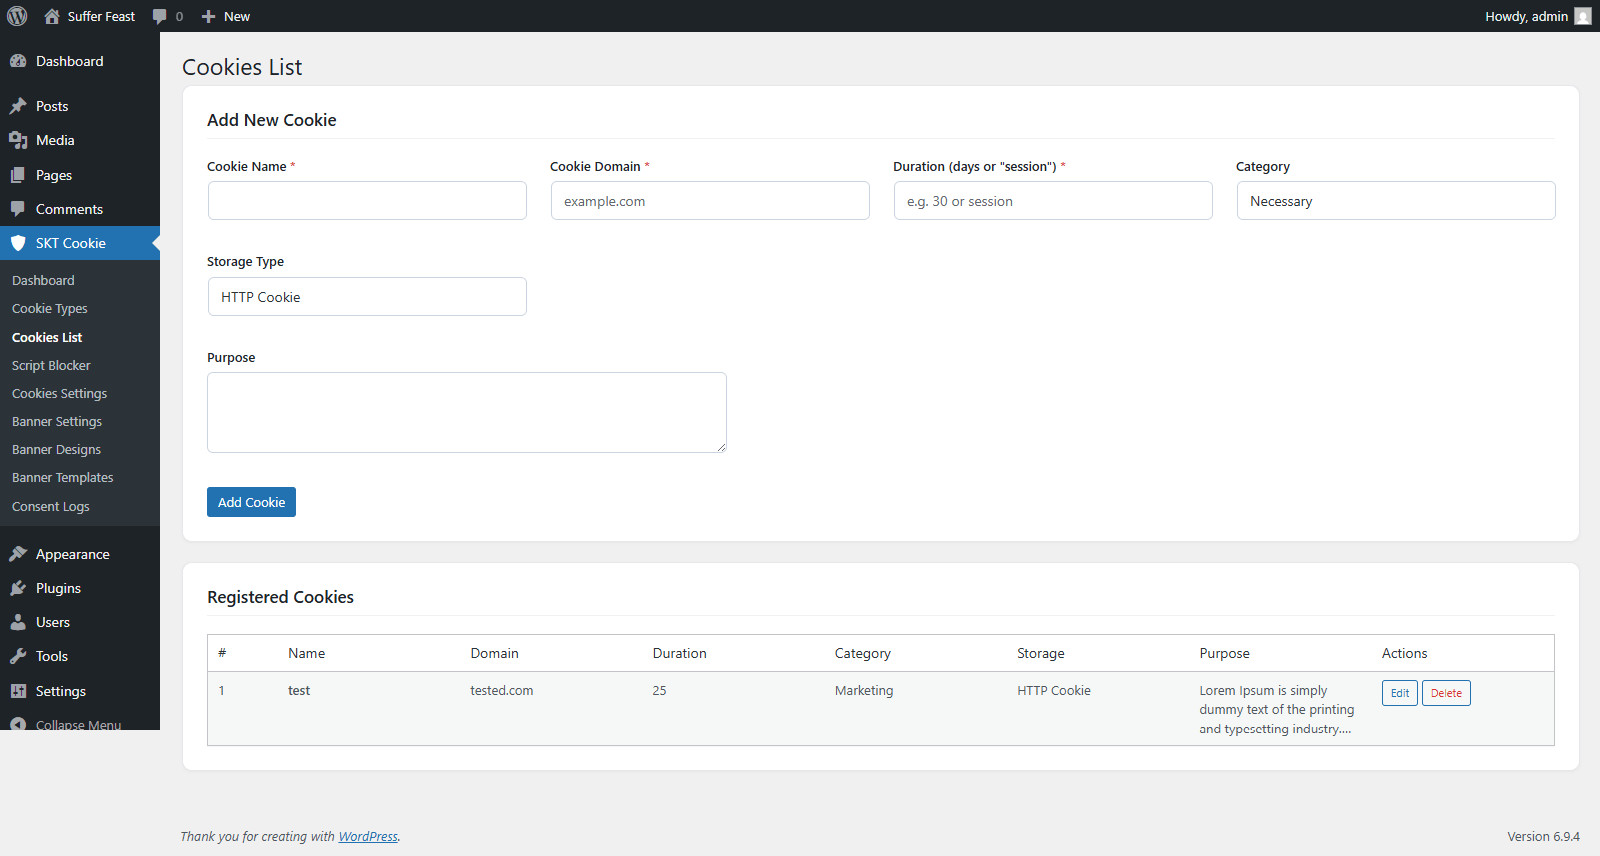
Managing Existing Cookies
All declared cookies appear in a table below the form showing Cookie Name, Domain, Duration, Type, Storage Type, and Purpose. From this table you can:
| Action | How |
|---|---|
| Edit a cookie | Click the Edit link next to the cookie. The form above will pre-fill with the cookie's data. |
| Delete a cookie | Click the Delete link. The cookie is permanently removed from the list. |
Script Blocker
The Script Blocker is one of the most powerful features of SKT Cookie Consent. It automatically prevents third-party tracking scripts from loading until a visitor gives their consent — ensuring you are truly compliant, not just displaying a notice.
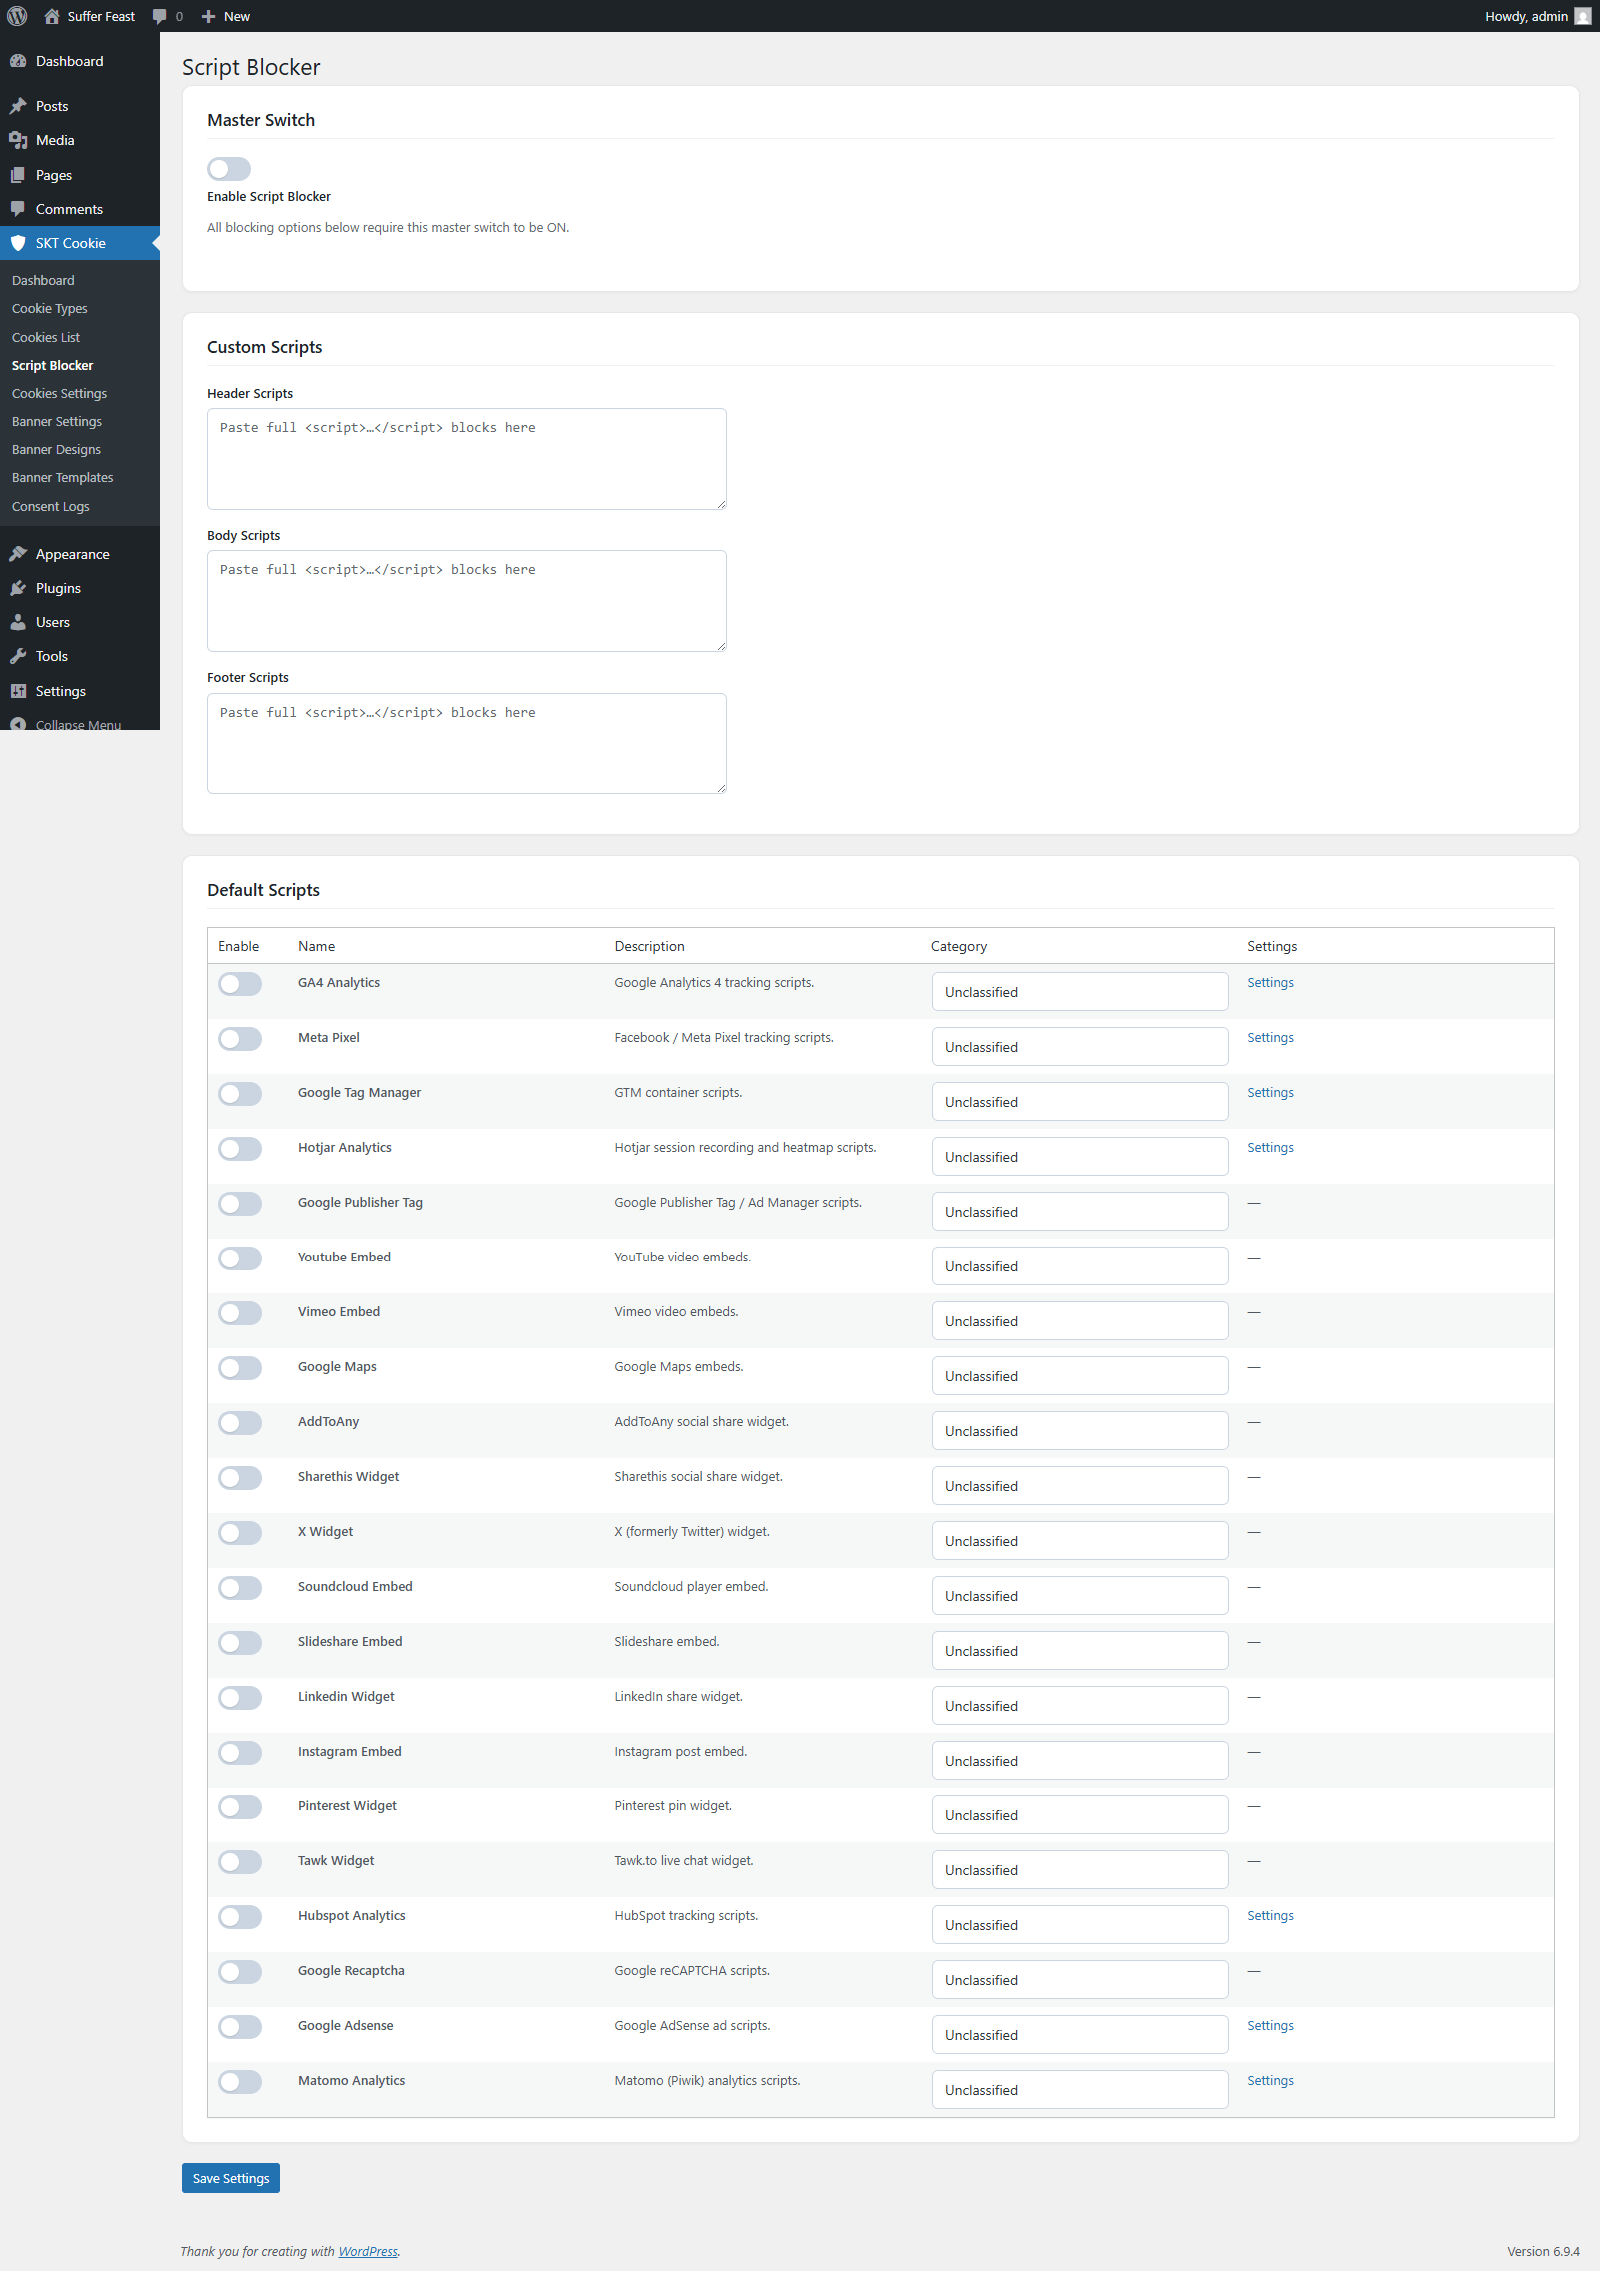
How It Works
When the Script Blocker is enabled, all scripts in its list are prevented from loading on page load. Once a visitor accepts cookies (fully or partially), the blocked scripts are activated immediately without requiring a page reload.
Built-in Scripts
The plugin includes a pre-configured list of 20+ commonly used third-party scripts that can be toggled on/off:
Additional built-in scripts include: Vimeo Embed, Google Publisher Tag, AddToAny, ShareThis, X (Twitter) Widget, Soundcloud, Slideshare, LinkedIn, Instagram, Pinterest, Hubspot, Google reCAPTCHA, Google AdSense.
How to Configure the Script Blocker
Navigate to the Script Blocker page in your admin dashboard.
Toggle the main Enable Script Blocker switch to ON at the top of the page.
In the scripts table, use the toggle next to each script name to enable blocking for that specific script. Only enabled scripts will be blocked.
For scripts not in the default list, paste your custom <script> tags into the Header Scripts, Body Scripts, or Footer Scripts text areas. These will also be blocked until consent is given.
Click Save Changes to apply the script blocker configuration.
For GA4, Meta Pixel, Hotjar, HubSpot, and similar analytics scripts, you must also enter their tracking IDs in Cookies Settings so the plugin knows how to fire them after consent is granted.
Cookies Settings
The Cookies Settings page is where you configure your analytics and tracking IDs. These IDs are used by the Script Blocker to fire the correct scripts after a visitor grants consent.
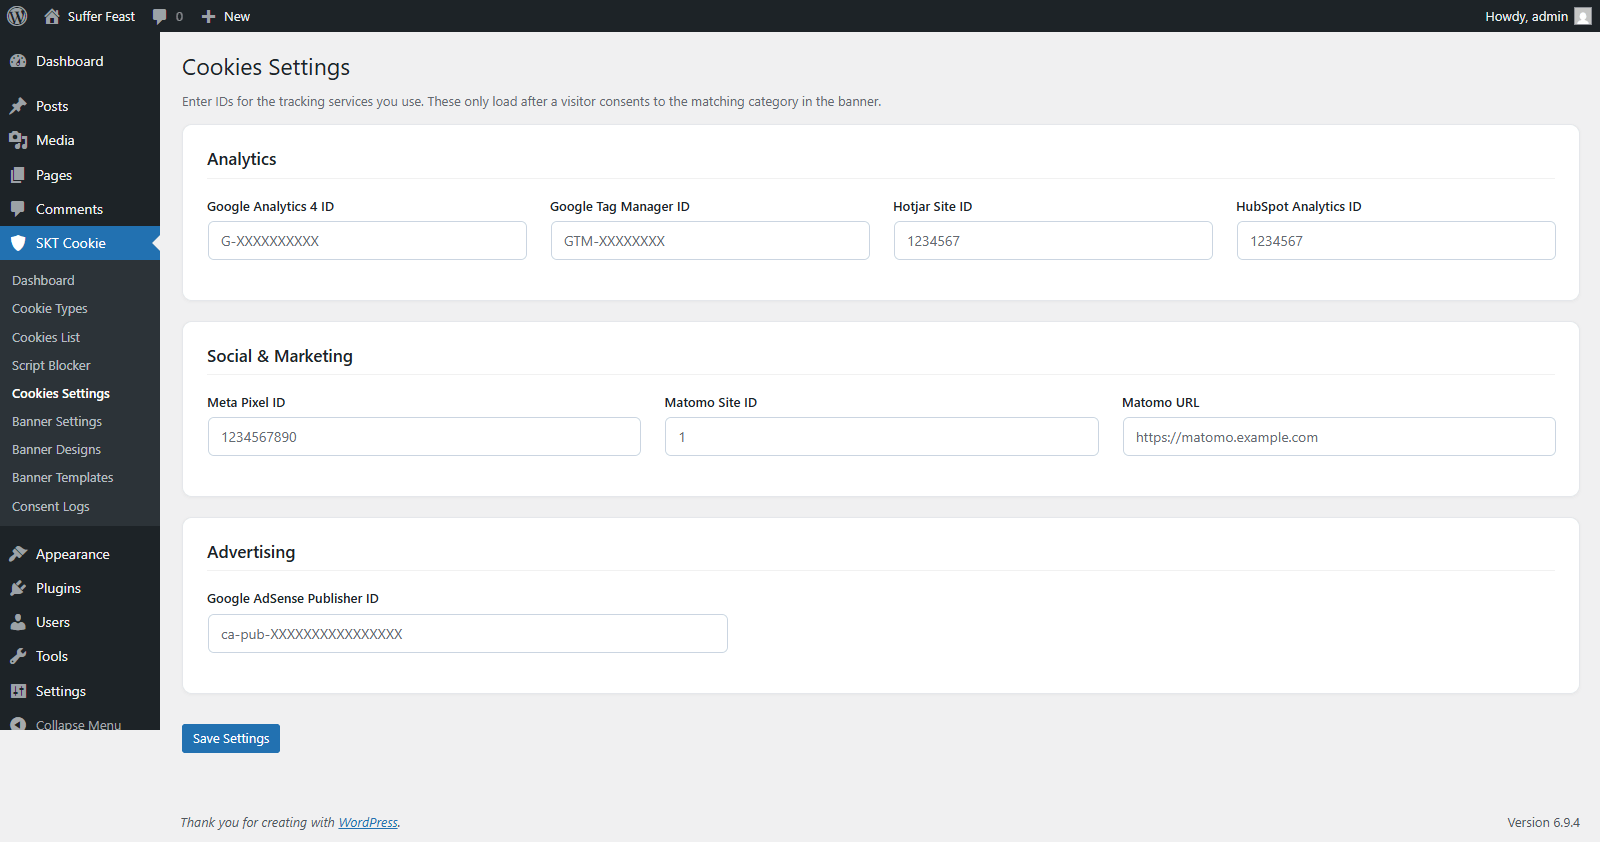
Available Tracking Settings
| Setting | Description | Example Value |
|---|---|---|
| Google Analytics 4 ID | Your GA4 Measurement ID. Used to fire the GA4 tracking script after Analytics consent. | G-XXXXXXXXXX |
| Meta Pixel ID | Your Facebook/Meta Pixel ID. Fires after Marketing consent is granted. | 1234567890 |
| Google Tag Manager ID | Your GTM Container ID. Loads the GTM container after consent. | GTM-XXXXXXX |
| Hotjar Site ID | Your Hotjar tracking ID. Fires session recordings after Analytics consent. | 1234567 |
| HubSpot Portal ID | Your HubSpot portal ID for tracking scripts. | 12345678 |
| Google AdSense Publisher ID | Your AdSense publisher ID for ad scripts. | pub-XXXXXXXXXXXXXXXX |
| Matomo Site ID & URL | Your Matomo site ID and the URL where Matomo is installed. | 1 / https://analytics.yoursite.com/ |
How to Configure
Open the Cookies Settings page from the admin menu.
Fill in the IDs for all tracking tools you use on your website. You only need to fill in the services you actually use — leave others blank.
Make sure the corresponding script is also toggled ON in the Script Blocker page so it gets blocked until consent.
Click Save Changes.
If you use Google Tag Manager, you only need to enter your GTM ID here. Configure all your other tracking tools (GA4, Meta Pixel, etc.) inside GTM instead of entering multiple IDs here.
Banner Settings
Banner Settings controls the text content of your cookie consent banner, including messages for different privacy laws, the privacy policy link, and basic border styling.
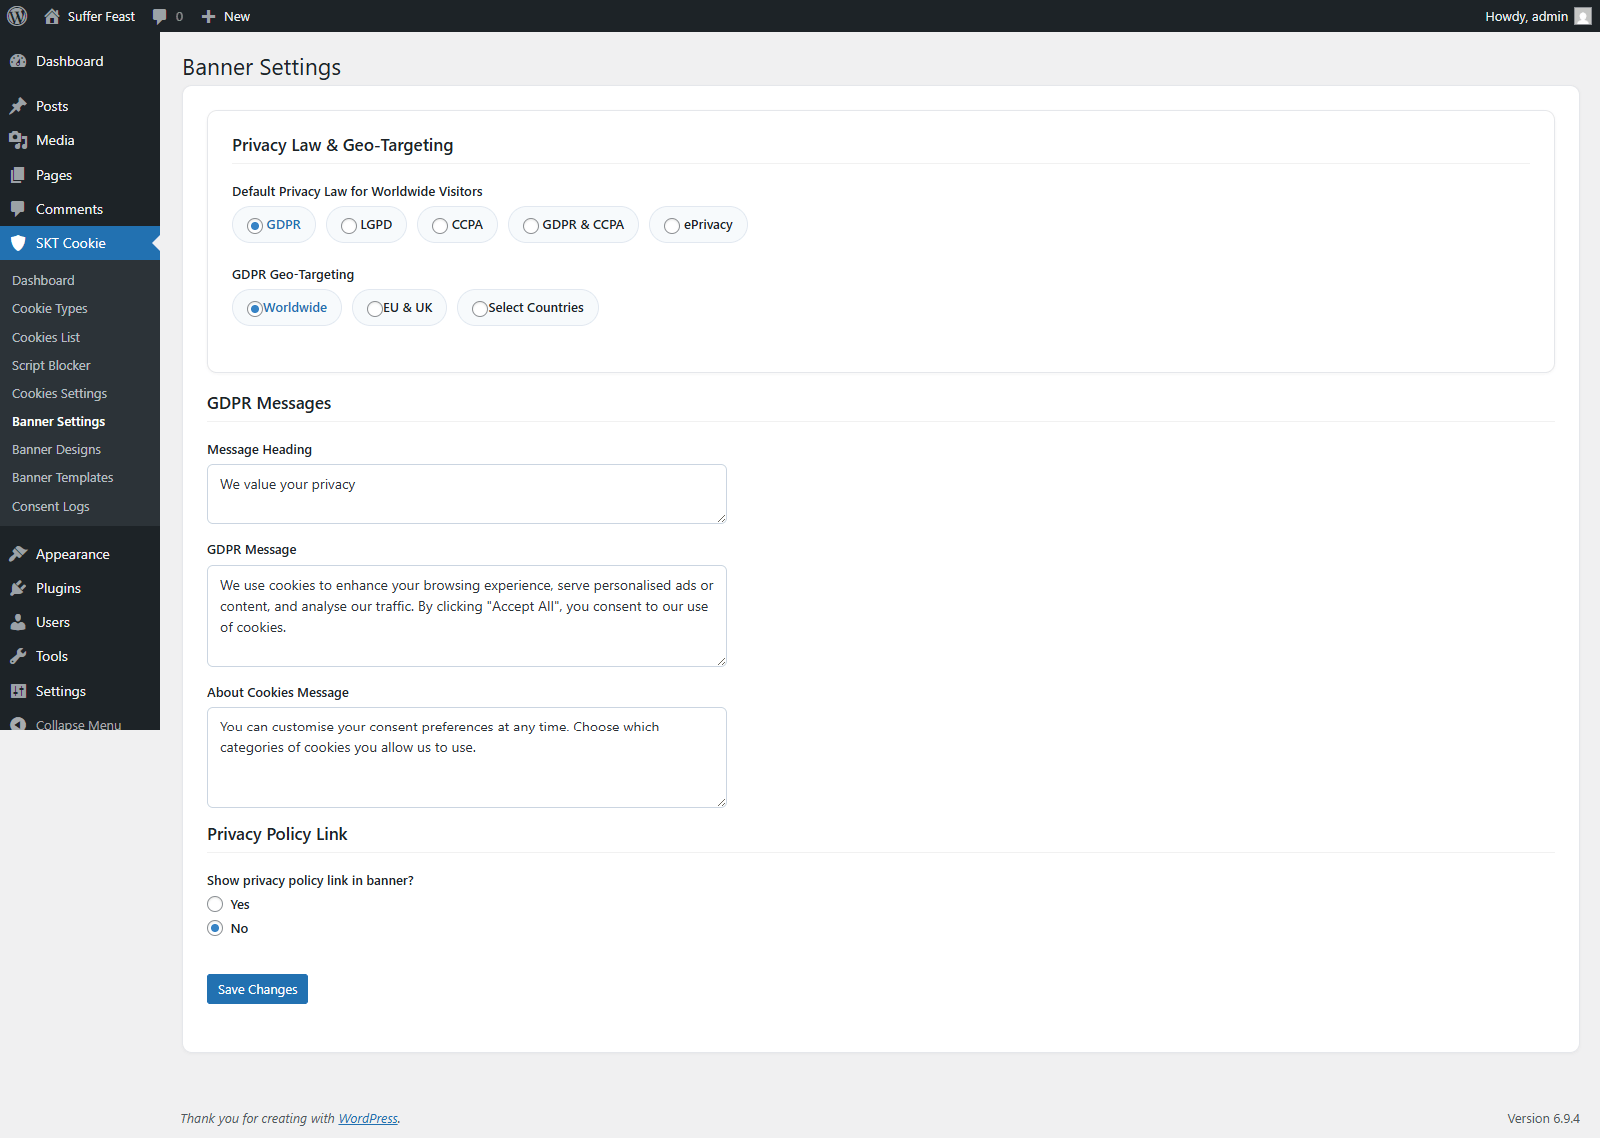
Privacy Law Selection
At the top of Banner Settings, you select which privacy law applies to your site. This controls which message template is shown in the banner:
| Law Option | Who Should Use It |
|---|---|
| GDPR | Websites targeting European Union visitors. |
| CCPA | Websites collecting data from California (USA) residents. |
| GDPR + CCPA | Websites targeting both EU and US/California visitors. Uses geo-targeting to show the correct banner to each visitor. |
| LGPD | Websites targeting Brazilian visitors. |
| ePrivacy | For the EU ePrivacy Directive (cookie law) separate from GDPR. |
Message Settings by Law
Depending on your selected privacy law, you will see the relevant message fields:
| Field | Description |
|---|---|
| Message Heading | The headline text shown in bold at the top of the banner (e.g. "We use cookies"). |
| GDPR Message | The main cookie consent message for GDPR compliance. |
| About Cookies Message | An additional informational message about what cookies do. |
| CCPA Heading | The headline for CCPA (California) visitors. |
| CCPA Opt-out Message | The opt-out message shown to California residents. |
| LGPD Heading / Message | Messages for Brazilian visitors under the LGPD law. |
| ePrivacy Message | Message shown for the EU ePrivacy Directive. |
Privacy Policy Link
You can optionally display a link to your Privacy Policy inside the banner. When enabled, additional fields appear:
| Field | Description |
|---|---|
| Show Privacy Policy Link | Toggle Yes/No to show or hide the privacy policy link in the banner. |
| Privacy Policy URL | The full URL of your Privacy Policy page (e.g. https://yoursite.com/privacy-policy). |
| Link Text | The clickable text shown (default: "Read Policy"). |
| Text Color | Color of the link/button text. |
| Display As | Show the privacy policy as a plain Link or a Button. |
| Background Color | Background color when displayed as a button. |
| Background Opacity | Opacity of the button background (0.0 to 1.0). |
Border Settings (for Privacy Policy Button)
| Field | Description |
|---|---|
| Border Style | Select from: none, solid, dashed, dotted, double, groove, ridge, inset, outset. |
| Border Width | Border thickness in pixels (0–20px). |
| Border Color | The color of the border. |
| Border Radius | Rounding of corners in pixels (0–100px). |
When you select GDPR + CCPA, a Geo-Targeting section appears where you can configure which countries see which banner. EU visitors automatically see the GDPR banner, and California/US visitors see the CCPA banner.
Banner Designs
Banner Designs gives you full visual control over how your cookie consent banner looks — colors, typography, buttons, background, and borders. Every element can be styled to match your website's branding.
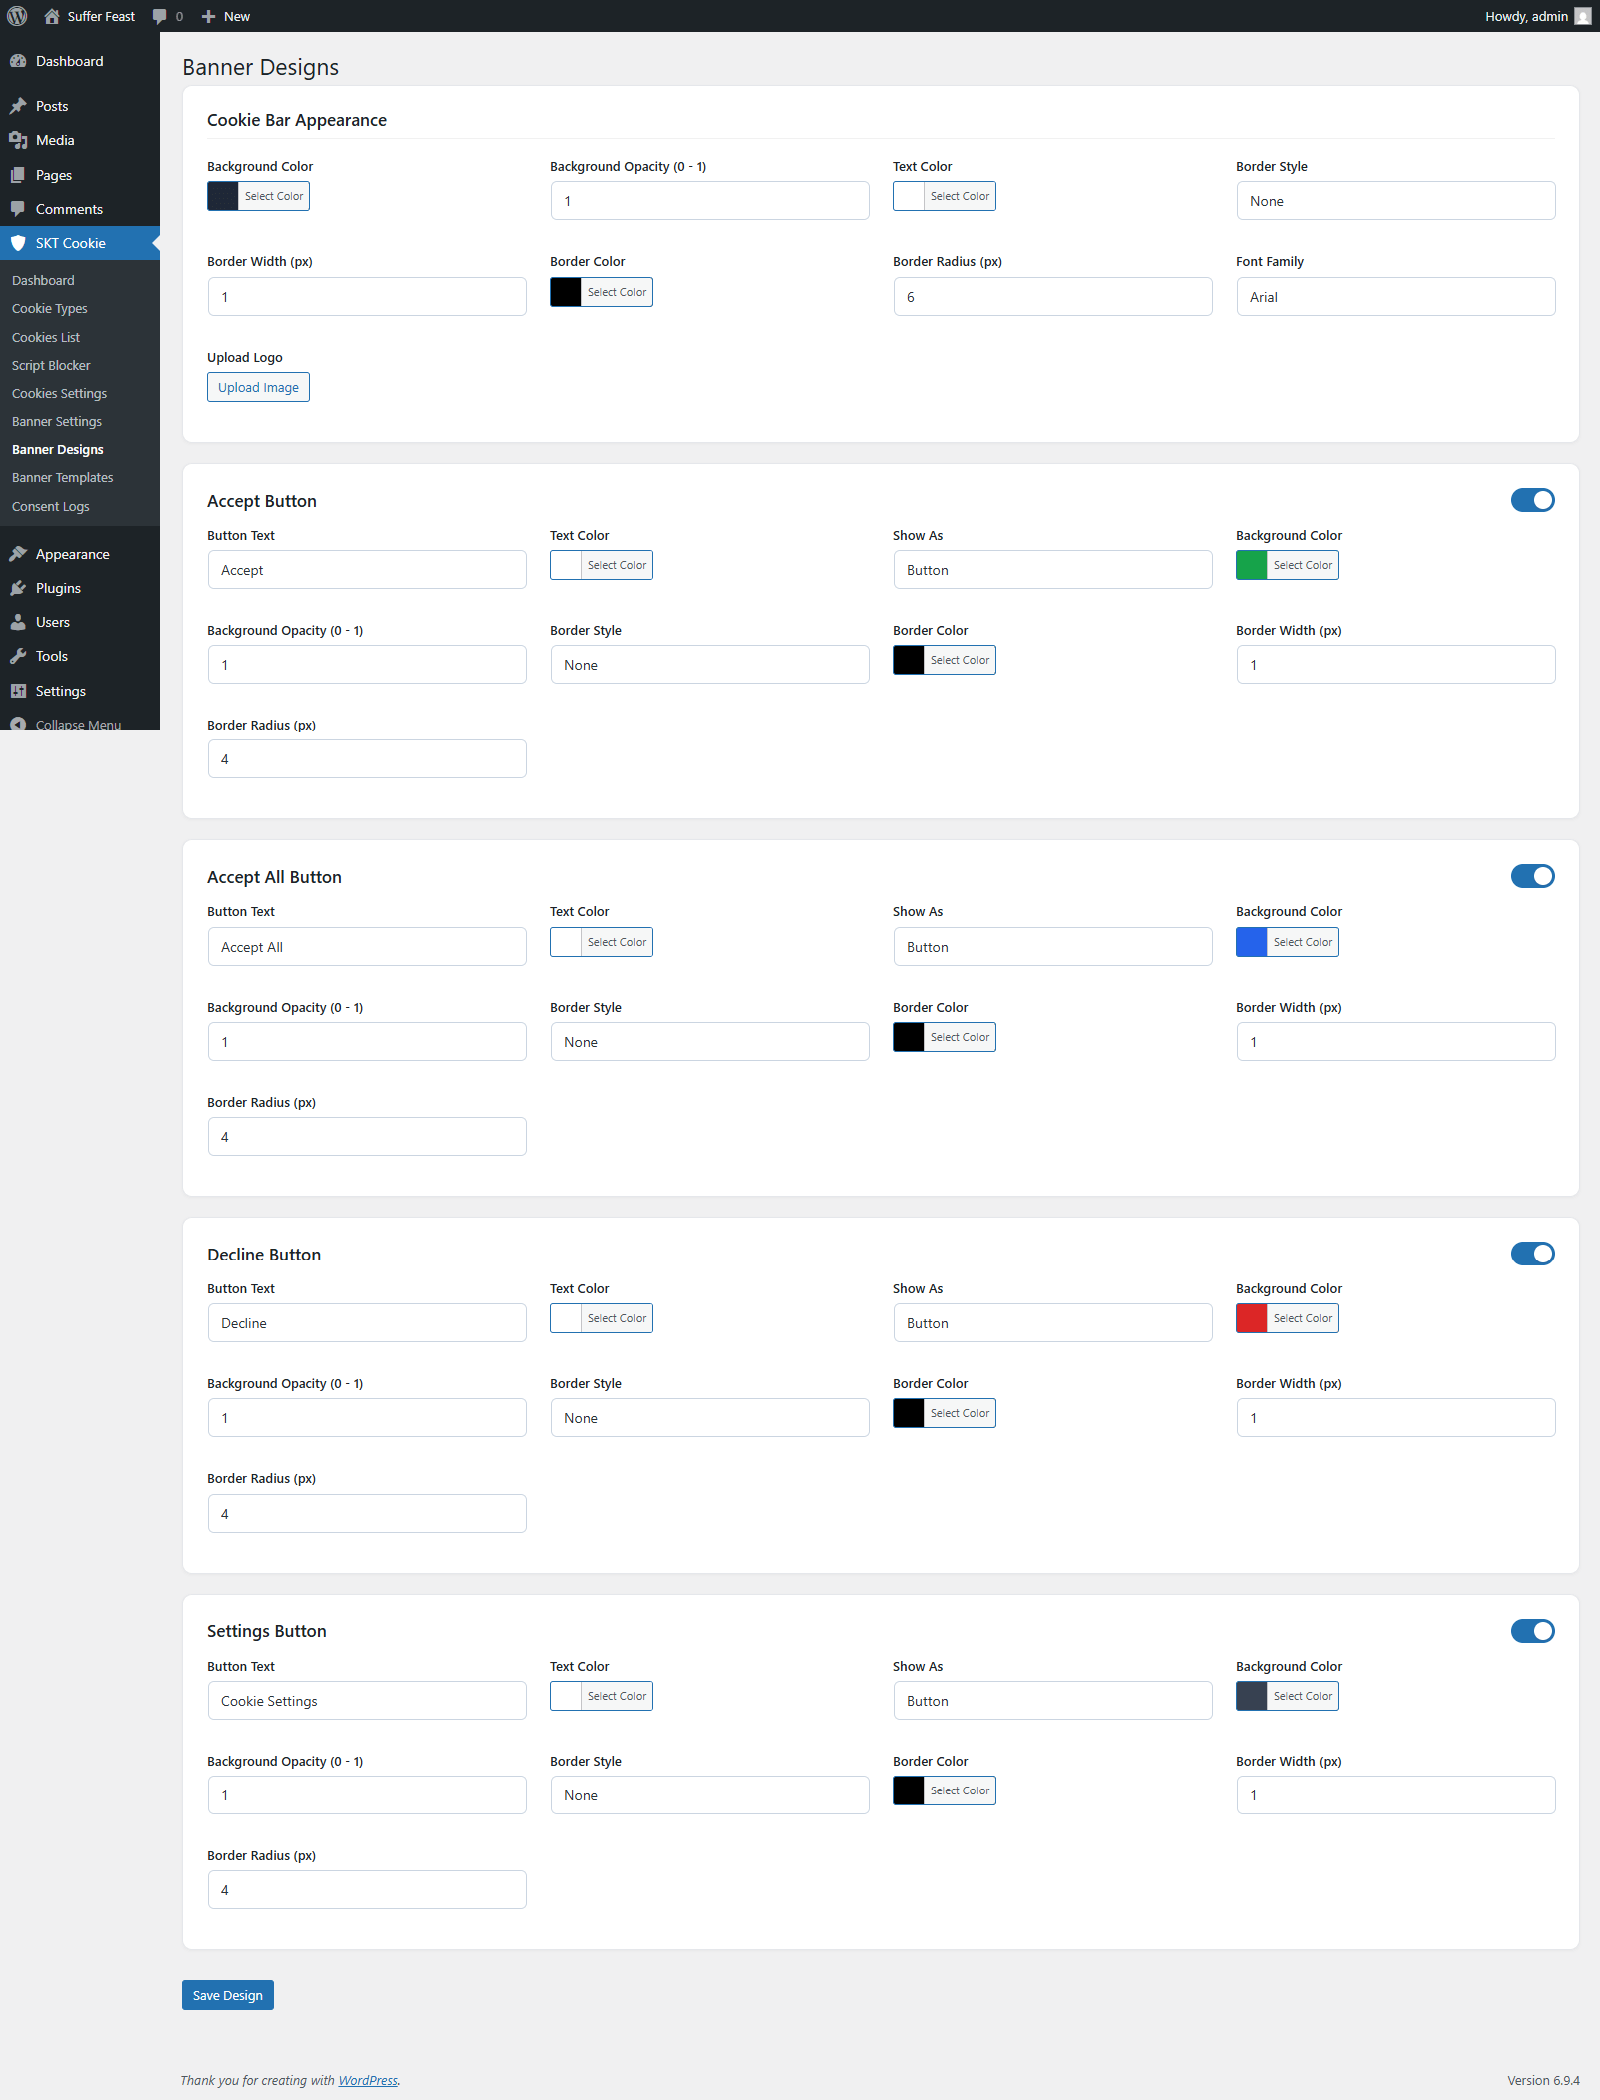
Banner Overall Style
| Setting | Description |
|---|---|
| Background Color | The background color of the banner/popup. |
| Background Opacity | Transparency of the banner background (0.0 to 1.0). |
| Heading Color | Color of the banner heading text. |
| Message Text Color | Color of the body/description text in the banner. |
| Banner Border Style | Border style around the banner (solid, dashed, etc.). |
| Banner Border Width | Thickness of the banner border in pixels. |
| Banner Border Color | Color of the banner border. |
| Banner Border Radius | Rounding of banner corners in pixels. |
Button Sections
Each button in the banner has its own section with an enable/disable toggle. You can independently configure each button:
| Button | Purpose |
|---|---|
| Accept All Button | Accepts all cookies when clicked. Should be prominently styled. |
| Reject All Button | Rejects all non-essential cookies when clicked. |
| Customise Button | Opens the cookie preferences panel for granular category selection. |
| Save Preferences Button | Saves the visitor's custom category selections. |
| Accept Selected Button | Accepts only the categories the visitor has toggled on. |
Per-Button Settings
For each enabled button, you can configure:
| Field | Description |
|---|---|
| Button Text | The label displayed on the button. |
| Text Color | Color of the button label text. |
| Show As | Display as a full Button or plain Link. |
| Background Color | Background fill of the button. |
| Background Opacity | Opacity of button background (0.0–1.0). |
| Border Style | Border style around the button. |
| Border Width | Thickness of button border in pixels. |
| Border Color | Color of the button border. |
| Border Radius | Corner rounding of the button in pixels. |
Banner Templates
Banner Templates controls the layout and position of your cookie consent notice — whether it appears as a banner bar, a popup, or a small widget, and where it appears on the page.
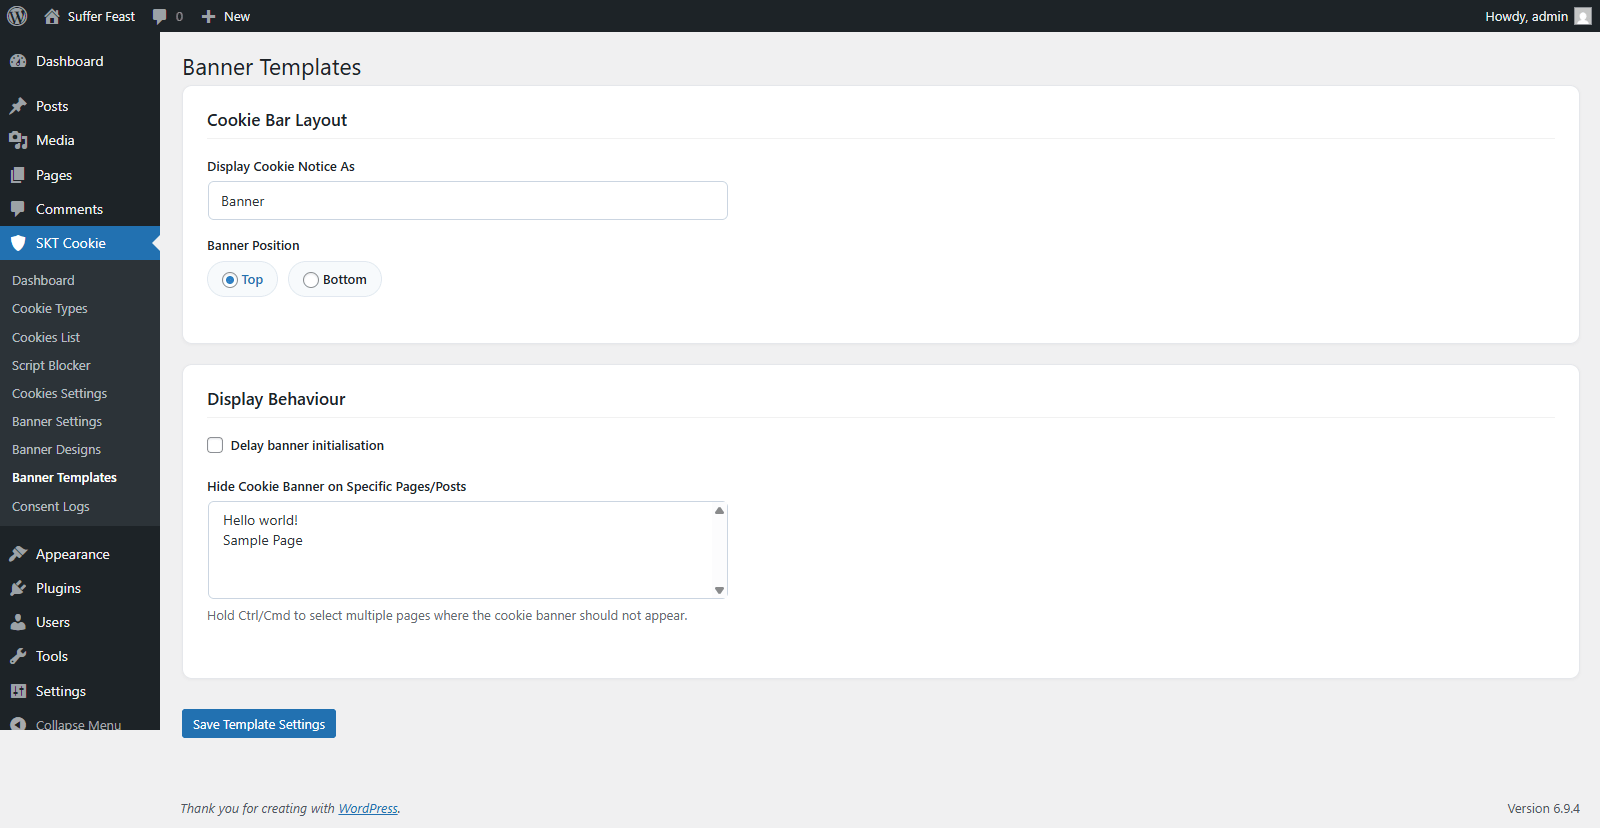
Display Types
| Type | Description | Position Options |
|---|---|---|
| Banner | A full-width bar that appears at the top or bottom of the page. Visitors can still scroll and interact with the page. | Top or Bottom of the page |
| Popup | A centered modal dialog that appears over the page content. Optional dark overlay behind it for emphasis. | Center (with optional overlay) |
| Widget | A compact floating button/box positioned in a corner of the screen. Less intrusive but still accessible. | Bottom Left, Bottom Right, Top Left, Top Right |
Display Timing Settings
| Setting | Description |
|---|---|
| Load Delay | When enabled, the banner appears after a delay instead of immediately on page load. |
| Delay (ms) | The delay in milliseconds before the banner appears. Default is 1000ms (1 second). |
Hide on Specific Pages
You can prevent the cookie banner from appearing on specific pages (e.g. your Privacy Policy page or Cookie Policy page). Select the pages from the multi-select list in this section. The banner will be suppressed on any page you select.
How to Set Up Your Banner Template
Select Banner, Popup, or Widget from the dropdown.
For Banner: choose Top or Bottom. For Widget: choose a corner. For Popup: optionally enable the dark overlay.
Enable the load delay and set the delay time if you want the banner to appear after the page loads rather than immediately.
If there are pages where you don't want the banner shown, select them in the hide list.
Click Save Changes to apply.
Consent Logs
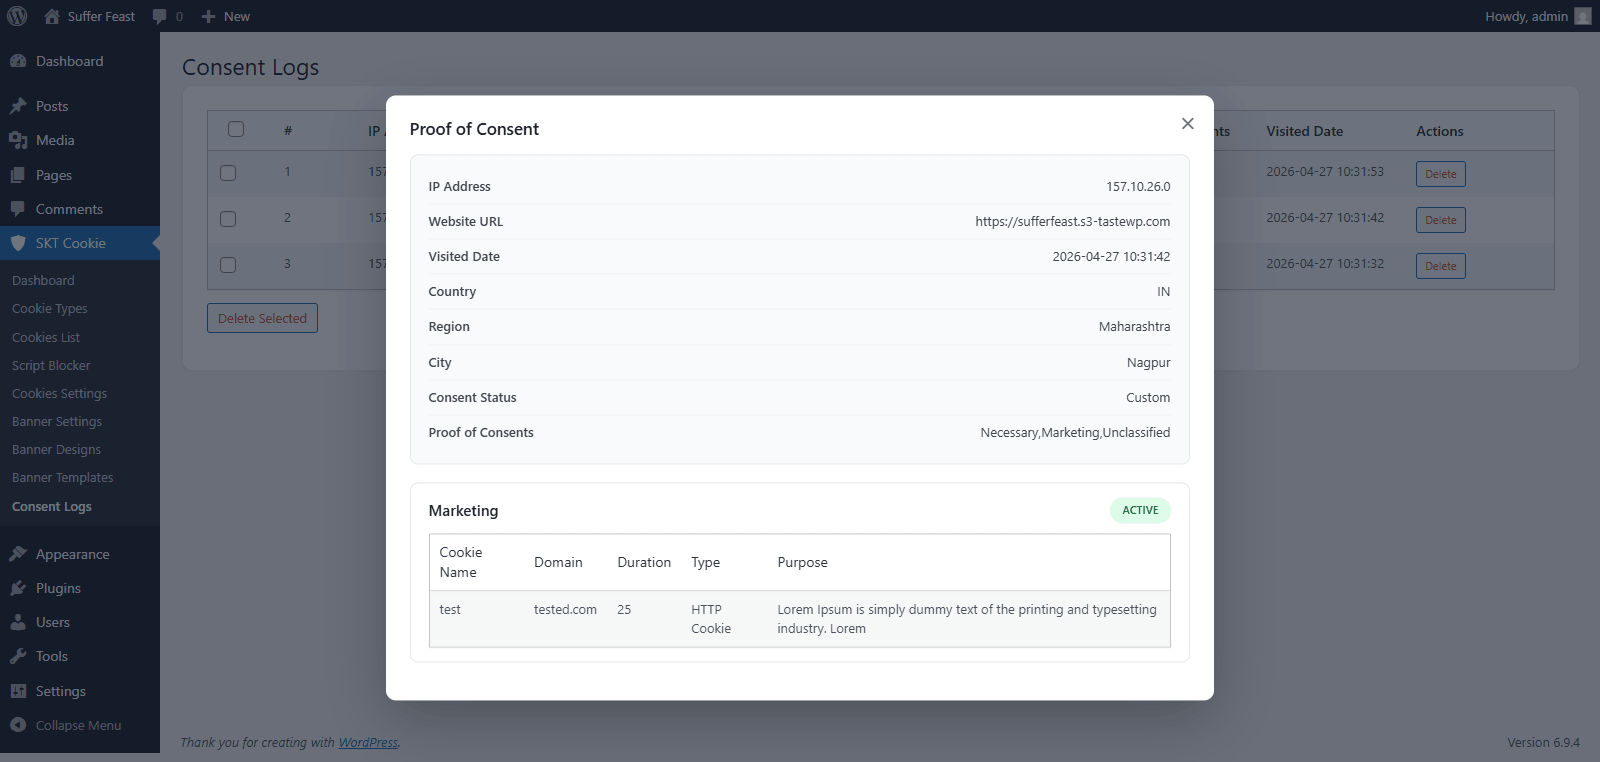
Consent Logs maintains a complete, tamper-evident audit trail of every consent action recorded on your website. This is essential for demonstrating compliance during an audit or regulatory investigation.
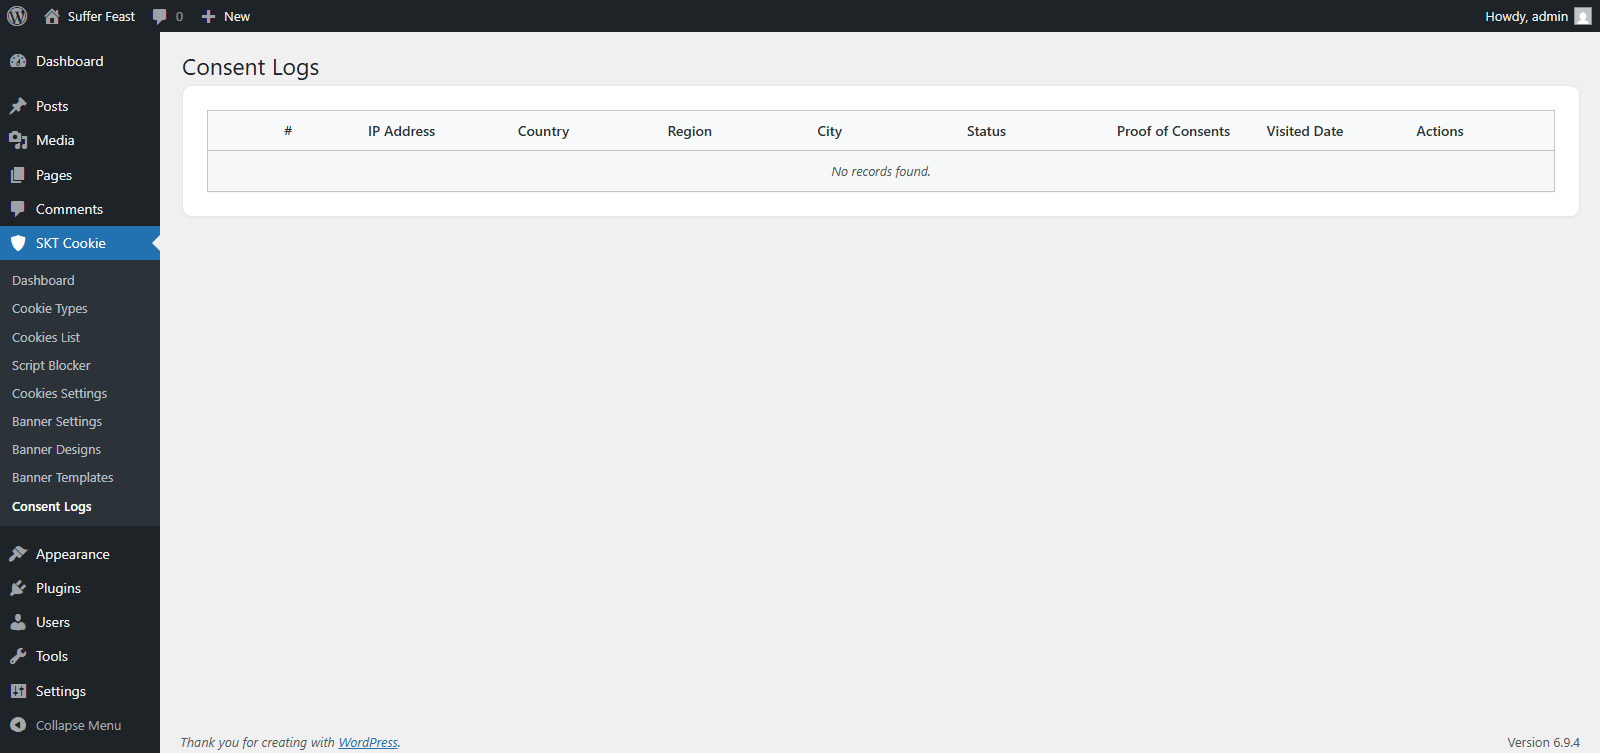
What Is Recorded Per Consent
| Field | Description |
|---|---|
| IP Address | The visitor's IP address (anonymized where required by law). |
| Country | Country detected from the visitor's IP address. |
| Region / City | Region and city of the visitor. |
| Consent Status | The visitor's choice: Accepted, Rejected, Partially Accepted, or Bypassed. |
| Proof of Consent | A record of which specific cookie categories were accepted or rejected. |
| Date & Time | The exact timestamp when consent was given or changed. |
| Site URL | The website URL where the consent was recorded. |
Consent Status Types
| Status | Meaning |
|---|---|
| Accepted | Visitor clicked "Accept All" — all cookie categories are enabled. |
| Rejected | Visitor clicked "Reject All" — only Necessary cookies are allowed. |
| Partially Accepted / Custom | Visitor used the Customise option to select specific categories. |
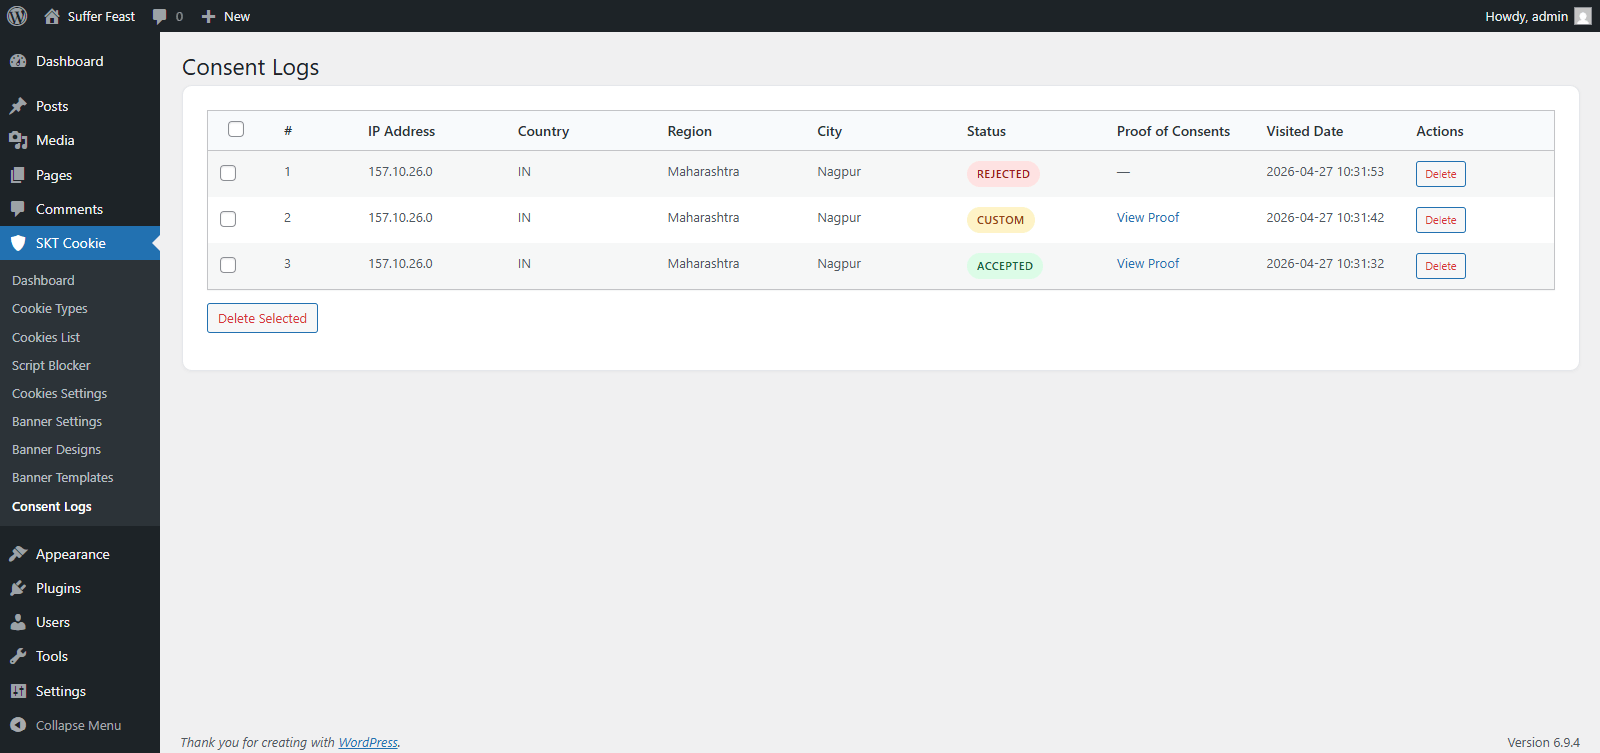
Managing Logs
| Action | How to Do It |
|---|---|
| View a specific log | Click View next to any log entry to see full details including proof of consent. |
| Delete a single log | Click Delete next to an entry and confirm the action. |
| Bulk delete logs | Select multiple logs using the checkboxes then click Bulk Delete. |
| Pagination | Logs are paginated at 20 per page. Use the page navigation at the bottom to browse older records. |
Under GDPR, you should have a data retention policy for consent logs. Consider periodically deleting logs older than your stated retention period. Always document your data retention policy in your Privacy Policy.
Compliance Laws Reference
SKT Cookie Consent supports four major privacy/cookie laws. Here is a quick reference to help you choose the right law for your website:
| Law | Region | Key Requirement |
|---|---|---|
| GDPR | European Union | Requires explicit, informed, freely-given consent before non-essential cookies are set. Must offer easy opt-out. |
| CCPA | California, USA | Requires informing users about data collection and giving them the right to opt-out of the "sale" of personal data. |
| LGPD | Brazil | Similar to GDPR — requires consent for data processing and gives individuals rights over their personal data. |
| ePrivacy | European Union | The EU Cookie Directive — requires prior informed consent before placing cookies or similar tracking technologies. |
This plugin helps you implement cookie consent mechanisms, but is not a substitute for legal advice. Consult a qualified legal professional to ensure your website is fully compliant with all applicable privacy laws for your specific situation.
Frontend Display
Once configured, the cookie consent banner automatically appears on your website's frontend for new visitors and visitors who haven't yet given consent.

How the Frontend Works
When a new visitor lands on your site, the cookie banner appears based on your template settings (Banner, Popup, or Widget).
The visitor can click Accept All, Reject All, or Customise to select specific categories. Their choice is recorded in the Consent Logs.
Based on the visitor's choice, the Script Blocker immediately activates the allowed tracking scripts without requiring a page reload.
The visitor's consent is stored in a cookie. On return visits, the banner won't appear again until the consent expires or is manually reset.
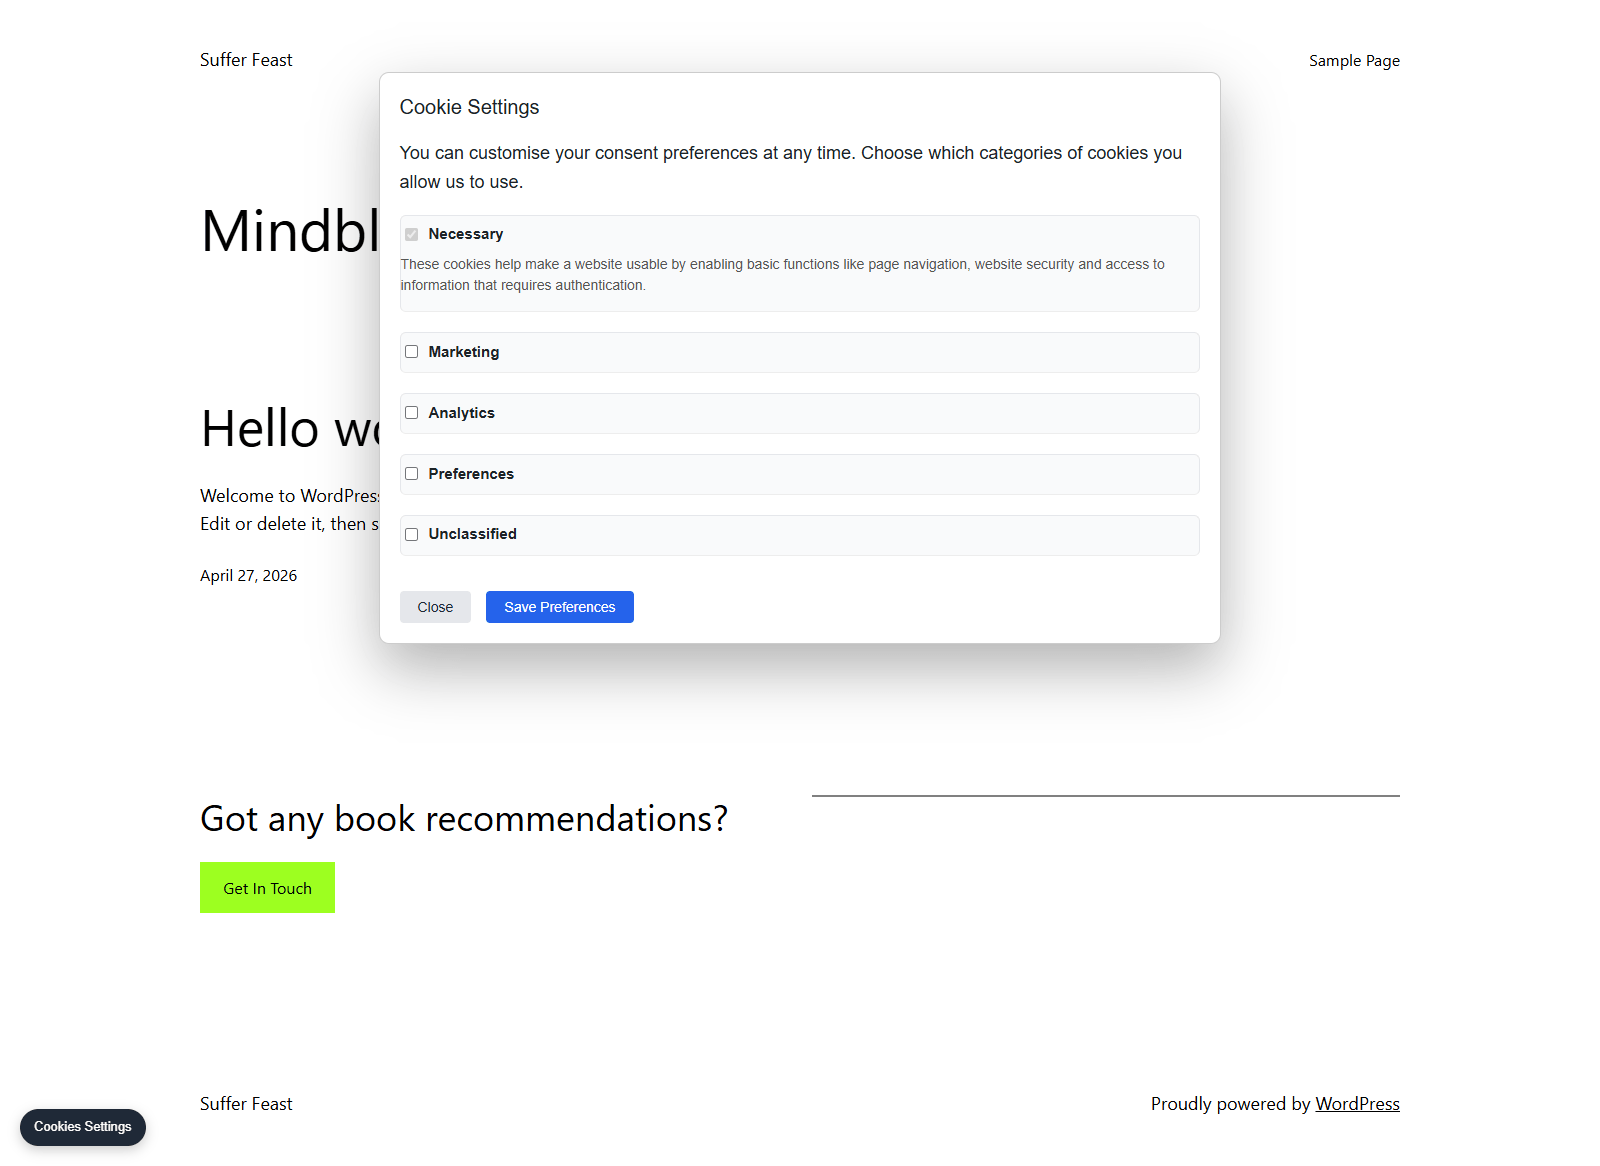
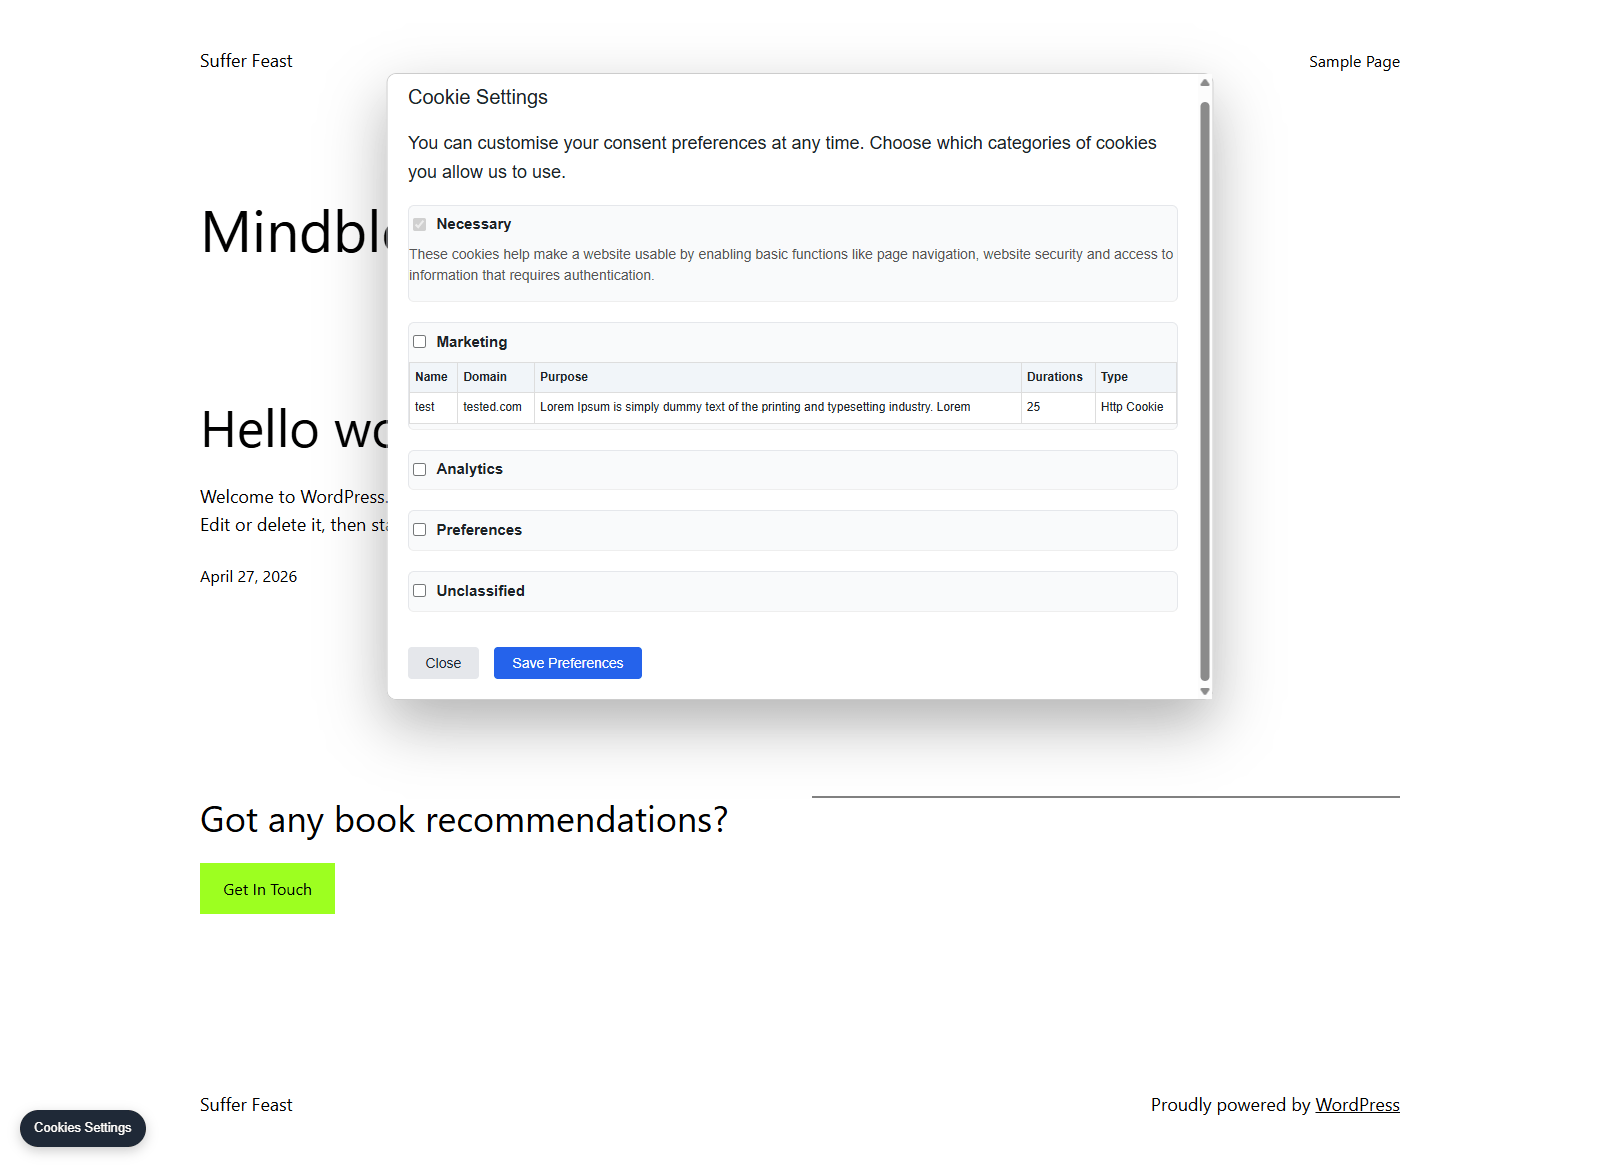
If the visitor clicks Customise, an expanded panel shows all enabled cookie categories with toggle switches. The visitor can individually accept or reject each category and save their preferences.
Frequently Asked Questions
The banner is not showing on my website. What should I check?
First, ensure the plugin is activated in Plugins → Installed Plugins. Then check that Banner Templates is configured and saved. If you have already accepted consent in your browser previously, clear your browser cookies or test in an incognito/private window where no cookie is stored.
Can I show different banners to visitors from different countries?
Yes. Select GDPR + CCPA as your privacy law in Banner Settings. Then configure the Geo-Targeting settings to assign countries to the correct law. EU visitors will see GDPR messaging and US/California visitors will see CCPA messaging.
Do I need to enter all tracking IDs in Cookies Settings?
Only enter IDs for the services you actually use on your website. If you use Google Tag Manager to manage all your scripts, you can enter just the GTM ID and manage everything else inside GTM.
What is the difference between Banner Settings and Banner Designs?
Banner Settings controls the text content — the heading, messages, and privacy policy link. Banner Designs controls the visual appearance — colors, fonts, buttons, and borders.
How do I add a cookie to the Cookies List?
Go to SKT Cookie → Cookies List and fill in the Add New Cookie form at the top of the page. Enter the cookie name, domain, duration, type, storage type, and purpose, then click Save Cookie.
Can I hide the banner on specific pages?
Yes. In SKT Cookie → Banner Templates, scroll down to the "Hide on Pages" section and select the pages where you don't want the banner to appear (e.g. your Privacy Policy or Cookie Policy page).
How do I reset all consent logs?
Go to SKT Cookie → Consent Logs, select all entries using the checkboxes, and use the Bulk Delete option to remove them.
Is the Necessary cookie category always shown?
Yes. The Necessary category is always enabled and cannot be disabled. It is also always displayed as active in the preferences panel because essential cookies are required for the website to function and do not require visitor consent.
Troubleshooting
Banner Not Showing
| Check | Solution |
|---|---|
| Plugin not activated | Go to Plugins → Installed Plugins and activate SKT Cookie Consent. |
| Browser already has consent cookie | Open an incognito/private browser window and test again. |
| Banner disabled on the page | Check Banner Templates → Hide on Pages to make sure the current page is not excluded. |
| Caching plugin interference | Clear your caching plugin's cache and test again. |
| JavaScript error | Open your browser's developer console (F12) and check for any JavaScript errors. |
Scripts Still Loading Before Consent
| Check | Solution |
|---|---|
| Script Blocker not enabled | Go to Script Blocker and ensure the master toggle is ON. |
| Individual script not toggled on | In the Script Blocker scripts table, ensure the specific script's toggle is enabled. |
| Script added via another plugin | If a caching or header-injection plugin adds the script independently, it may bypass the blocker. Add it manually in the Custom Scripts section. |
| Tracking ID not entered | Ensure the tracking ID for the service is entered in Cookies Settings. |
Consent Logs Not Being Recorded
| Check | Solution |
|---|---|
| Consent logging disabled | Check in Cookies Settings that consent logging is enabled. |
| Database tables missing | Deactivate and reactivate the plugin. Activation automatically creates the required database tables. |
| Server-level caching | If your host has server-level caching, the AJAX calls used to log consent may be cached. Contact your host. |
Settings Not Saving
| Check | Solution |
|---|---|
| Insufficient permissions | Ensure you are logged in as a user with the Administrator role (requires manage_options capability). |
| Security plugin blocking | Some security plugins block options API requests. Check your security plugin's logs. |
| Nonce expired | If a settings page has been open for a long time, the security nonce may expire. Refresh the page and try again. |
If you continue to experience issues after following the troubleshooting steps above, please contact SKT Themes with a description of your issue, your WordPress version, PHP version, and the steps you've already taken.
SKT Cookie Consent · Developed by SKT Themes